2 4 0 T U R B O .
C O M
|
| YOUR COMMENTS ARE WELCOME CONTACT ME |
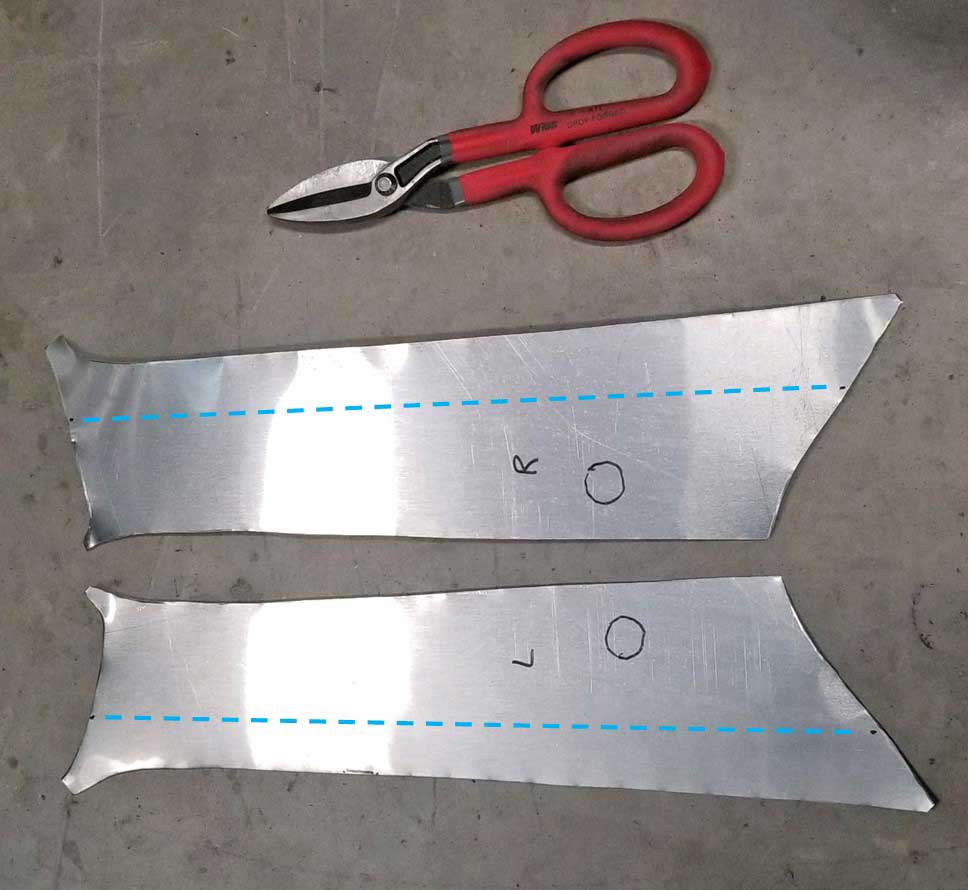
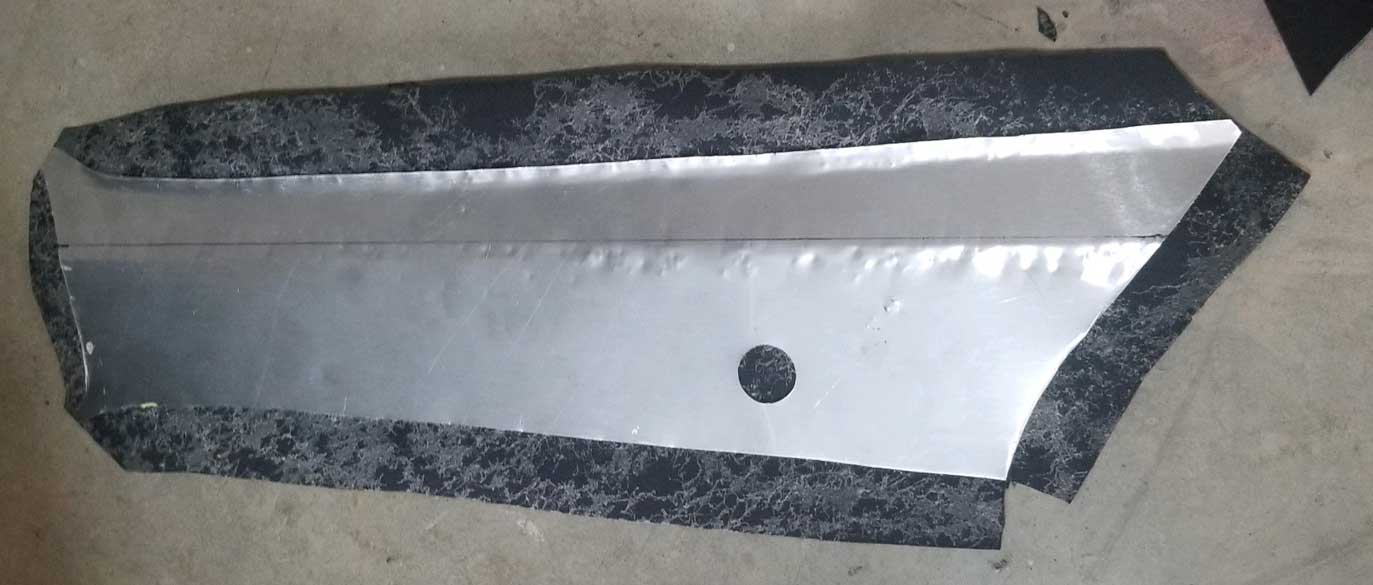
 When I began my 242 motorized vent window project in 2022, I noticed my original 1984 plastic C-pillar panels were both cracked. They had never been removed before and I suspected they would be fragile. 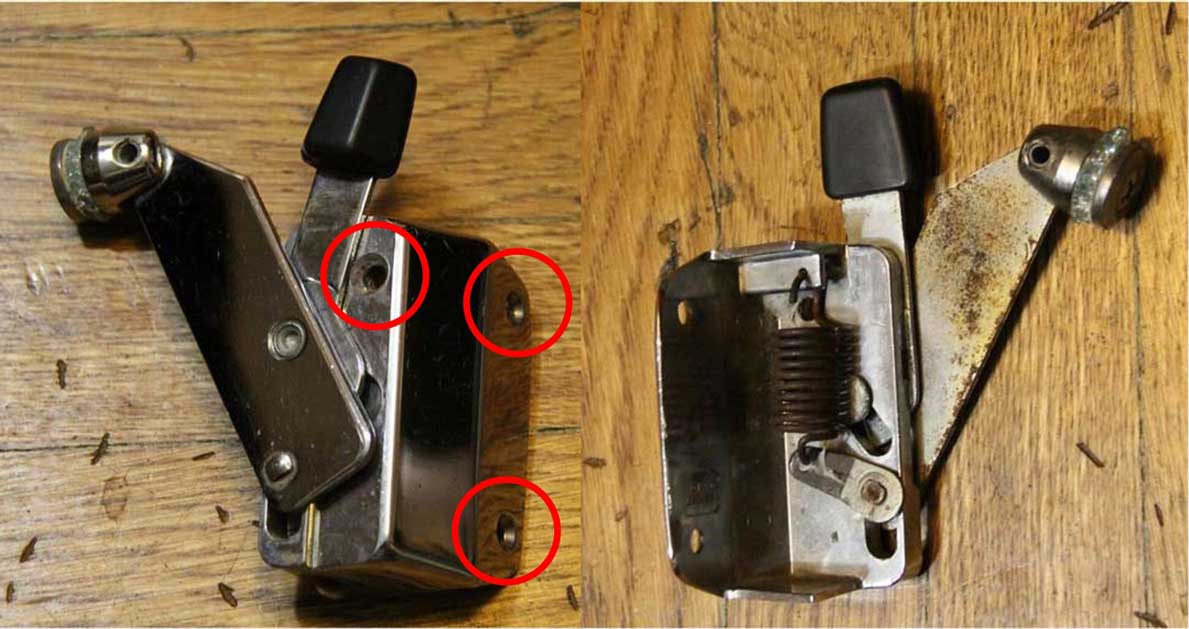 NOTE that there are THREE mounting screws for each one. The left photo ABOVE shows the THIRD mounting hole near the handle that you may not see at first. 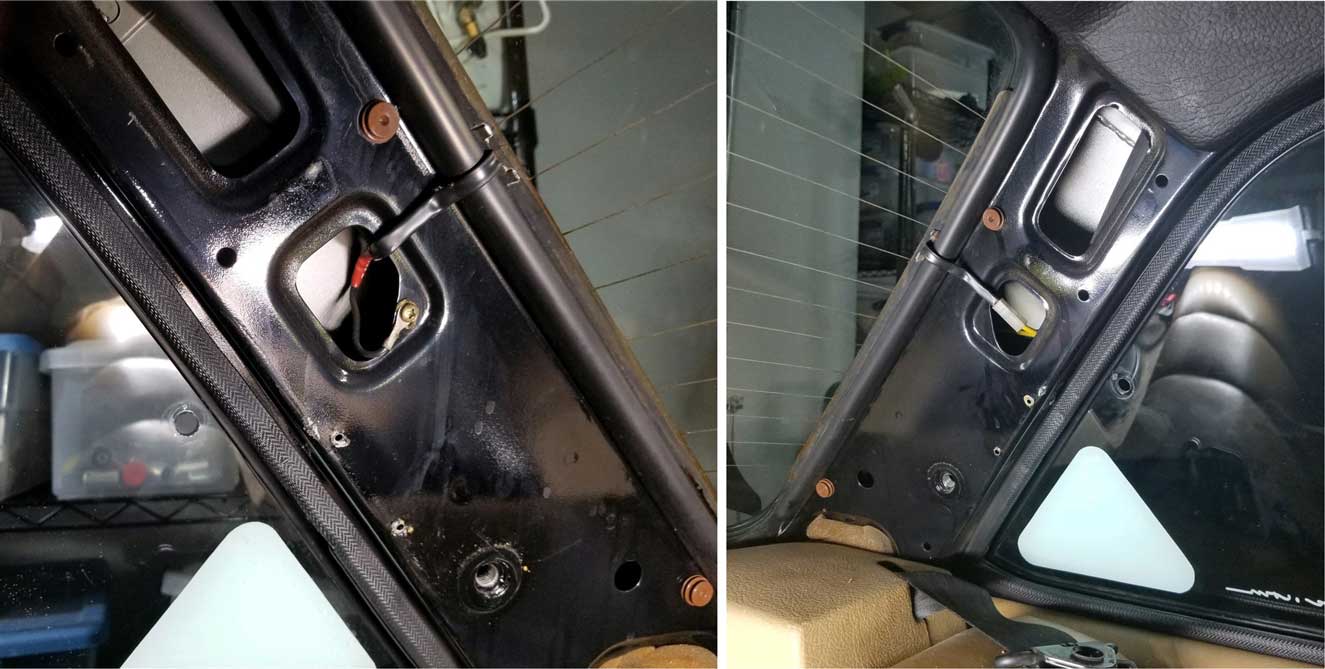 Here are the C-pillars after removing the panels. The heated rear glass power lead is on the left pillar. The ground for the heated grid is on the right pillar. I first thought maybe I could repair the cracks and still use these. Nope. Calling these "fragile" is putting it mildly. 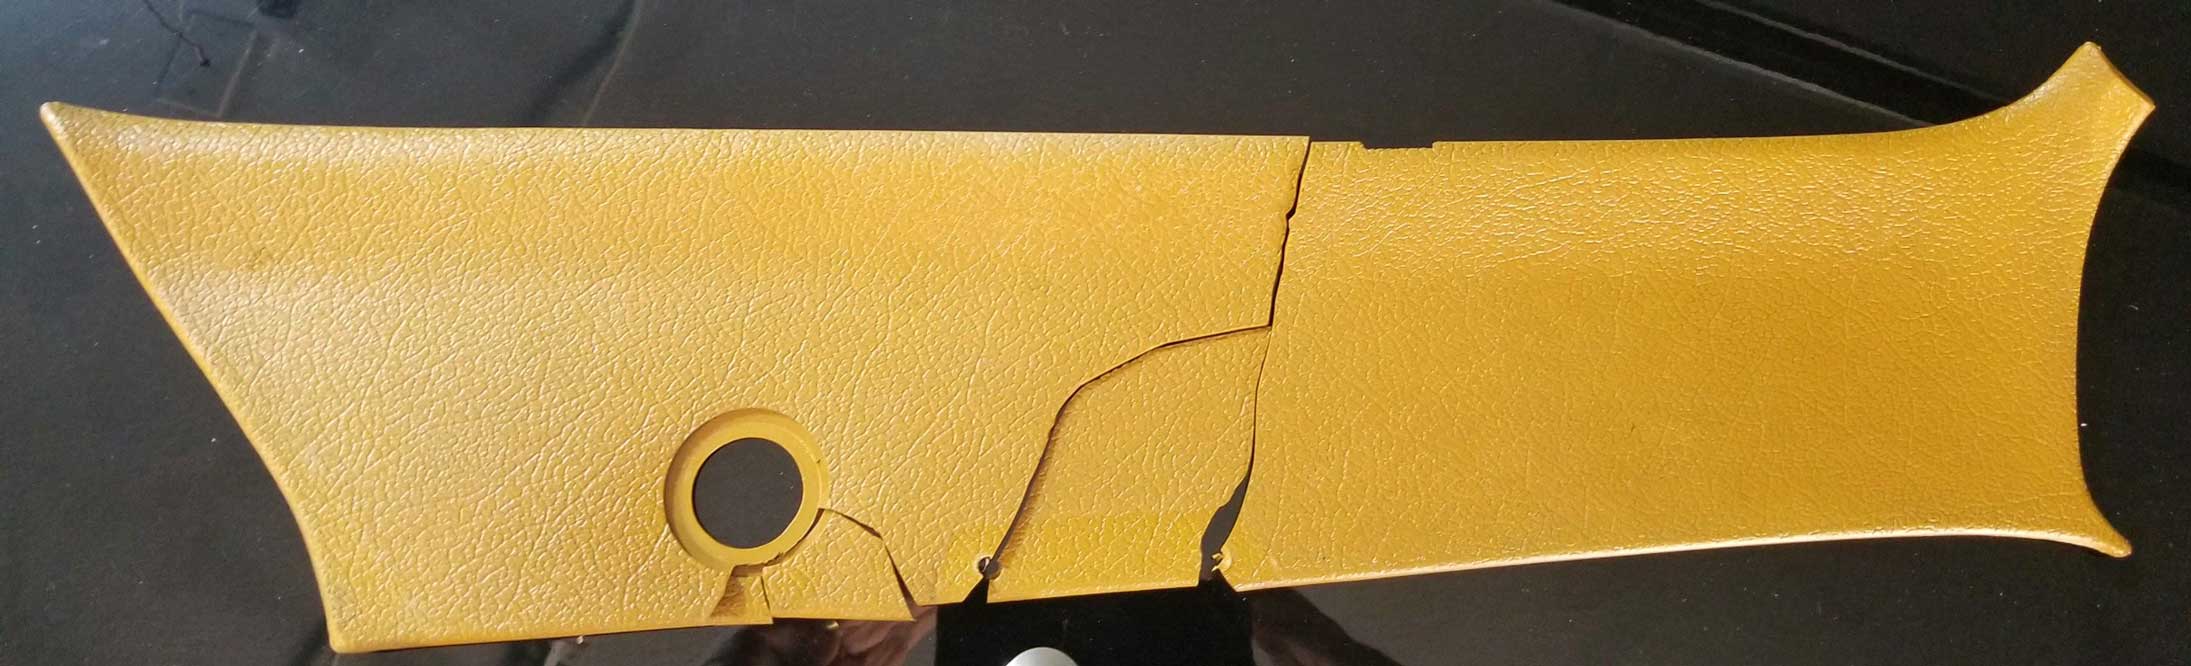 As I began removing the first left side panel, it began breaking apart with very light handing. It was clear these original panels could never be used again. 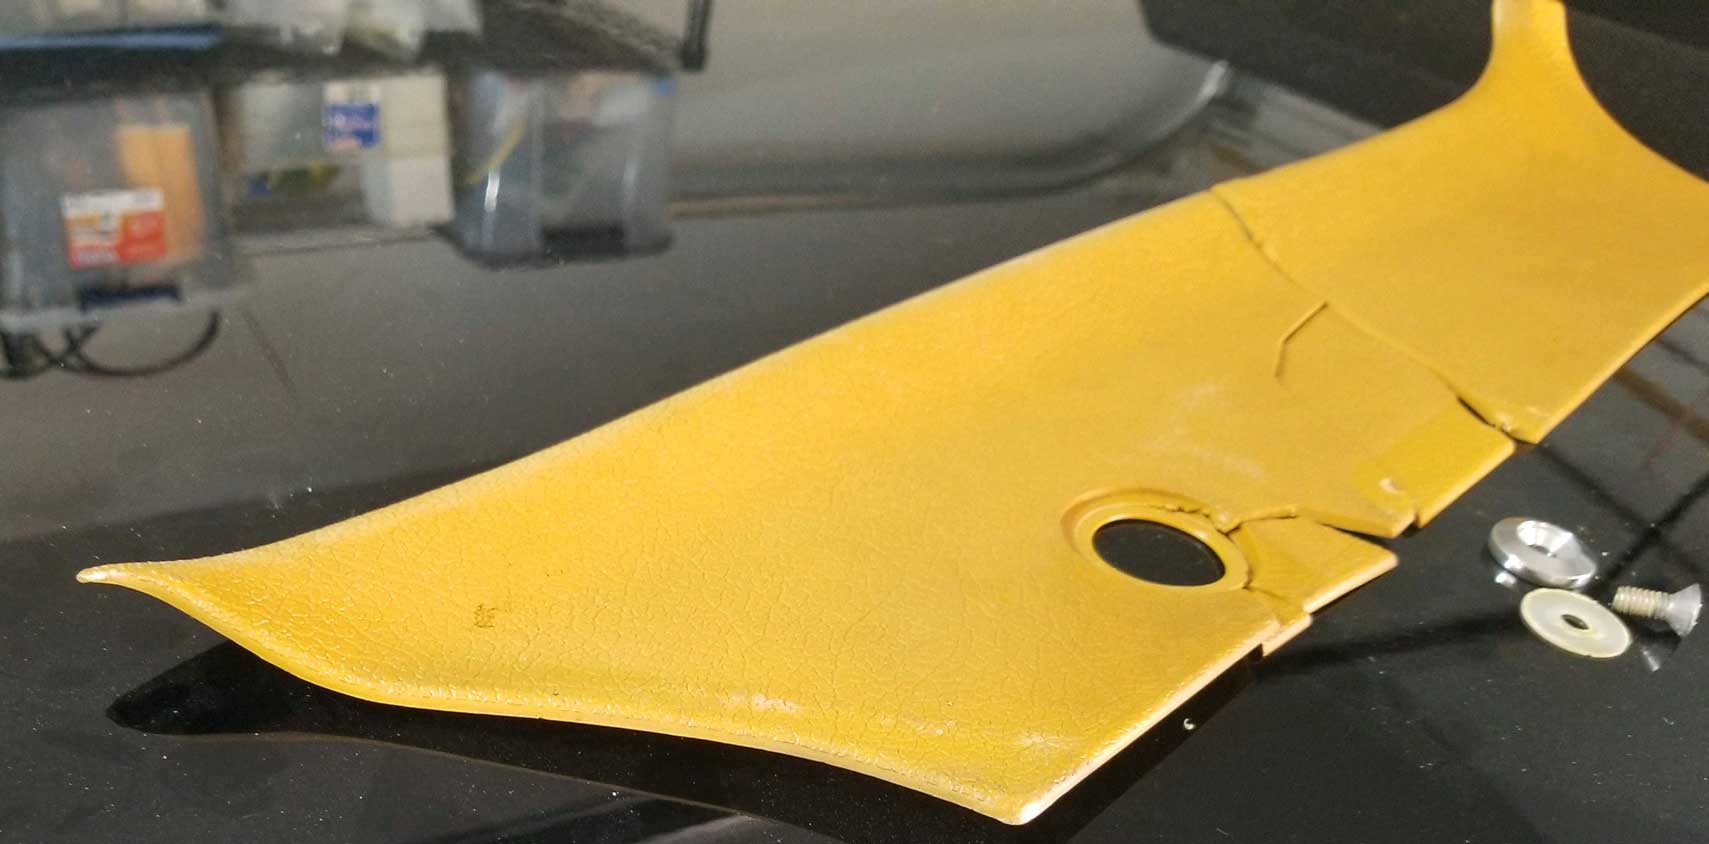 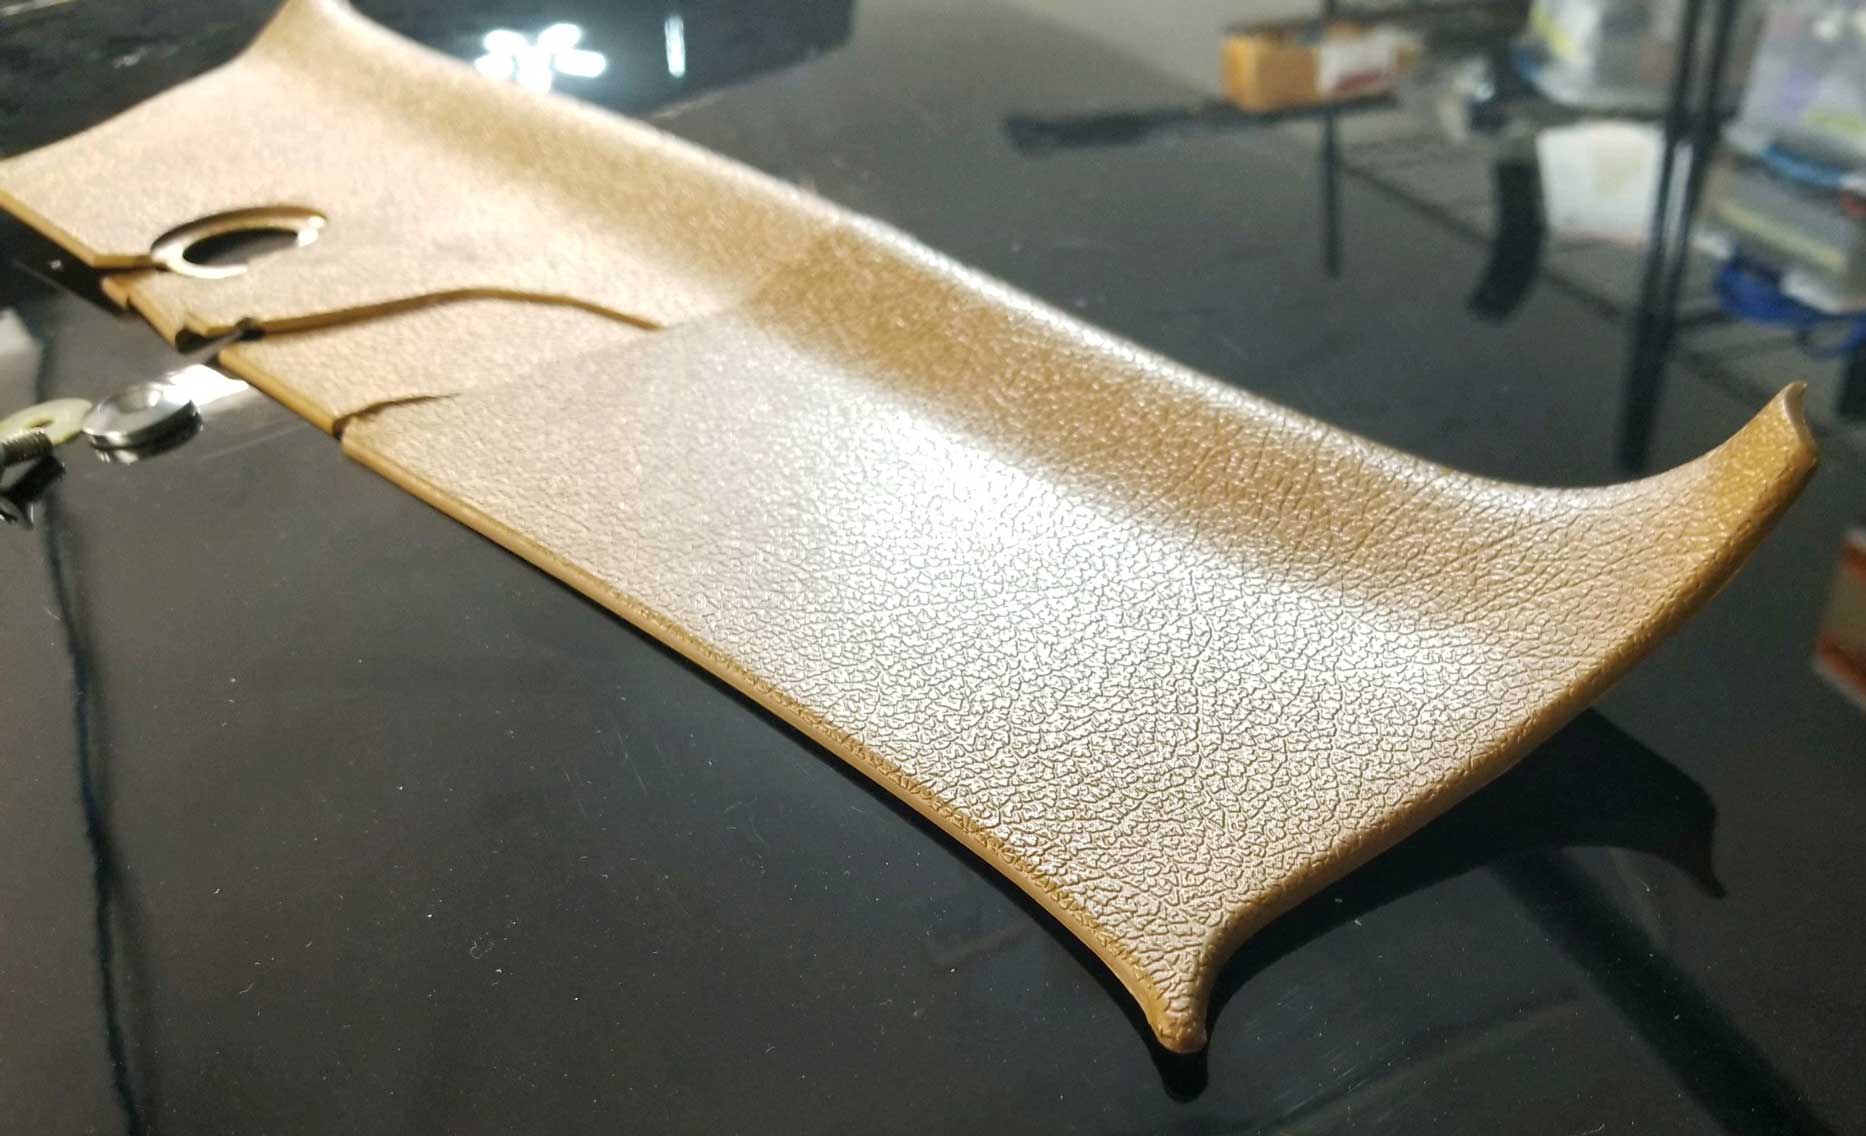  The back side will have a few stand-offs and two parts which receive plastic clips. You'll see two round clips on each side near the back glass. 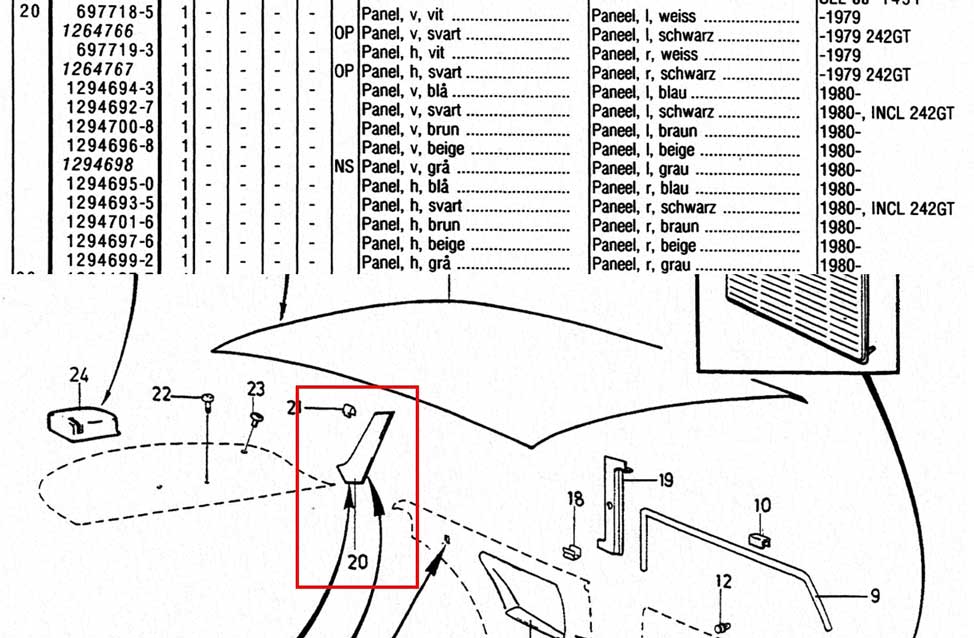 If you're curious about the part numbers for these panels, here they are above. Left or right are listed in various colors. Most common colors are: 1294692 1980-84 Black LH 1294693 1980-84 Black RH 1294696 1980-84 Beige LH 1294697 1980-84 Beige RH UPDATE 2023: I have been told that new reproduction C-pillar panels are in the planning stages for a Volvo parts supplier. Finding used 242 C-pillar panels would be nice if they weren't really fragile too. My 242 has been garaged all its life, so I don't know if a better set of panels could be found. These panels are no longer available new, unless someone begins making new ones again. I decided to make a new DIY set for my car. Here's the process below.  I began by creating a cardboard template of this left side panel. I added the locations of holes. The straight line is the approximate location of the main long curve you can see in the photos. If you need a template, you can use this image above or the below PDF. I saved this as a PDF file, which is on 3 pages that you can print and tape together. Be sure your printer is set to 100% size, since some printer settings may automatically reduce the size. Check the rulers on the printed pages for accuracy. This template is for the LEFT side, but if you flip it over it'll work for the other side. PDF file: https://www.davebarton.com/pdf/242C-PillarTemplate.pdf PLASTIC I think there are two potential materials that a DIYer can use to make something like this. Plastic or metal.  ABS plastic could be used. It can be cut with scissors or tin snips and can be formed to shape with some heat (like a heat gun) on a table edge or over a round pipe. The above ABS sheets have a textured surface on one side if you prefer to use that as the outer surface. It comes in black and can be painted if needed. Above image from Amazon: https://www.amazon.com/Plastic-3-pack-0-0625-Resource-Robotics/dp/B016PESTJS/ One 12 x 24 inch sheet should work to make two C-pillar panels.
 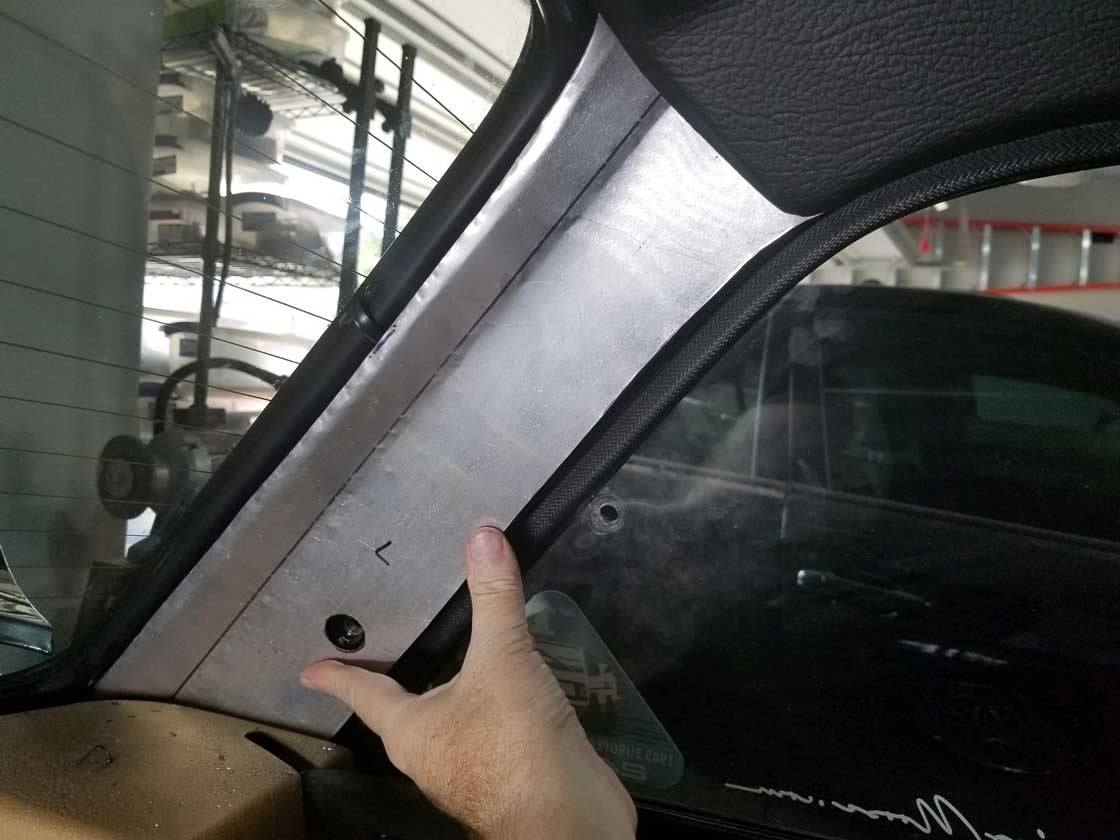  A metal panel would need to be covered with a synthetic vinyl leather, which should be glued on with a strong contact adhesive. Material like this is easy to find in black, but it can also be painted if needed. Or you can find similar vinyl with an adhesive back, like this here from eBay. Self-Adhesive Vinyl Fabric Faux Leather 56" Wide by the Yard. https://www.ebay.com/itm/195990050265?var=495854373142  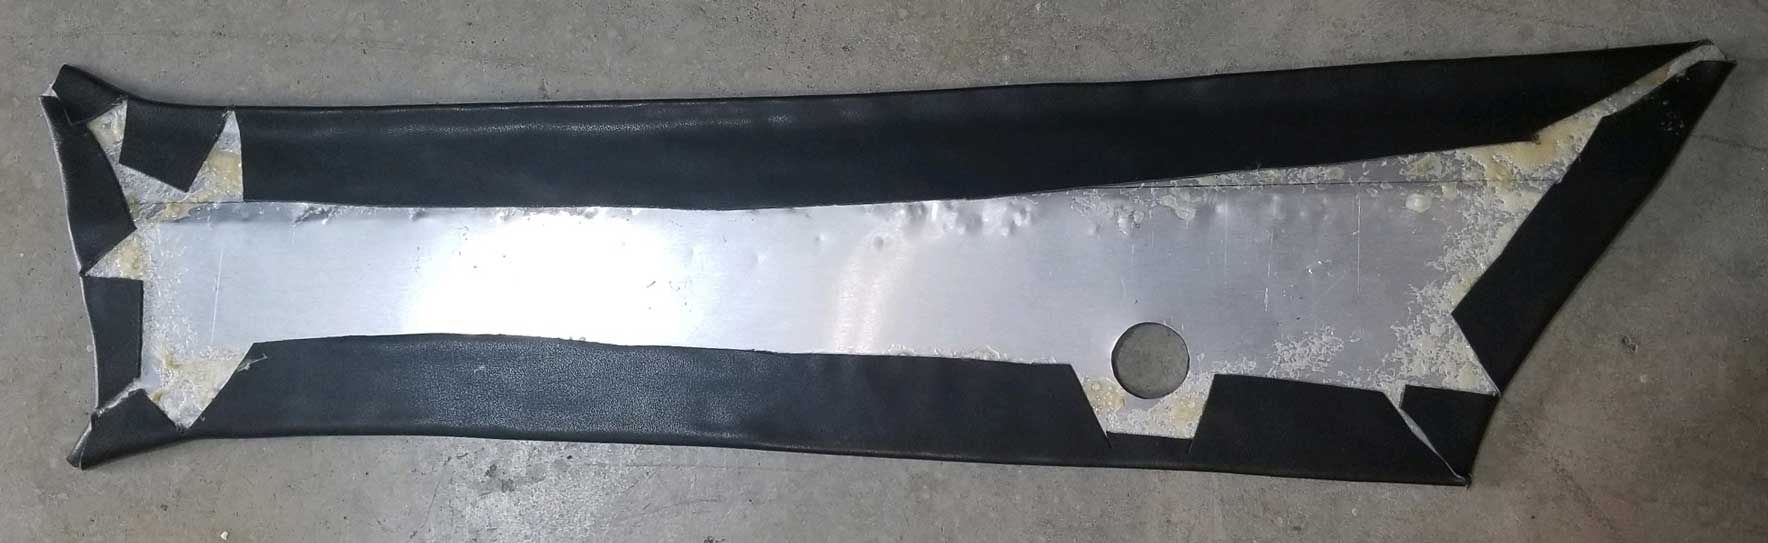  |

|


 alternators are known for poor voltage.")


