|
2 4 0 T U R B O . C O M D A V E ' S V O L V O P A G E
|
||||||||||||||||||||||||||||||||||||||||||||||||||
|
2 4 0 T U R B O . C O M D A V E ' S V O L V O P A G E
|
||||||||||||||||||||||||||||||||||||||||||||||||||
| If
you have any comments or if you can improve this
information, please feel free to email. CONTACT |
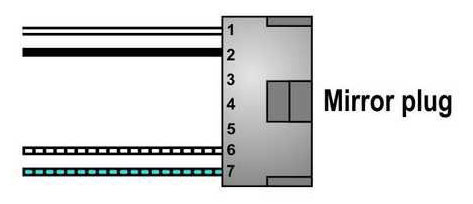
| Gentex
Mirror WIRING DIAGRAM |
| Mirror FUNCTIONS and
PROGRAMMING |
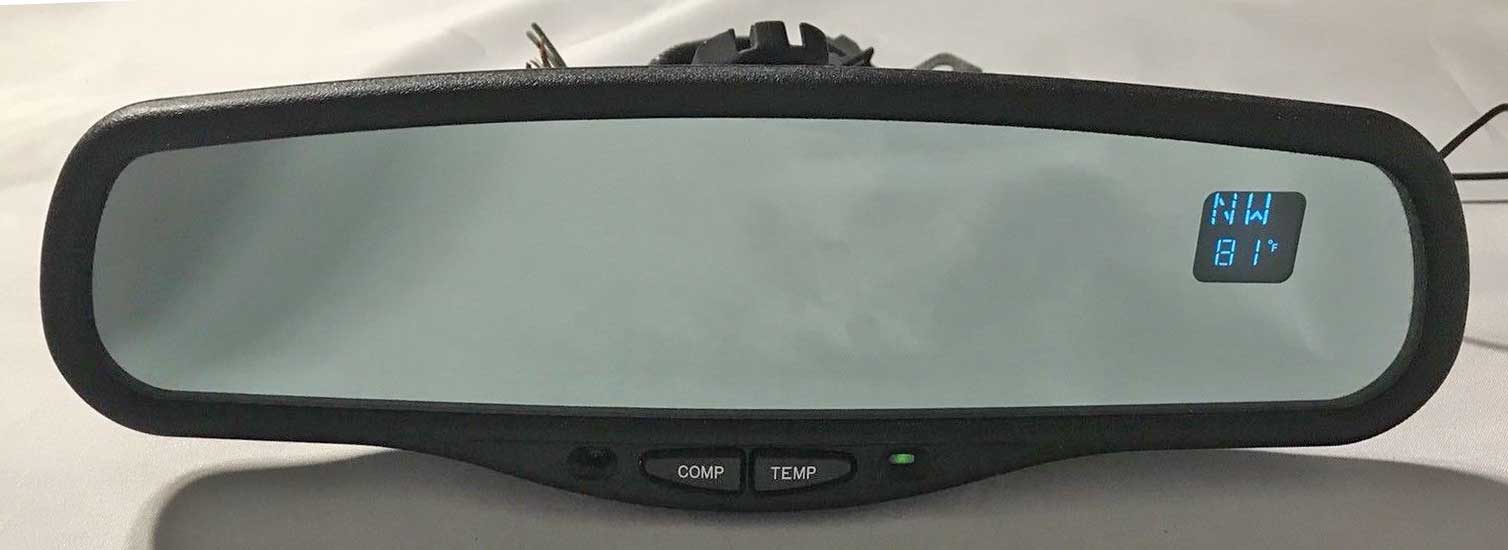 After seeing someone fit one of these mirrors in their non-Volvo car, I decided it was an upgrade worth checking out for my Volvo 242. Mirror with COMPASS and OUTSIDE TEMPERATURE.
The Gentex 177 can be easily found like this one above with Compass and Temperature dual display. Be aware that some have a single display that appears to be Temperature ONLY or some single displays allow you to toggle between compass and temperature by pressing buttons. If you want both Compass and Temperature to show, like in the photo above, make sure you choose the correct one that looks like the one above. The mirror I got has a BLUE/GREEN display. Also there seems to be some mirrors available with a RED/AMBER display, but they seem kind of rare. I didn't care. eBay prices seem to vary between $30 and $50 (and higher), so shop around. I got mine on eBay for under $40 shipped. It included the outside TEMP SENSOR with wire pigtail and the 7-POLE PLUG with wire pigtail. Be sure to choose one that comes WITH the 7-pole PLUG/PIGTAIL and a TEMP SENSOR/PIGTAIL. If you don't get the plug and wire pigtail (and a sensor), wiring this mirror will be more difficult. |
|||||||||||||||||||||||||||
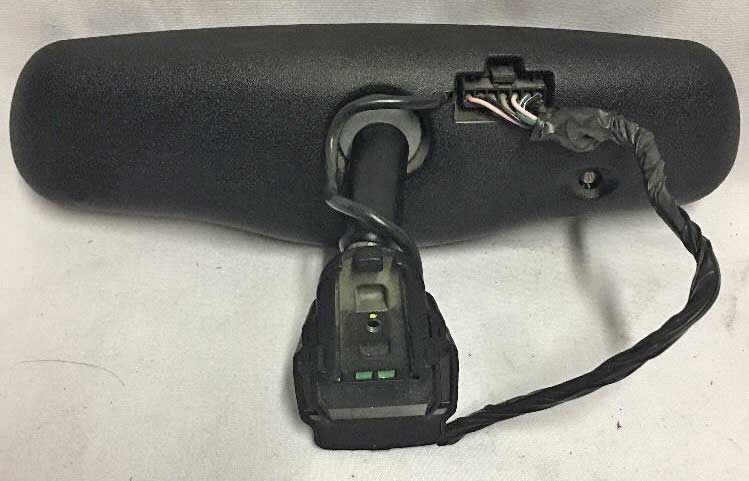 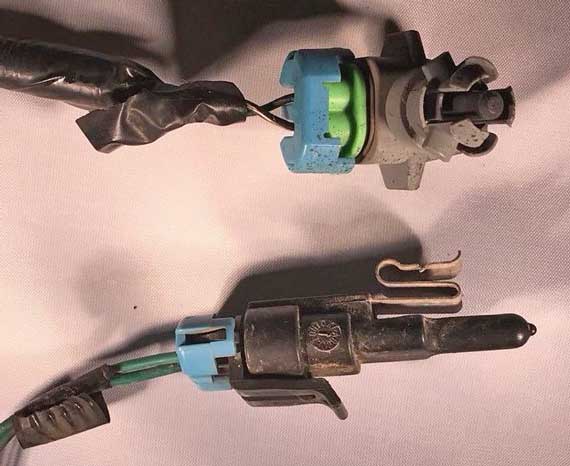
TEMP SENSORS (Two different types):
There appears to be a couple different types of sensors. The one I got is the TOP sensor shown above. I don't think there is a difference in how they function. The sensor should be mounted somewhere outside your car. The usual location seems to be under the front bumper of the car as far from engine or radiator heat as possible. The light sensor that controls the display brightness can be seen here just below the connector plug. And the COMPASS MODULE is in the small black case that attaches to the windshield mount. 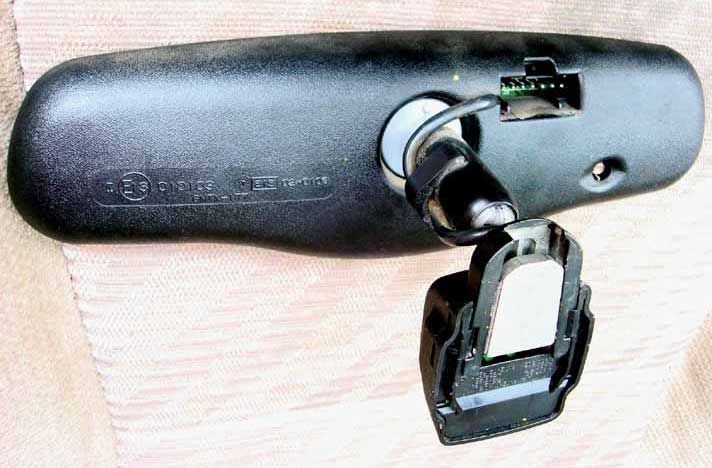
|
|||||||||||||||||||||||||||
| Differences
in Original 240 Mirrors |
|||||||||||||||||||||||||||
|
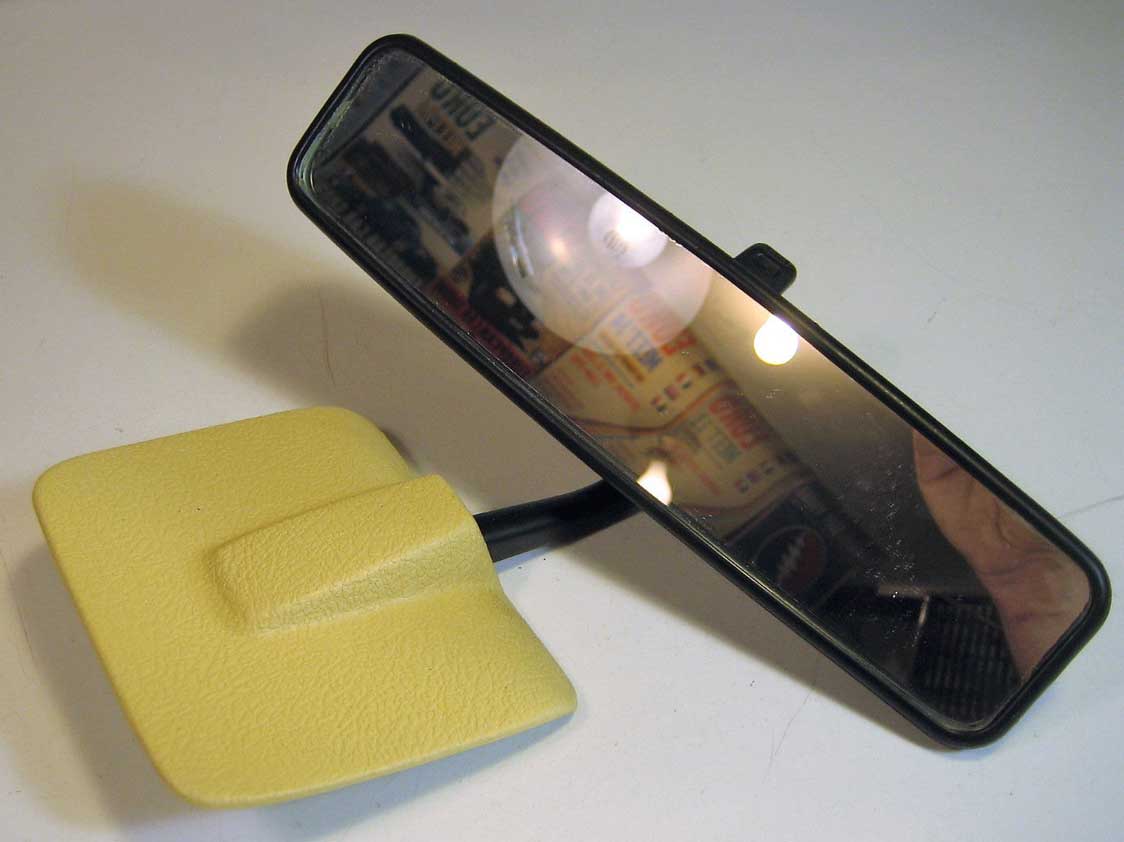
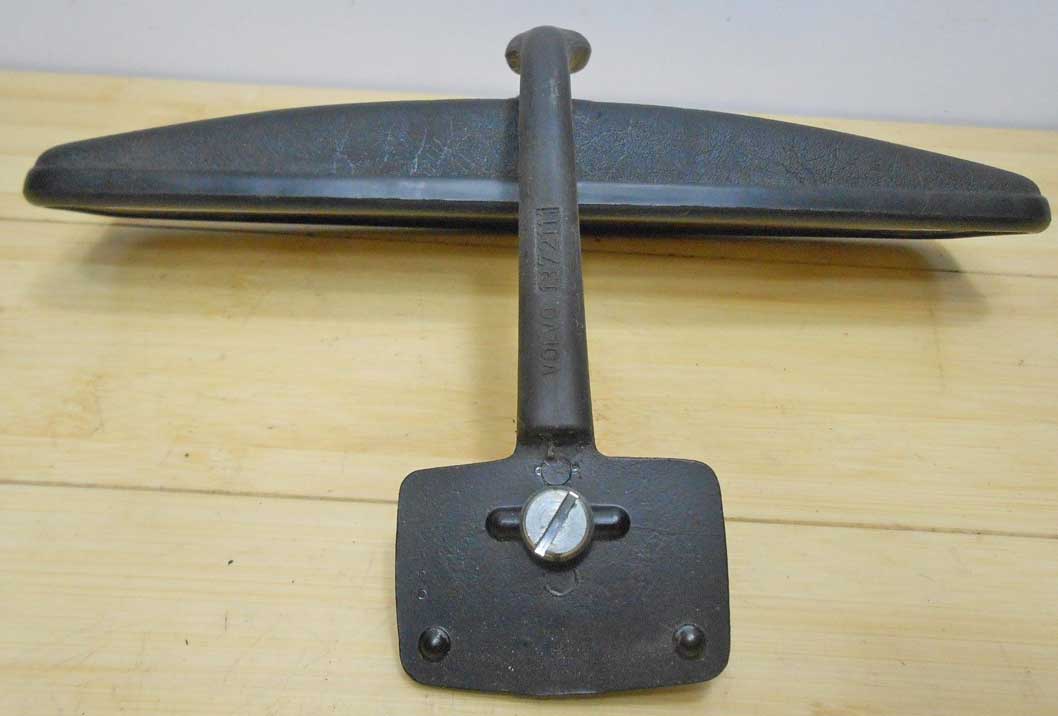
If you have a 240
2-door or 4-door sedan,
your original 240 mirror will have a plastic cover like
these photos. Your original Volvo mirror can be
pulled off with a tug. If comes off that way as a
safety feature to protect your face when you collide
into the mirror in a crash.
|
|||||||||||||||||||||||||||
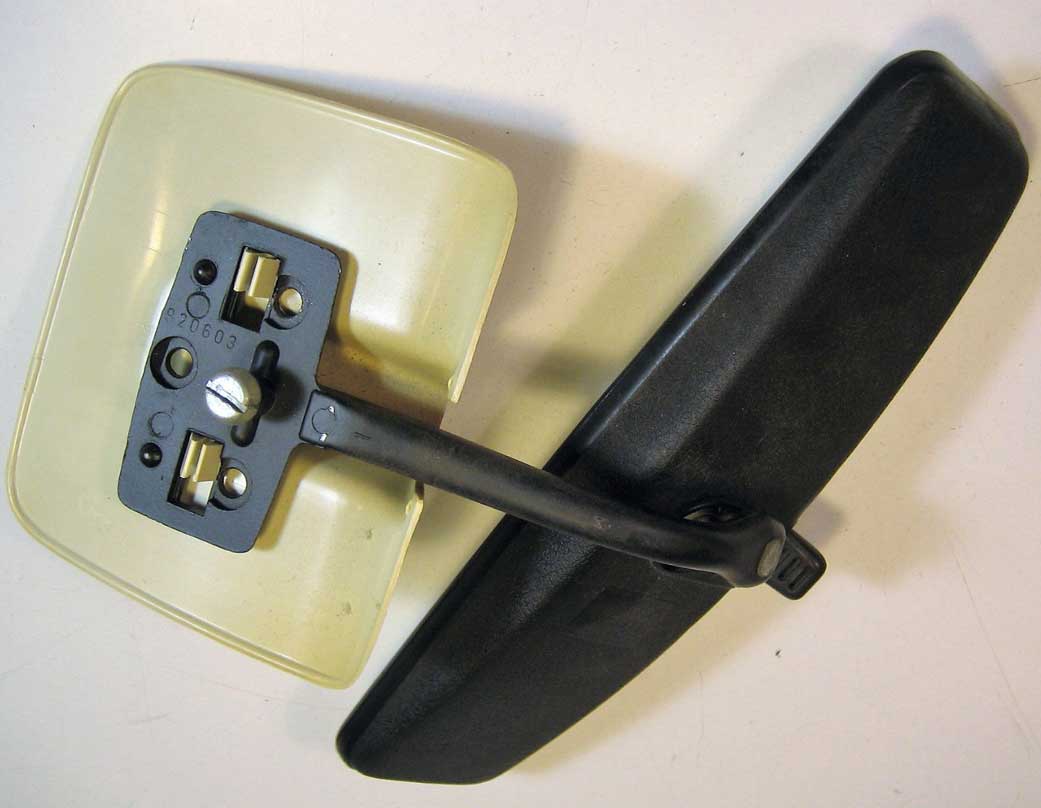
| If you have a 245
WAGON, your
original 240 mirror will look like these photos.
   WIDTH DIFFERENCE The Gentex mirror is a little WIDER than the original one. If this bothers you, too bad. When it's centered nicely, the visors can still be lowered, but they will just slight barely brush the mirror edges. 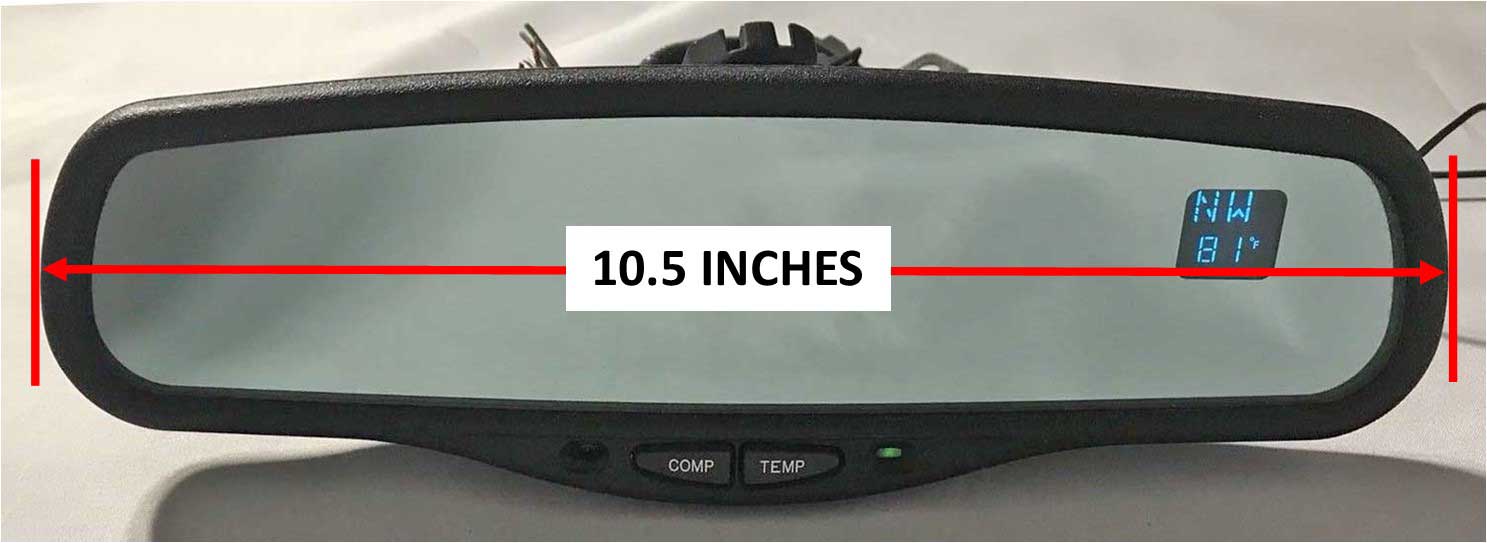 |
|||||||||||||||||||||||||||
As you can see here I have removed my mirror and I have mounted a radar detector. I decided to make a mount for it where the plastic cover used to be. So I'm not using the old plastic cover in my car. Then I glued the metal wedge mount button onto the windshield. Make sure you glue it on the correct side and NOT upside down or backwards. PAY ATTENTION! Before gluing the windshield button, I took some time to check positioning of the mirror by holding it up to the windshield. That metal button is going to be permanent on the glass, so make sure it's where you want it to be. I chose to place the top of the button about 2 inches below the top of the windshield. 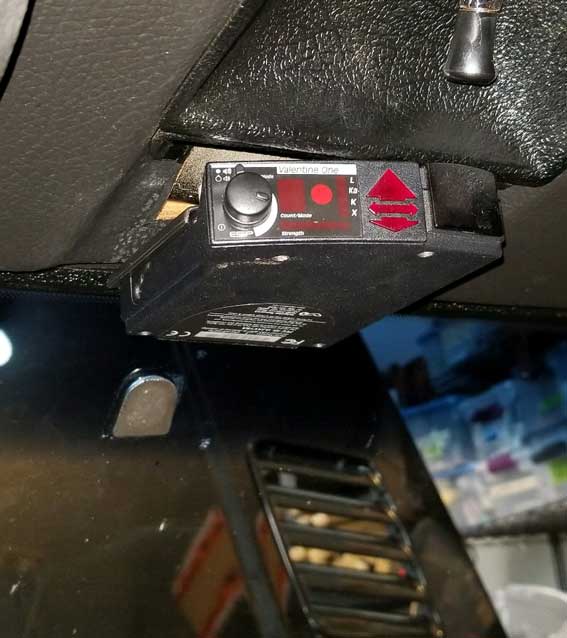
|
|||||||||||||||||||||||||||
| Problem: When the Button Fails
to Stick to the Glass! This seems to happen a lot when amateurs like me do stuff like this. I used Permatex windshield mirror adhesive (found at my local auto parts store) and I followed the instructions perfectly. It says to allow 30 minutes drying time before mounting the mirror. I did and the button then popped off while I was turning the set screw on the mirror mount. Attempt #2: I used a wire brush wheel on my bench grinder to clean the hard glue off of the button. The glue was having no problem sticking to the button, but it was not sticking to the windshield glass. Then I tried again, this time allowing several hours for drying. I got the mirror mounted and set screw tightened. As soon as I tried adjusting the mirror, the button popped off the windshield again! Attempt #3 (see pic): So on my third try I used some 180 grit sandpaper to rough up the glass surface first. I put down some masking tape to make sure I only sanded a small square. 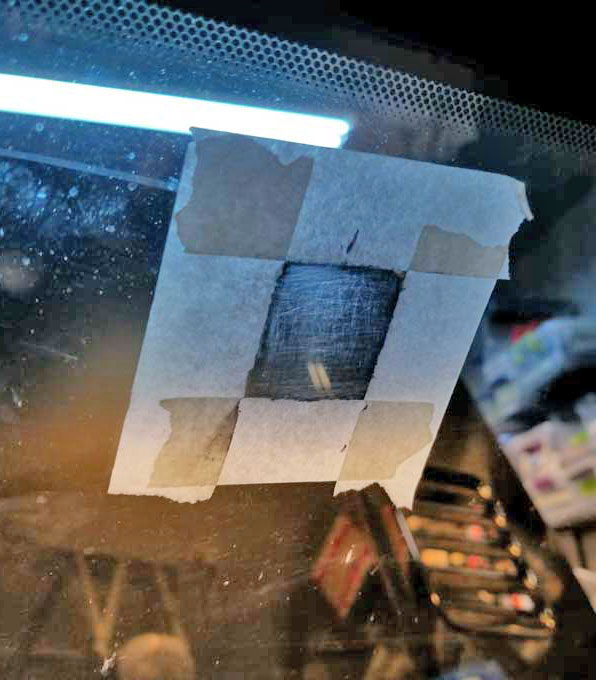 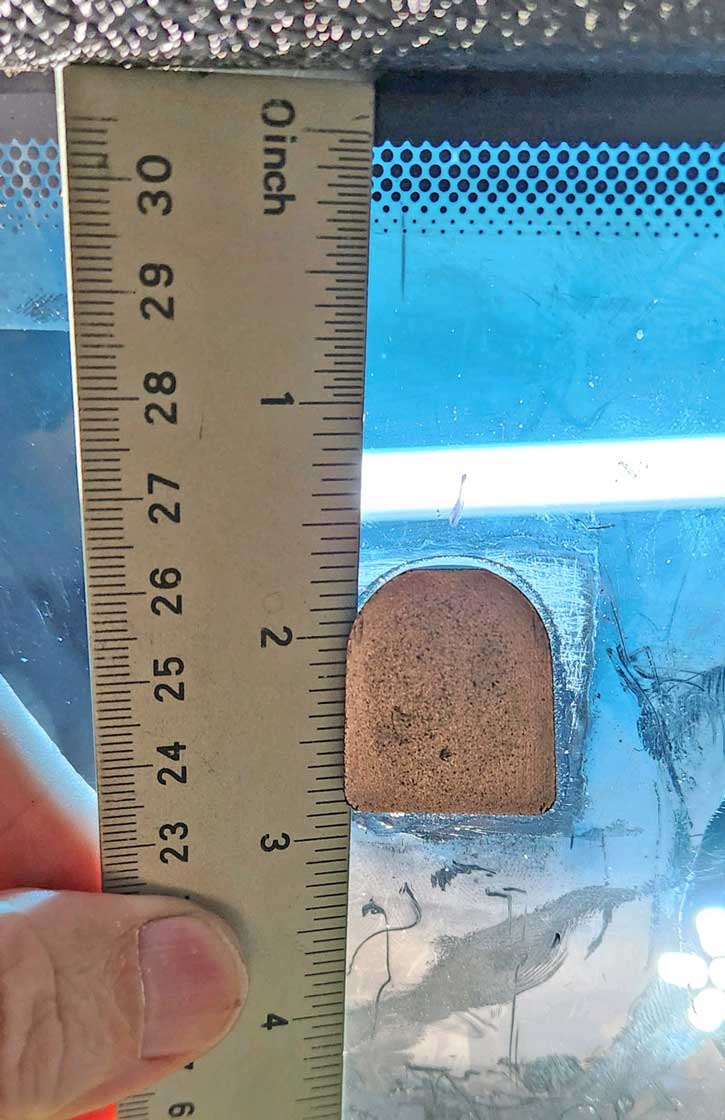 Then I glued it again and allowed the glue to dry OVERNIGHT. That one worked and it has stayed on. |
|||||||||||||||||||||||||||
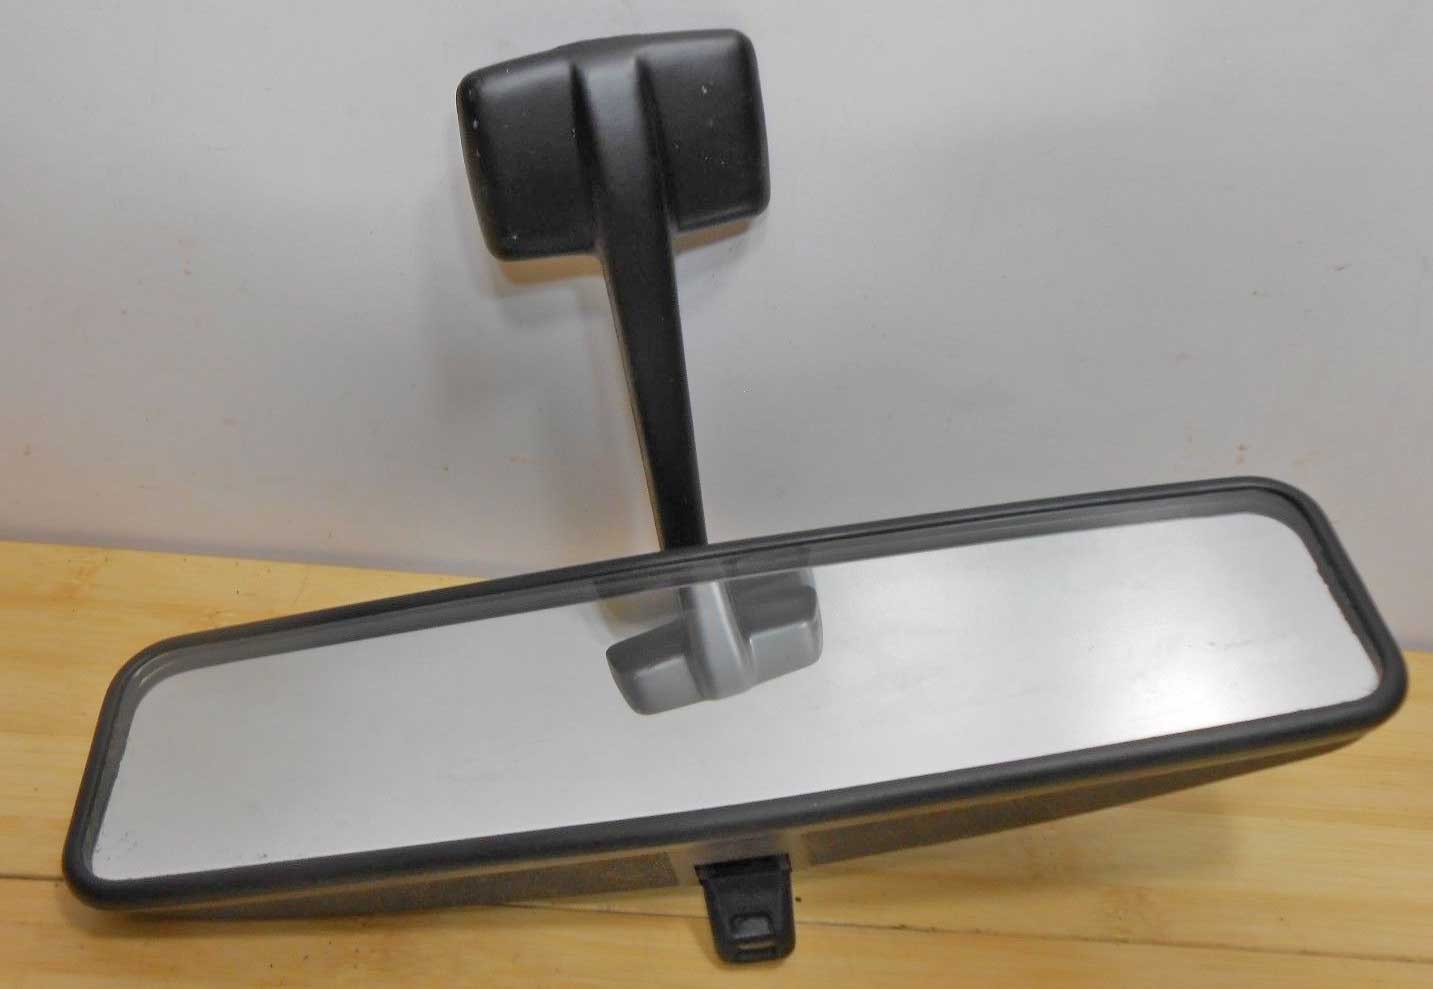
Here's the result.
There's a single set screw in the mounting base that tightens to snug the mount against the metal button. It's a Torx T-20 screw. Make it snug only. No need to twist hard, especially if your hoping to keep the mirror on the windshield. The compass module is then snapped onto the mounting base. 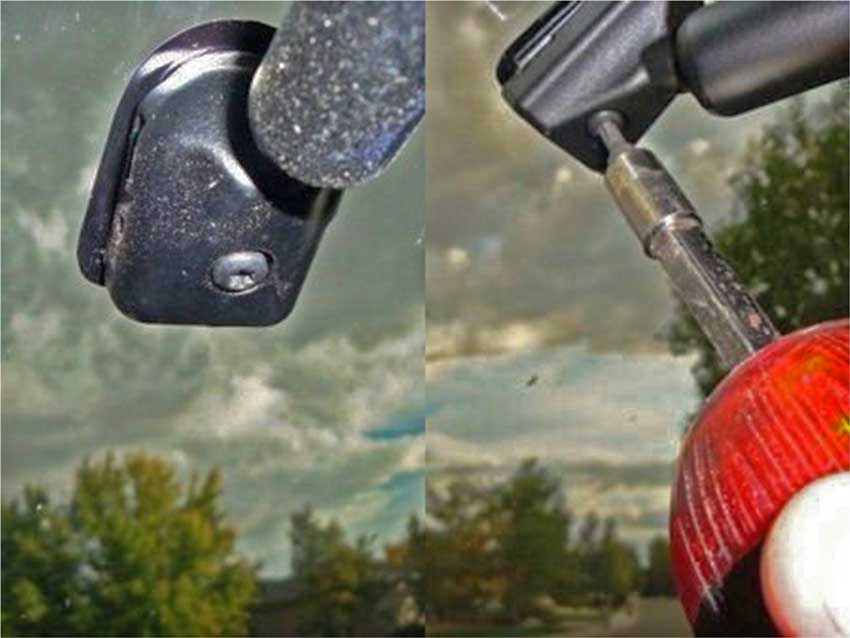 Overall this was an easy installation and well worth the effort in my opinion. 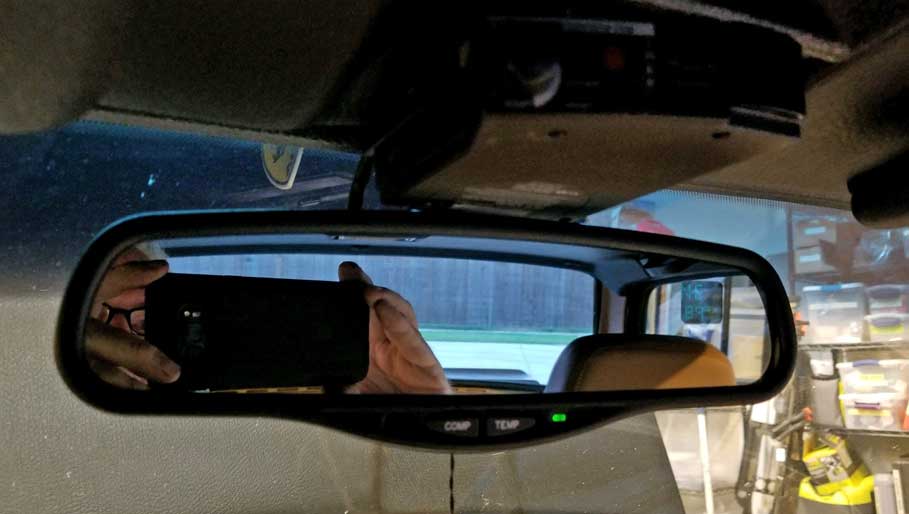 |
|||||||||||||||||||||||||||
|
Here's the outside view of the mount on the windshield.

|
|||||||||||||||||||||||||||
Below I'll go over the wiring, programming and a couple other things. Keep reading. |
|||||||||||||||||||||||||||
|
|||||||||||||||||||||||||||
|
|||||||||||||||||||||||||||
| Here are some simple
instructions for setting up the mirror after
installation. It covers setting the temperature display (Fahrenheit or Centigrade). It also covers setting the compass zone and compass calibration. |
|||||||||||||||||||||||||||
Click Image (PDF
document, 280 kb) |
|||||||||||||||||||||||||||
|
|
|||||||||||||||||||||||||||
|
|||||||||||||||||||||||||||
|
The compass and
temperature display in this photo doesn't tell the
complete story. This photo was taken in my
garage. That display is fairly visible when the
car is inside the garage, but when outside on a bright
day, it's hard to see.
It just seems to be a bit too dim to see well in bright daylight conditions. This compass/temp display will normally be DIM like this photo in low light conditions. Then it will automatically BRIGHTEN in brighter light conditions to make it easier to see. But it wasn't good enough in my opinion. 
To see how this display changes in brightness, have a look at this short video: https://www.youtube.com/watch?v=Va0hQfl0JLE. I found that even when the brighter setting took effect, my mirror was still not quite bright enough for me in bright daylight conditions. Below you will see my efforts to get a brighter display. |
|||||||||||||||||||||||||||
| The light
sensor that controls the display brightness can be
seen here just below the connector plug. And the COMPASS MODULE is in the small black case that attaches to the windshield mount.
|
|||||||||||||||||||||||||||
|
|||||||||||||||||||||||||||
| Separating the front
frame from the mirror body is easy. Wedge a flat screwdriver in there and slowly twist until you get a POP. Then slowly work around the rim twisting and popping the frame until you've gone all the way around and it comes loose. 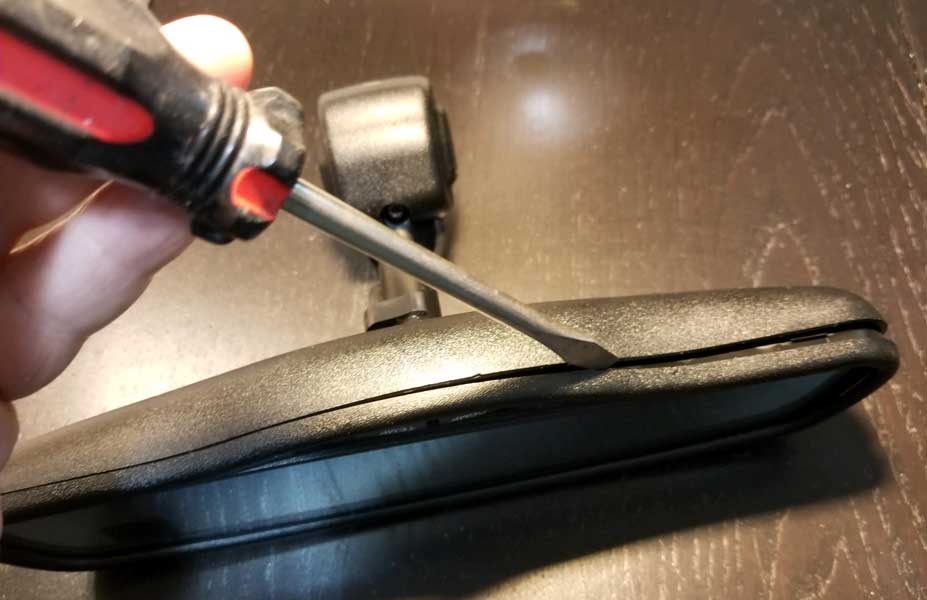
|
|||||||||||||||||||||||||||
|
The mirror and circuit board will come out together. Here's the back of the circuit board. You can see that it's attached to the mirror plastic body by a small harness. |
|||||||||||||||||||||||||||
To free the circuit board from the mirror body, simply unplug that small plug. It just pulls out. I know NOTHING technical about this circuit board, so I DID NOT mess with the electronics. If anyone has tried that route, I would like to hear from you. 
|
|||||||||||||||||||||||||||
Here's what I did. While being CAREFUL with the two small wires still connecting the circuit board to the mirror glass, separate the circuit board from the mirror and turn the circuit board over like this. They aren't glued together. They pull apart easily. Here's the front of the circuit board BELOW. That dark blue rectangle is the compass/temperature display. 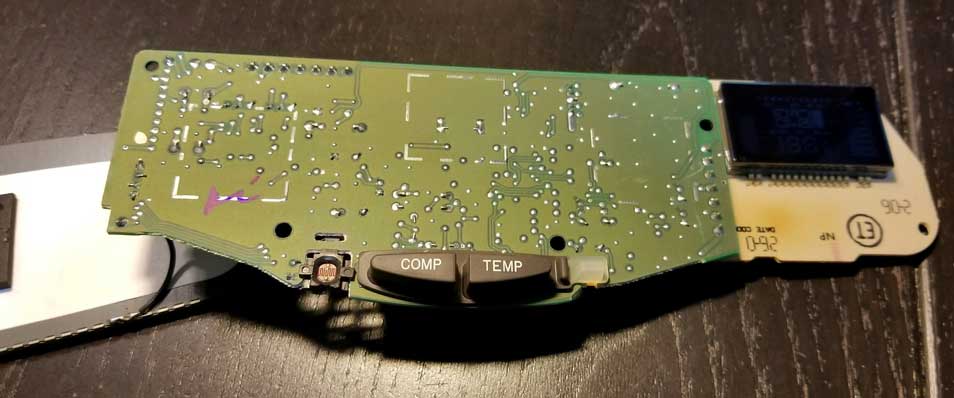 |
|||||||||||||||||||||||||||
That is a piece of dark blue film is held on with some soft glue on the right and left edges. I inserted a micro screwdriver to gently lift it. Then I could get my fingernail in there and I slowly pulled it off. 
|
|||||||||||||||||||||||||||
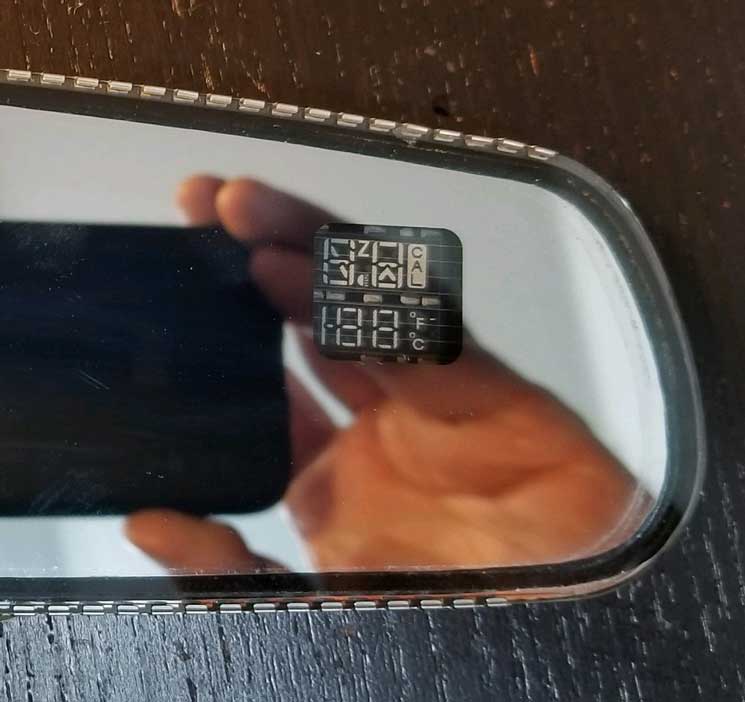
| BELOW you can see the display without the dark blue film over it. Now I know what you're thinking. 1. You want to know if the display is still blue/green. The answer is YES. The color hasn't changed, but this does help make it brighter. Keep reading. 2. You're also thinking that display looks really ugly without the blue film. Not to worry. Keep reading. 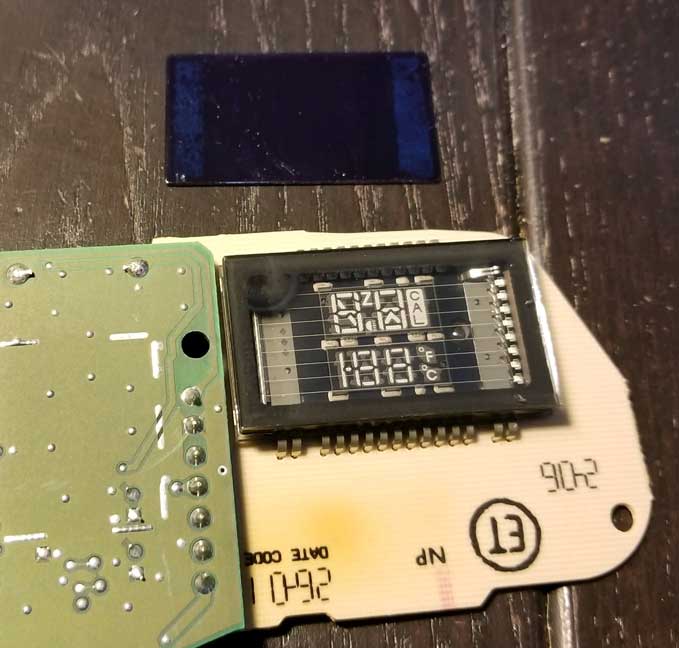
|
|||||||||||||||||||||||||||
|
With the mirror glass again placed over the circuit board, this is what you can now see through the window. Yes, this image BELOW may look undesireable, but once it's in the car it becomes pretty much invisible. Just wait.
Now you can reassemble your mirror the same way it
came apart.
|
|||||||||||||||||||||||||||
|
Final installation is complete. Looks pretty good, doesn't it? Compare the OLD photo on the LEFT with the NEW photo on the RIGHT. The display brightness has been improved. It's easier to see now in bright daylight conditions. And that ugly display thing you saw above is not visible. It's a miracle! 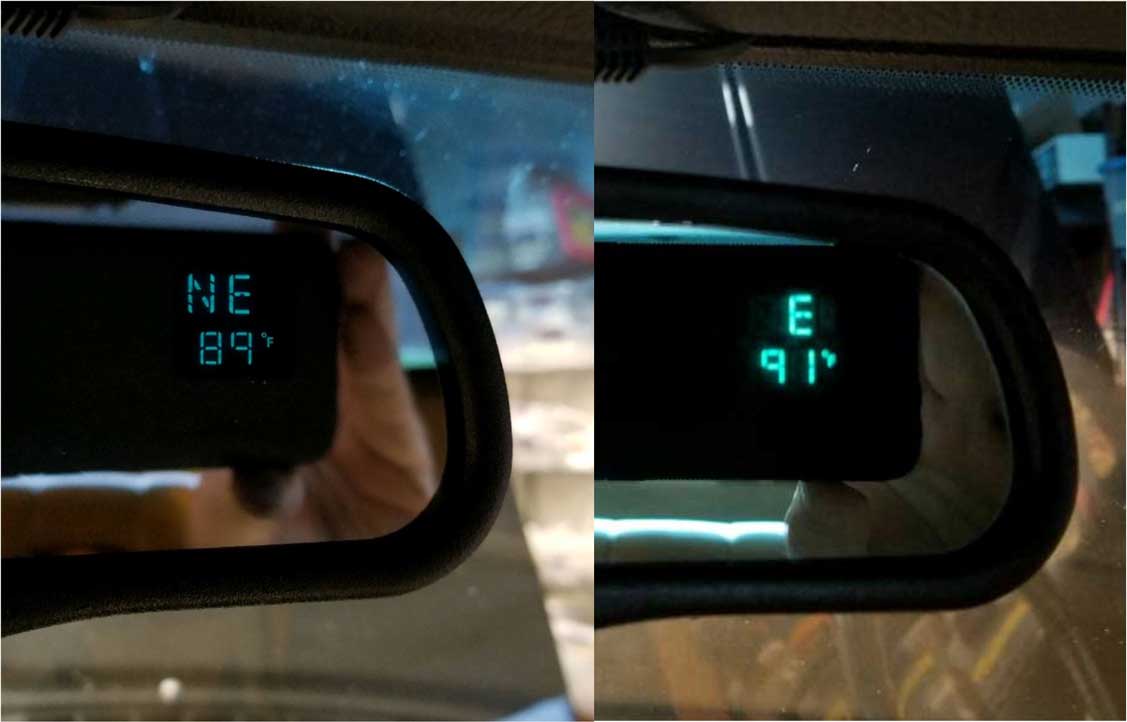
Mission complete. If you install a different mirror in your Volvo, I'd like to hear what you did and how things went. Email me: CONTACT |
|
|
||||
| davebarton.com |
prancingmoose.com |
240turbo.com |
Special Emblems |
|
| Prancing
Moose Stickers |
Volvo
Stickers |
Body/Chassis/Engine
Labels |
240 MODS and FIXES Page | |
| Other Car Brand
Stickers |
Steering
Wheel Labels |
Center Cap Labels/Overlays |
Cool Volvo
Products |
|
| Grill Labels/Overlays |
Volvo Wire
Harnesses |
Conversion Harnesses |
Harness
Parts/Connectors |
|
| Volvo Relays |
Coil Repair
Harnesses |
240 Window
Scrapers |
740/940
Window Scrapers |
|
| Adjustable Voltage
Regulators |
Horn Buttons |
240 Odometer
Repair |
740 Odometer
Repair |
|
| Volvo Gauge
Faces |
740
Turbo/Boost Faces |
240 Black Door Vinyl |
850 Odometer
Repair |
|
| ALTERNATOR Page |
240 Power Mirrors - Switches |
240 Oil Cooler Page |
240 Fuse Panel Page |
|
| Group A
Racing 242 Turbo Page |
240 Hydraulic Clutch | Fuel Pump RELAY Page |
240 Headlight RELAY Page |
|
| Used Parts & Extra Stuff for sale |
CRIMPING Page |
240 Ignition Page |
240 Headlight Page |
|
| 240 Gauge Electrical Diagrams | 240 REAR END Page | Yoshifab Catch Can Install | 240 TAILLIGHT Page | |
| Side Marker
Lights Page |
Gentex Mirror Upgrade | Yoshifab Drain Tube Install | Modified 240 Favorites | |
| SoCal Salvage Yards | Unleaded Racing Fuel | B26FT Stroker | Dave's 245 Spec Page | |
| 240 SUSPENSION Page | 240 Lowering Page |
240 Windshield Page |
240 WIPER Page | |
| 240 BRAKES Page |
240 Dash Top Gauge Pod | Cadillac 4-Note Horn Install | 240 DYNAMAT Installation | |
| 4 Speed Fan
Controller |
Electric Cooling Fan
Page |
BRUSHLESS Cooling Fan Page |
Tropical Fan
Clutches |
|
| 240 AC Page | "KOMFORT BLINKER" Upgrade | T5 Trans Conversion Page | 240 Engine Mount Page | |
| 240 VIN Page | Stepper Idle Valve Page |
Vacuum Diagrams | 240 HOOD Page | |
| 240 Exhaust Page | 242 Power Vent Window Project |
EFI Volvo Pin Function Diagrams |
Favorite Links | |
| R-Sport
Apparel |
Prancing
Moose Apparel |
Volvo Meet Photo Albums | Texas Volvo Meets and Events | |
| Ordering Instructions | Policies | PAYMENTS Page |
Mojave Road Trail Map Page |
|
| Returns | Shipping | Shopping Cart Troubleshooting | Contact Us |
|

|


 alternators are known for poor voltage.")


