BALL SOCKET JOINTS
Ball
and socket joints used by all of the above actuators appear really close to about 10
mm in diameter (the Infiniti ball I had measured about 10.2 mm).
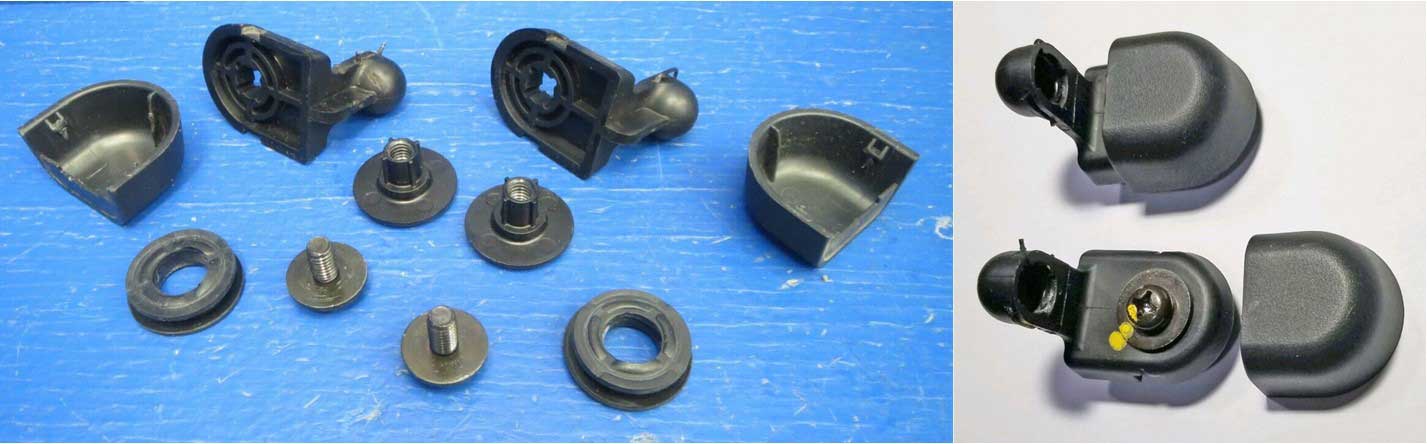
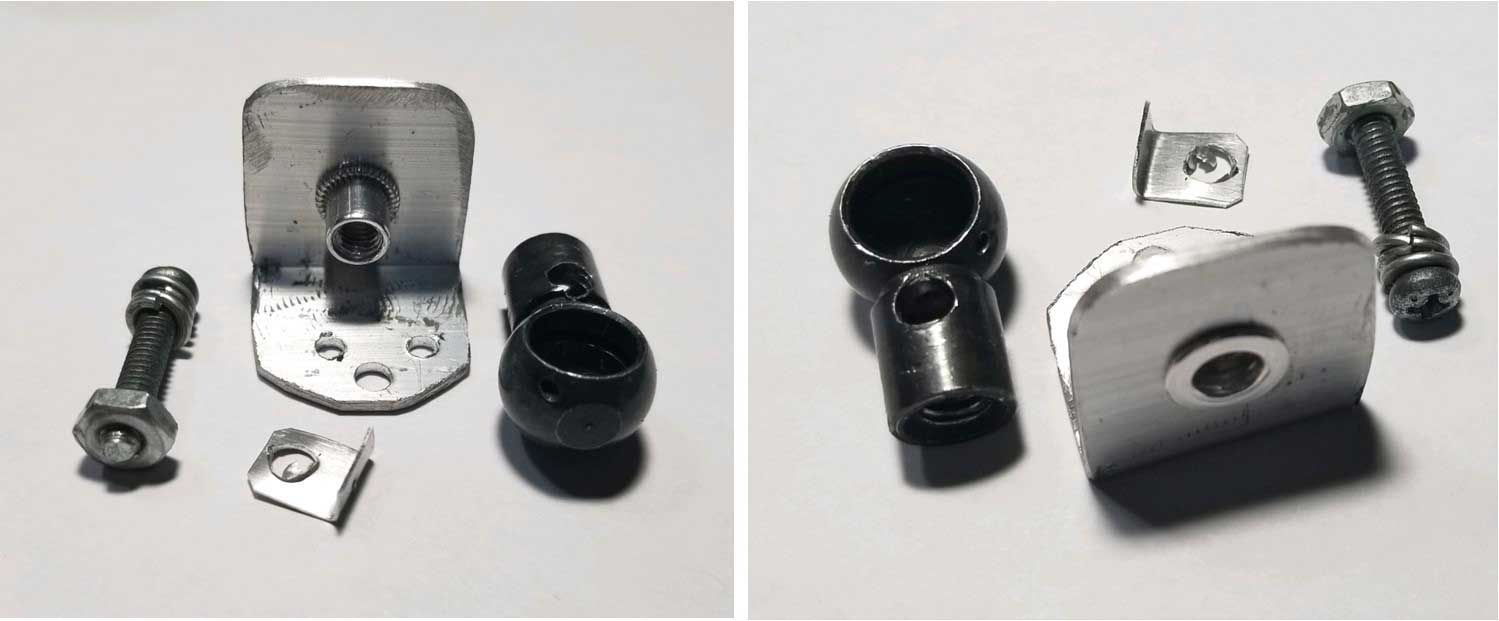
The metal 10 mm ball and socket parts below are available
for lift supports used for various things, such as trunk or rear hatch lift rods in cars.
Below I'll include some info on the specific parts I experimented with and then what I eventually used.
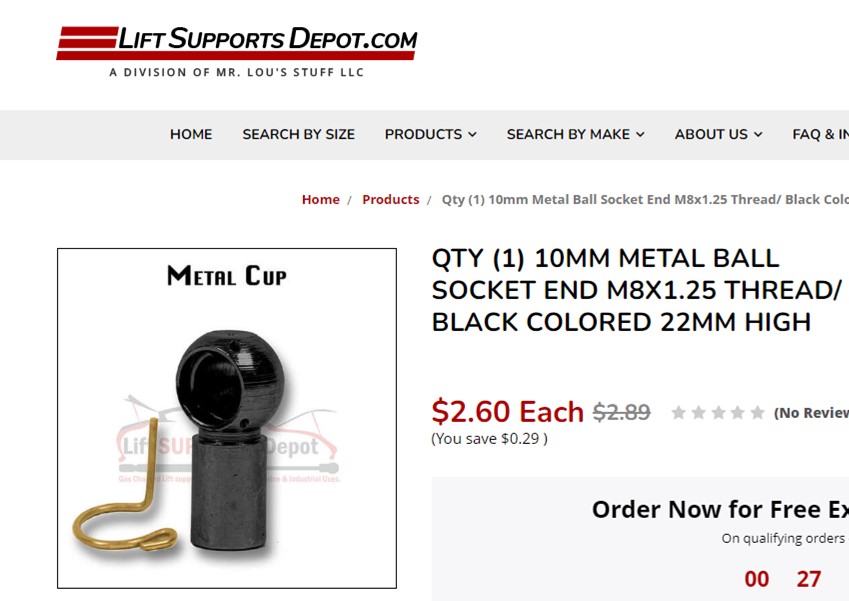 
If you need to create your own ball-socket links or glass mounts, Lift Supports Depot is one place you can look for these: https://www.liftsupportsdepot.com/products/ball-sockets/
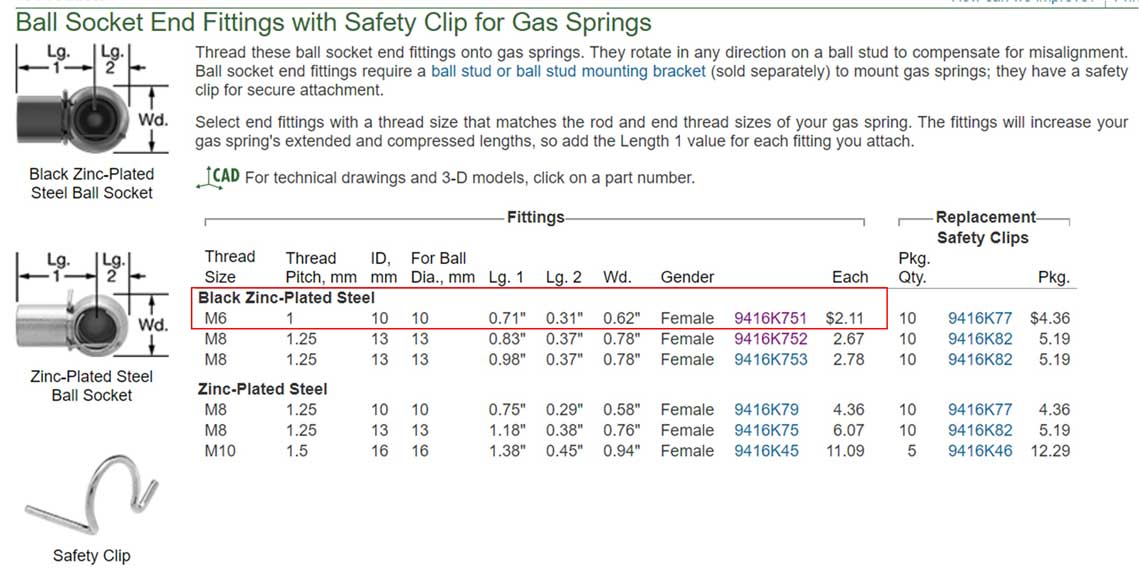
I ended up ordering some of these 10 mm BLACK ball sockets above with M6 female thread.
The original Volvo fastener that goes through the glass is an M6 screw, so that seemed like a good size to go with.
From McMaster-Carr: https://www.mcmaster.com/ball-sockets/
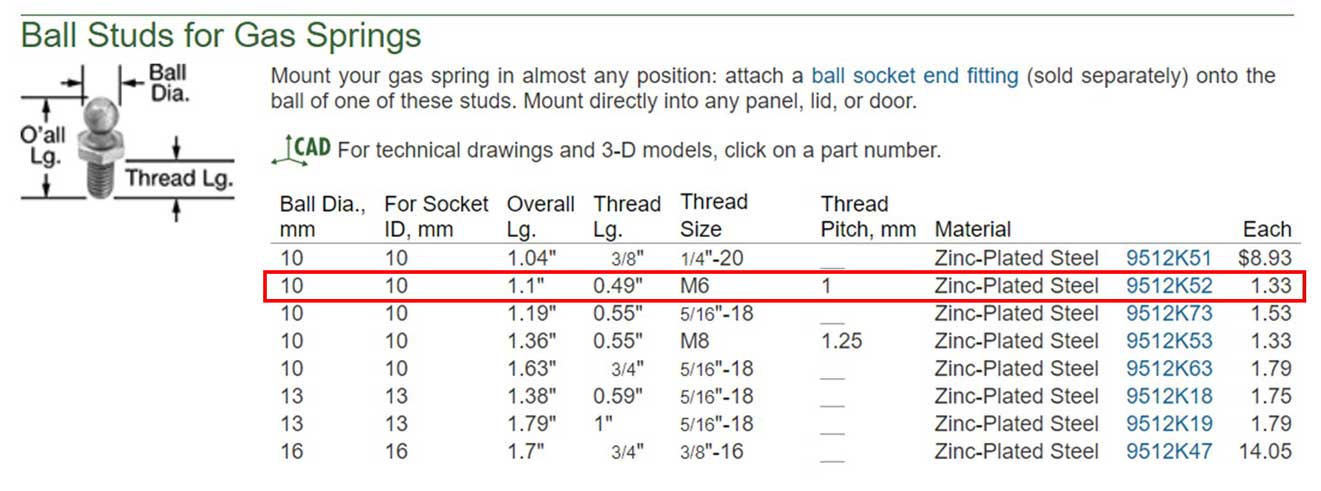
I wasn't sure if I would use them, but I also ordered some 10 mm ball studs with M6 thread.
From McMaster-Carr: https://www.mcmaster.com/ball-studs/ball-diameter~10-mm/

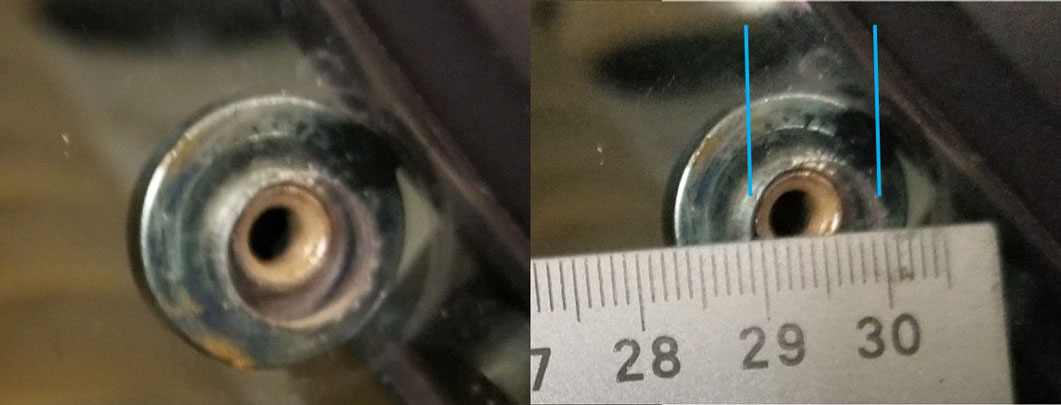
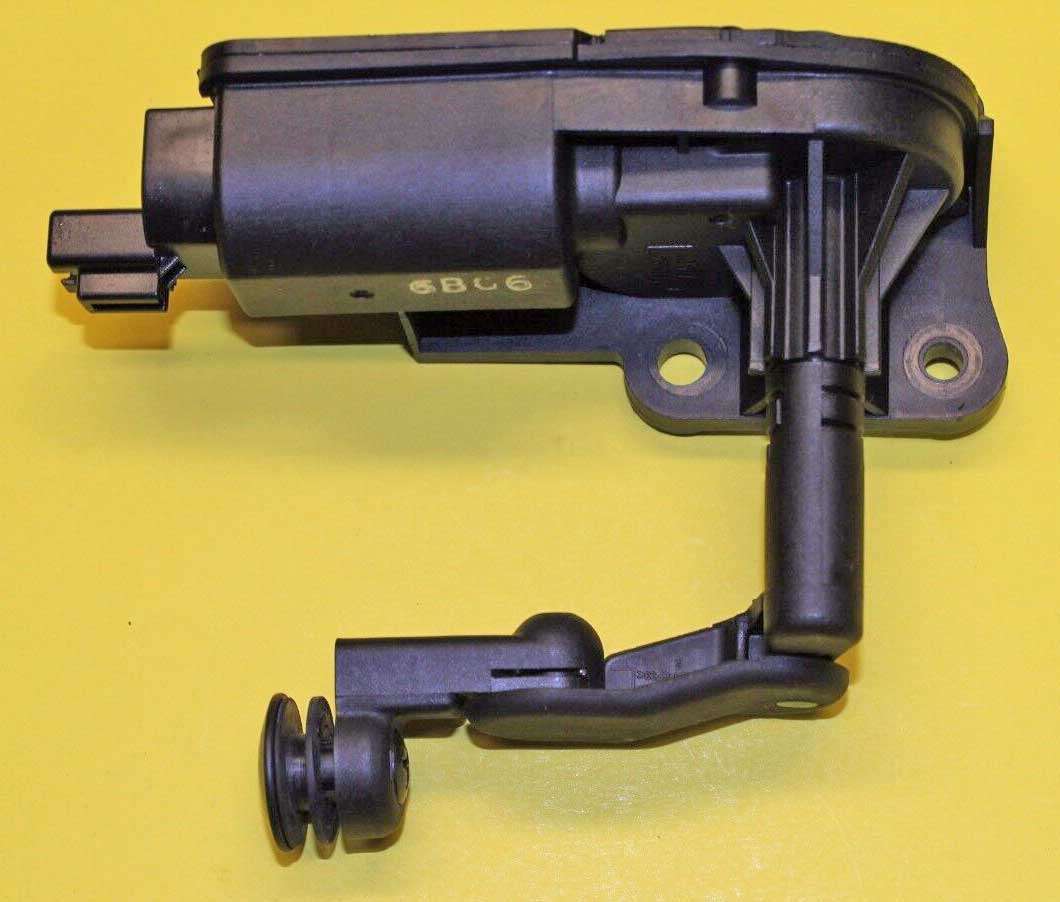
Here
are side by side close ups of the plastic ball on the Infiniti actuator
compared to the 10 mm metal ball stud from McMaster Carr. The metal
ball is precisely 10 mm in diameter, but the plastic ball is slightly
larger at about 10.2 mm and not really round.
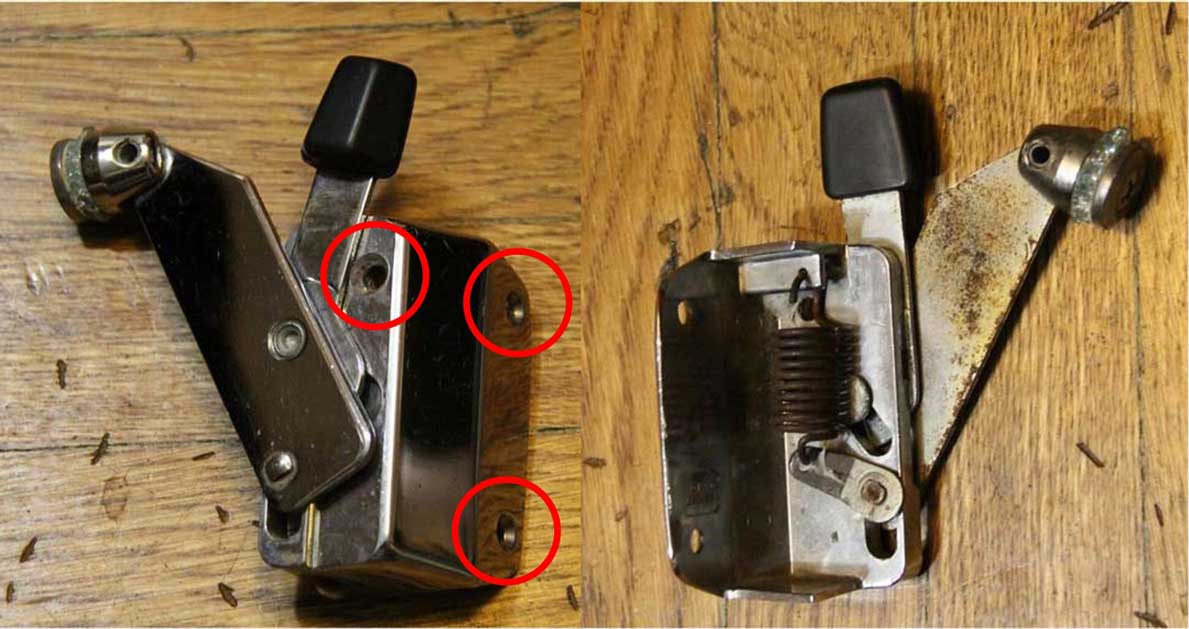
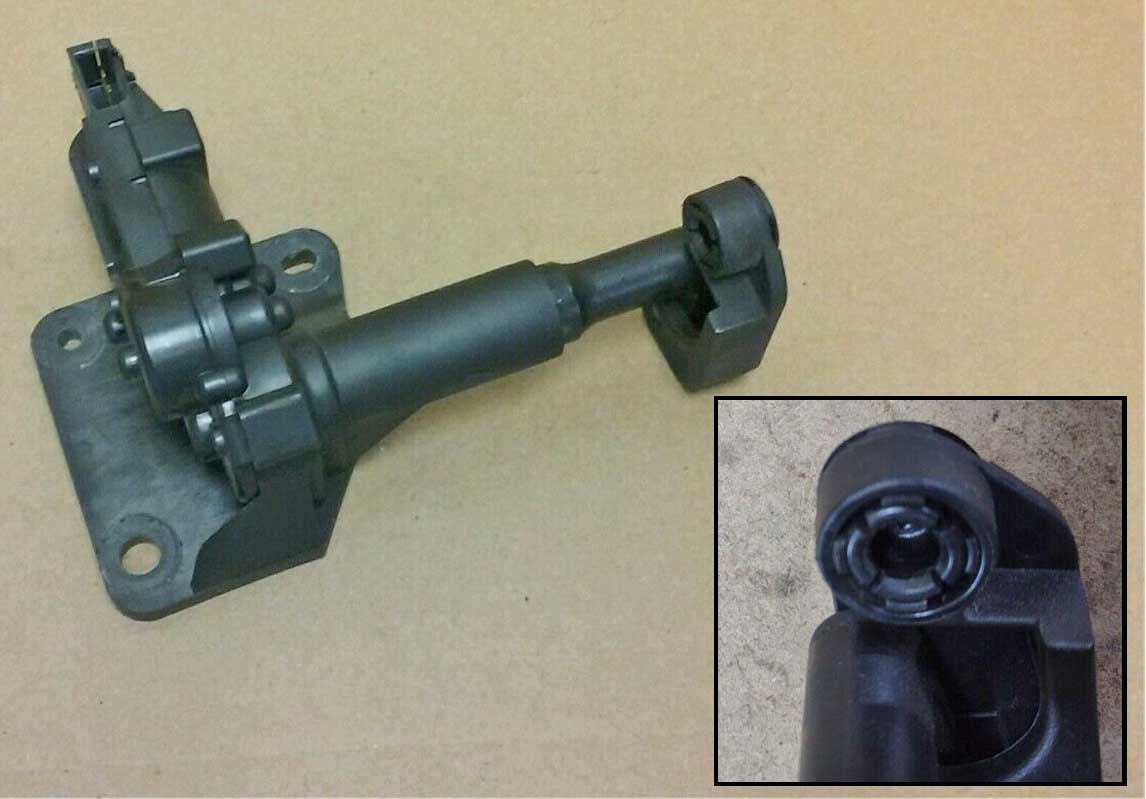
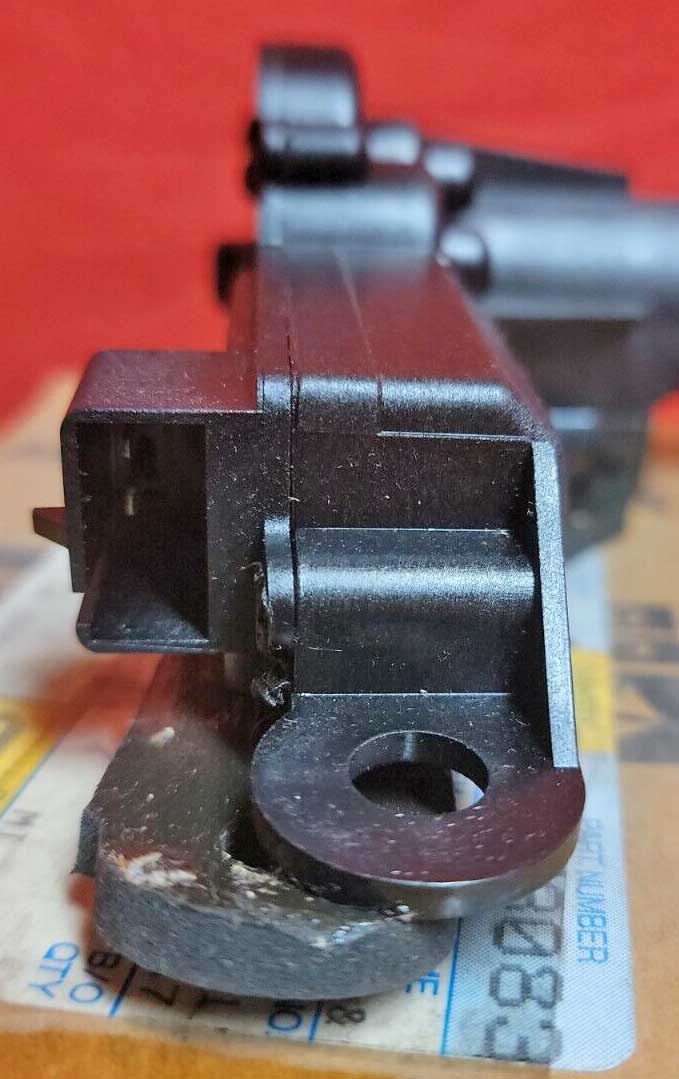
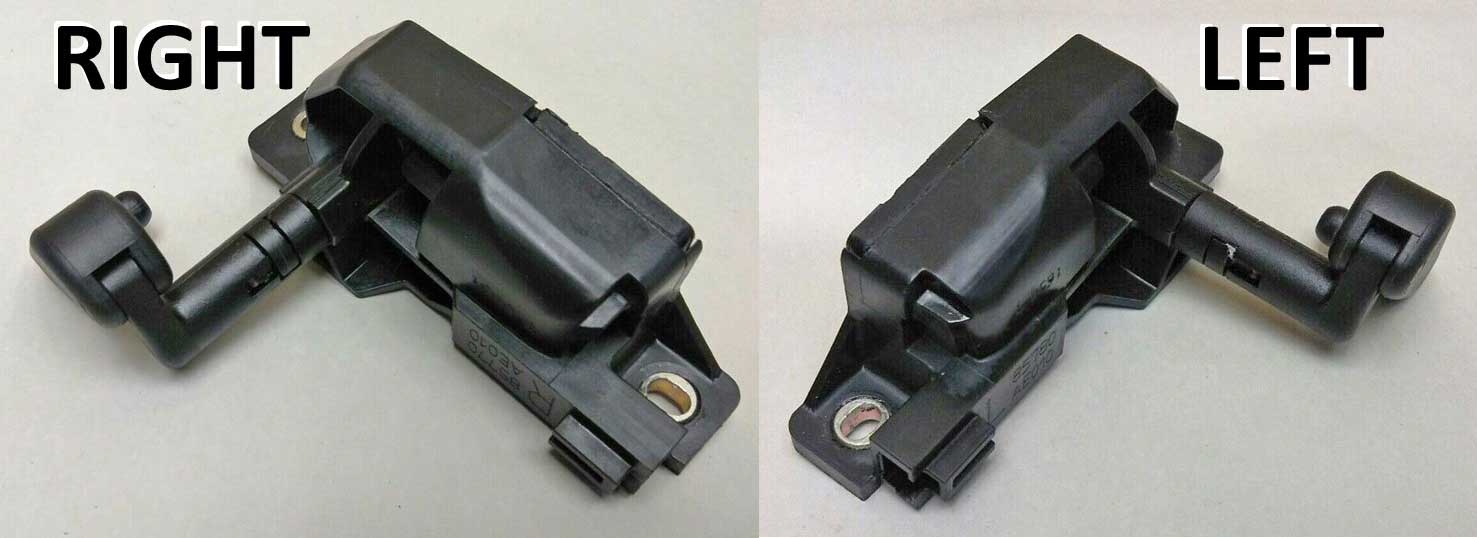
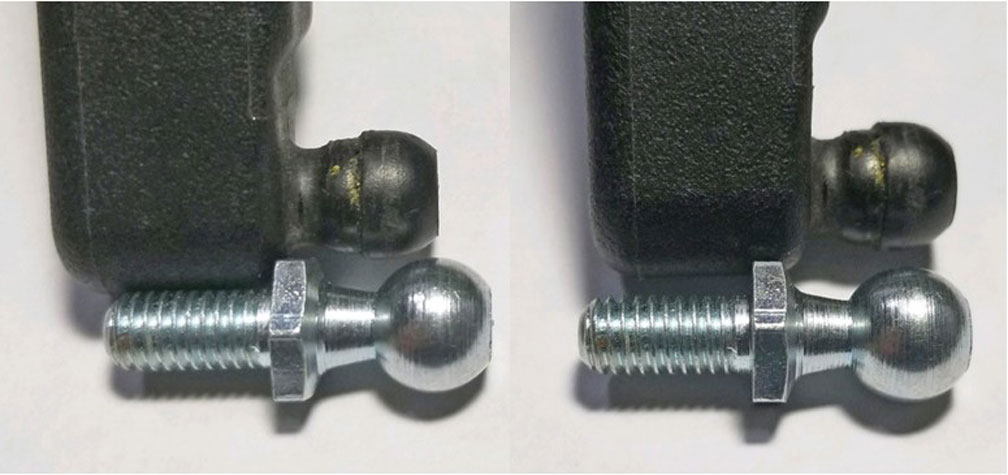
The below LEFT image
is the 10 mm metal ball stud and ball socket from McMaster Carr. I
tried fitting them together. The
fit is tight and it pivots ok, but there's a lot of resistance from a
tension spring inside that socket (more about that below).
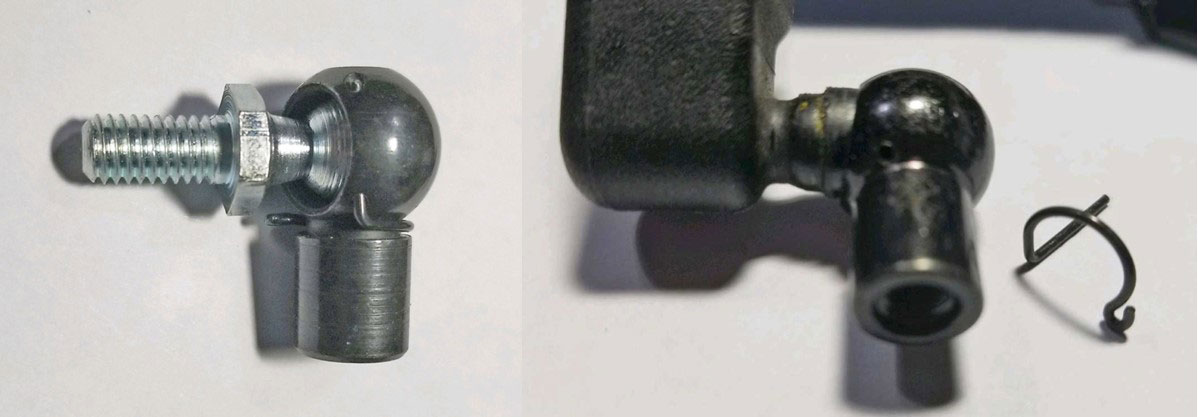
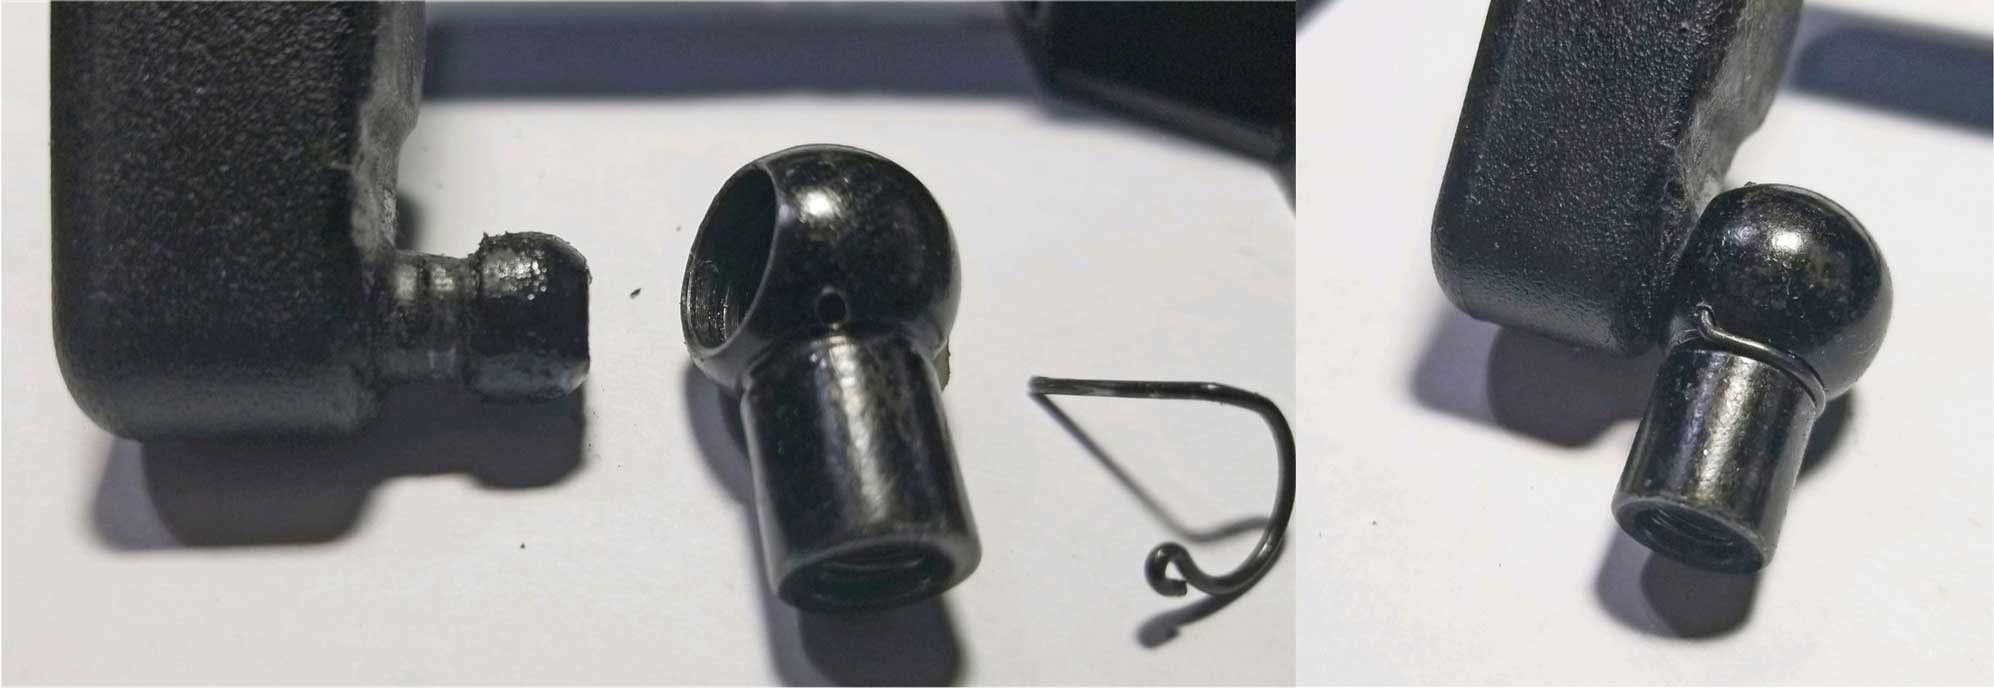
RIGHT IMAGE ABOVE: After
removing the retaining pin from the socket (seen above right), the plastic ball snapped into the metal socket fairly
easily and they fit together snugly. This combination will pivot ok, but the fit was too tight for this project. There was a lot of resistance. Prior to this point I was planning to use the plastic ball, but I changed my mind at this point.
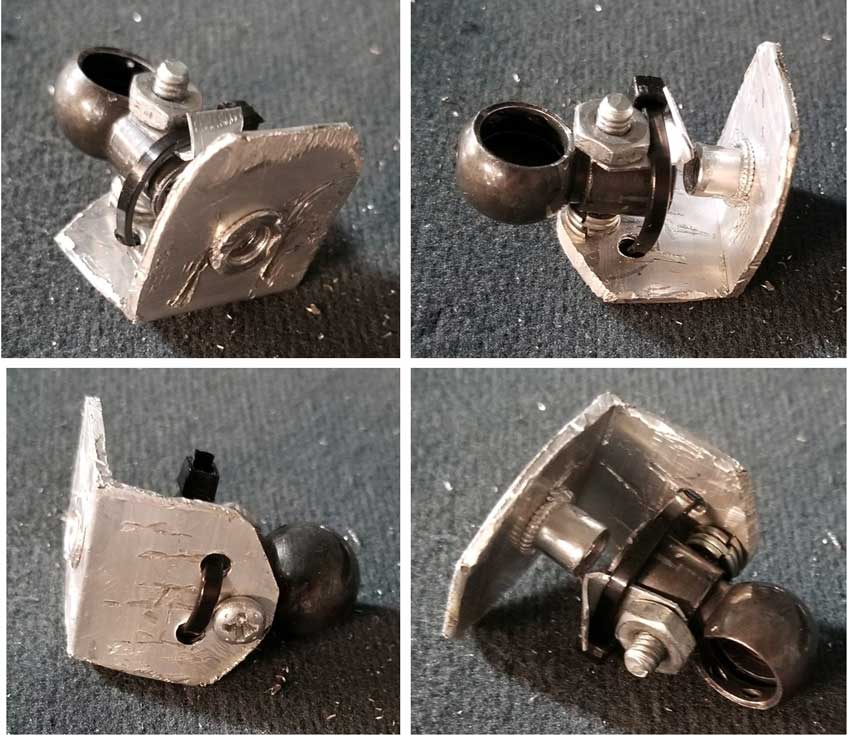
TENSION SPRING: As mentioned above, the fit between the metal ball stud and metal socket was
too tight. There was significant resistance when turning the ball in the socket
and I believed this would make moving a vent window difficult for the motor. The
reason for this tight fit is the spring metal tension ring
inside the socket as seen in the above images. If that ring had less tension, it
would have been better for this purpose. I simply removed it. Removing it turned out to be a bit tricky, but a great decision. The fit between the metal ball and metal socket was no longer too tight.
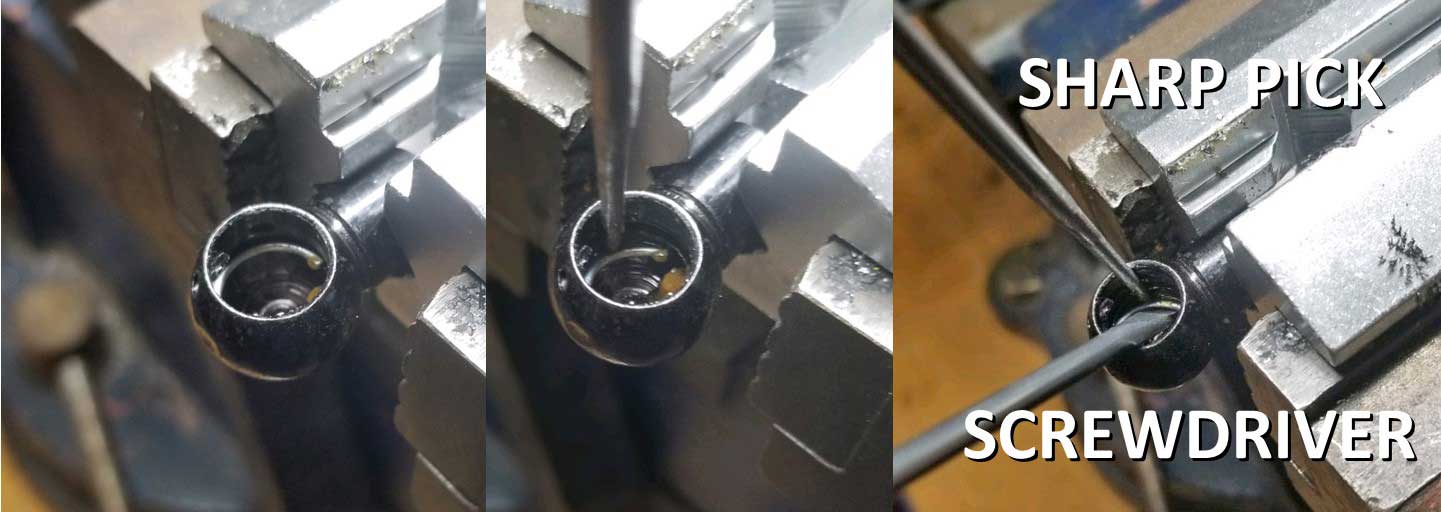
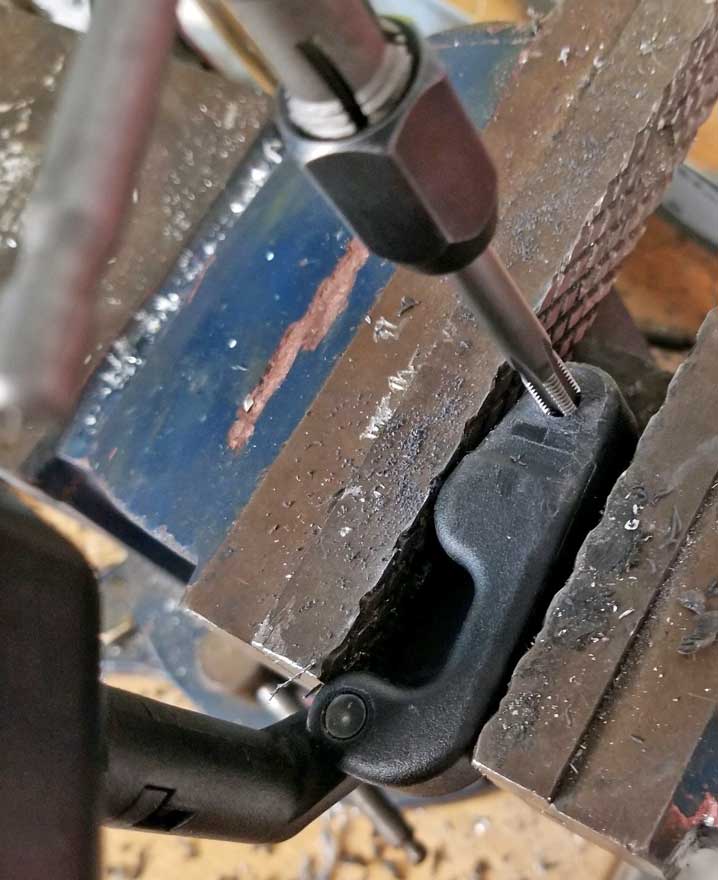
REMOVING A TENSION RING: A bench vise is a good thing to have to help remove that spring. After I secured the socket in a vise, placed a sharp pick inside to gently pull
the ring slightly out of the groove. Very little force is needed for that. Then
I used a small flat screwdriver to forcibly pry the ring up and
out. This methods worked really well.
Removing that retaining ring will not make the metal socket go onto the
plastic ball better. They still fit, but the plastic ball was still 0.2 mm too big and too snug for this.
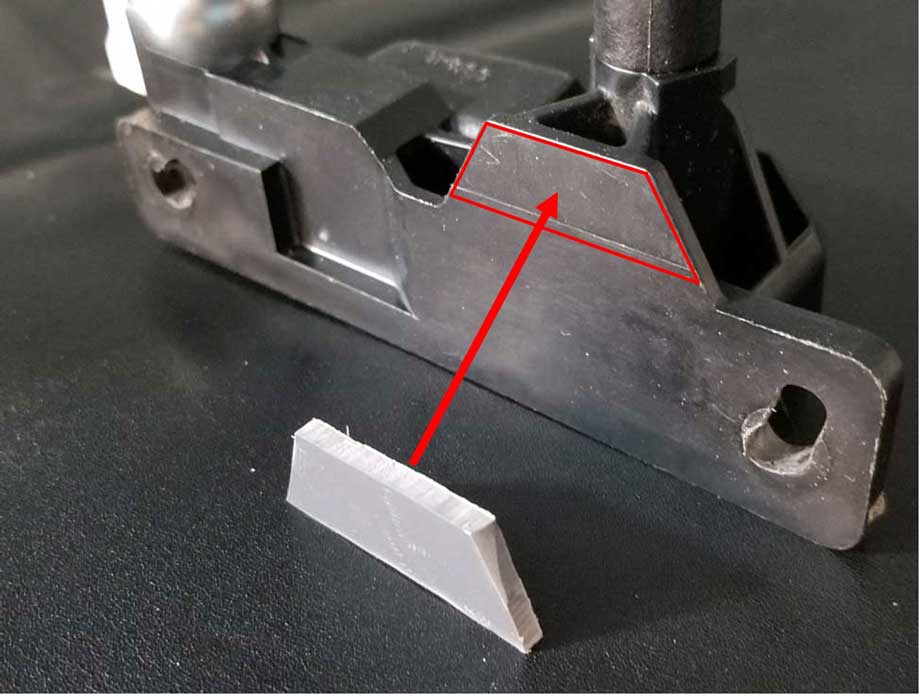
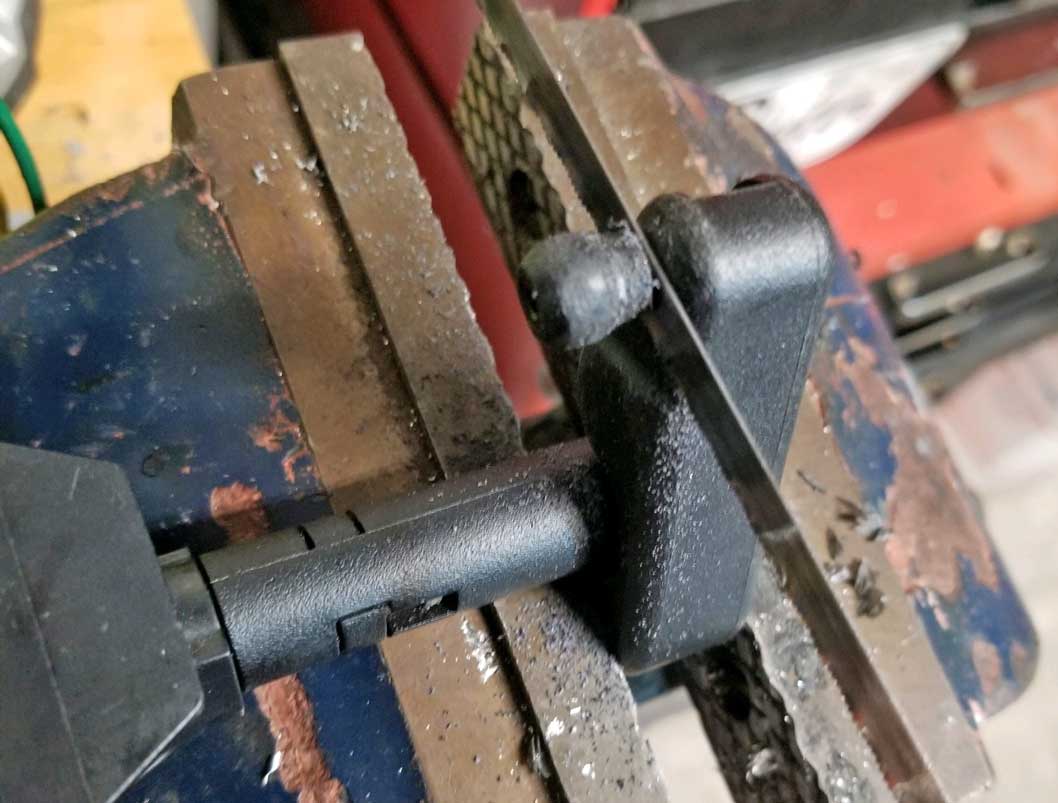
So I tried filing the plastic ball down. The above left image is after about 10 minutes with a file. I reduced
the ball diameter slightly and I also found I needed to remove some
plastic between the ball and the arm to clear the wire retainer near where it
gets inserted into its hole. This was beginning to look successful, however I
recognize that filing or grinding on that plastic ball has risks.
It would be really easy to go too far and ruin the plastic ball.
If the plastic ball could not be used or if a different ball is needed, I think it would be fairly simple to cut it off and then drill and tap a hole for M6 x 1 mm thread. Then
thread the metal ball stud into
the arm. This is ultimately a better solution. Also if necessary, the
bolt head hex could be ground
down so it could be inserted deeper in the arm. That would make it be
about the same distance from the arm as the plastic one is.
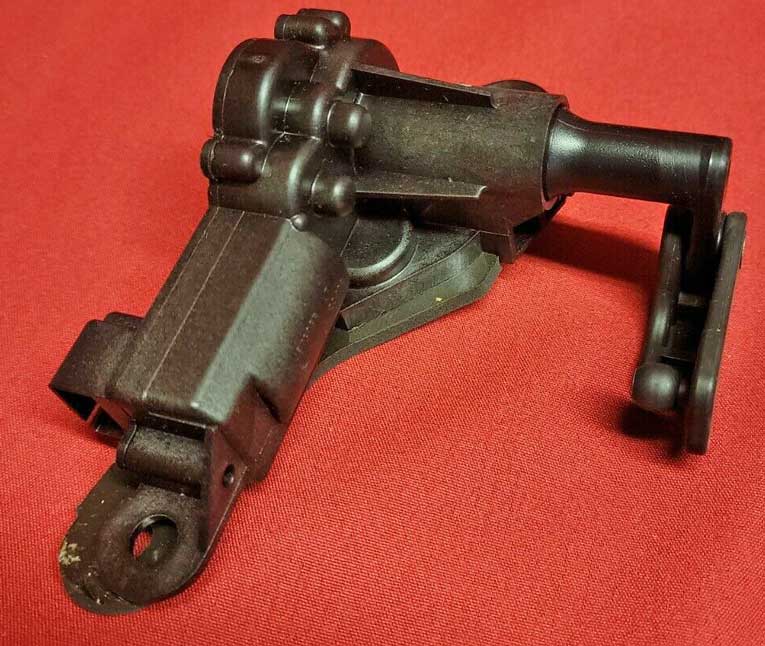
Cutting the Plastic Ball.
After playing with filing on the plastic ball, I gave up and chopped it off.
I drilled and tapped the arm for the metal ball stud.
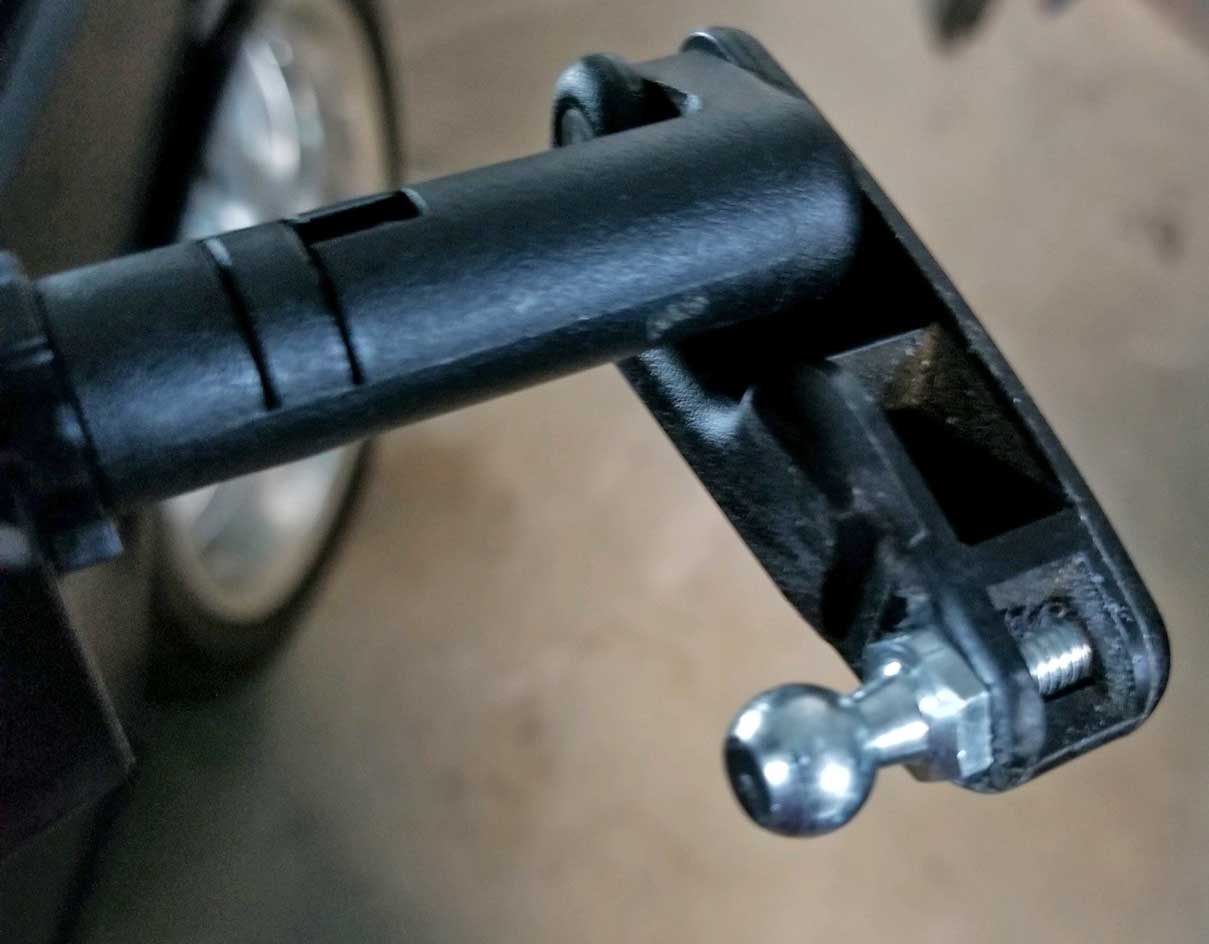
I ended up with this. Much, much better.
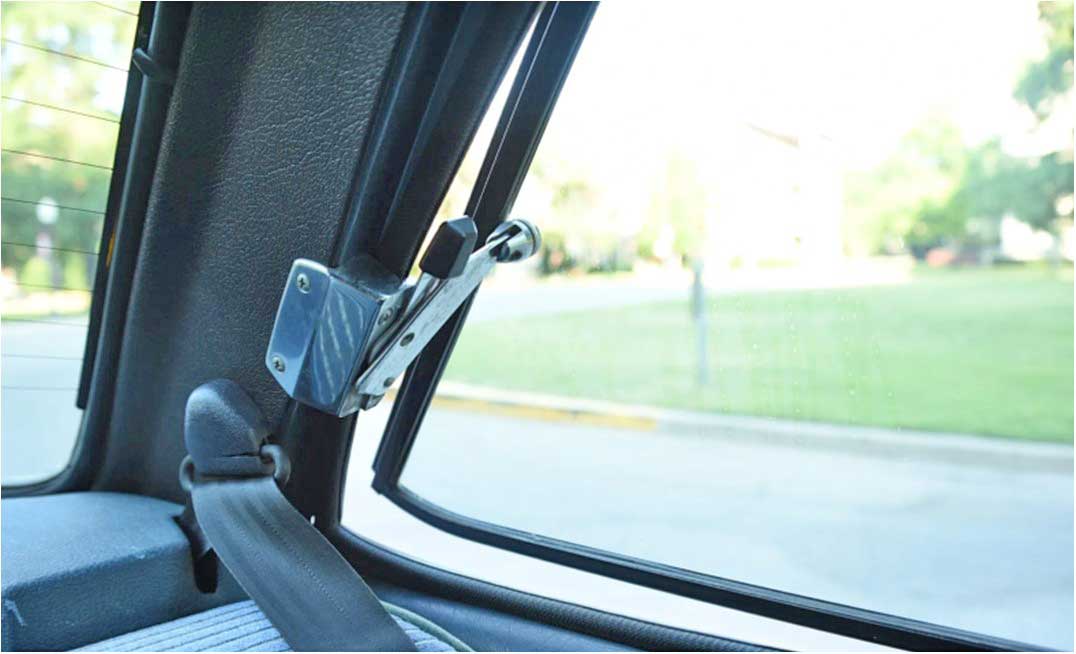
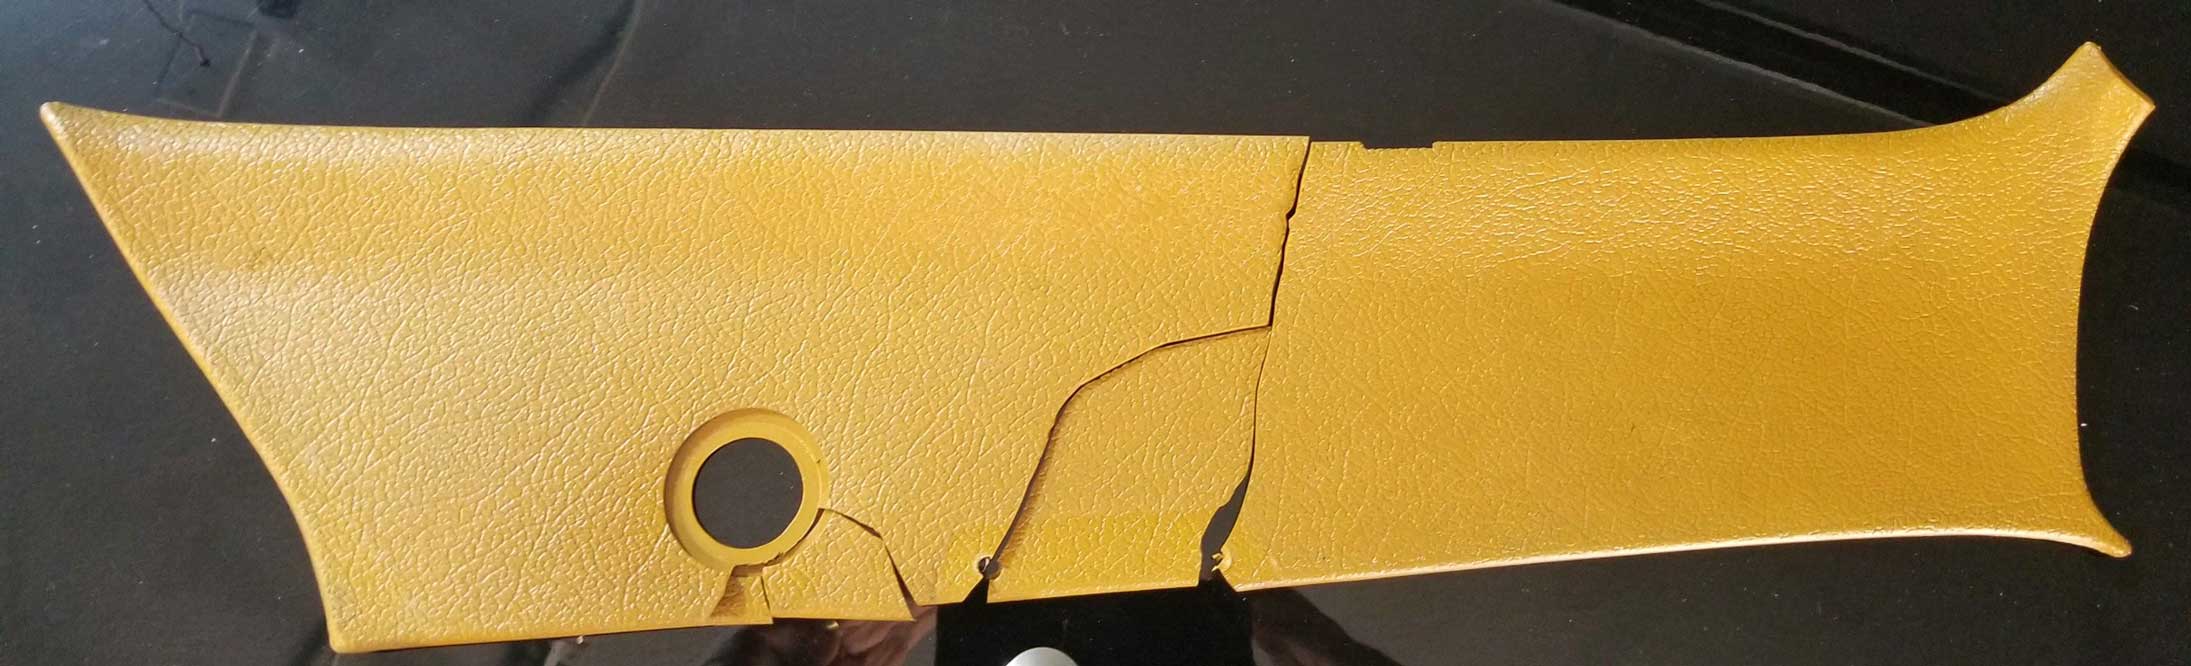
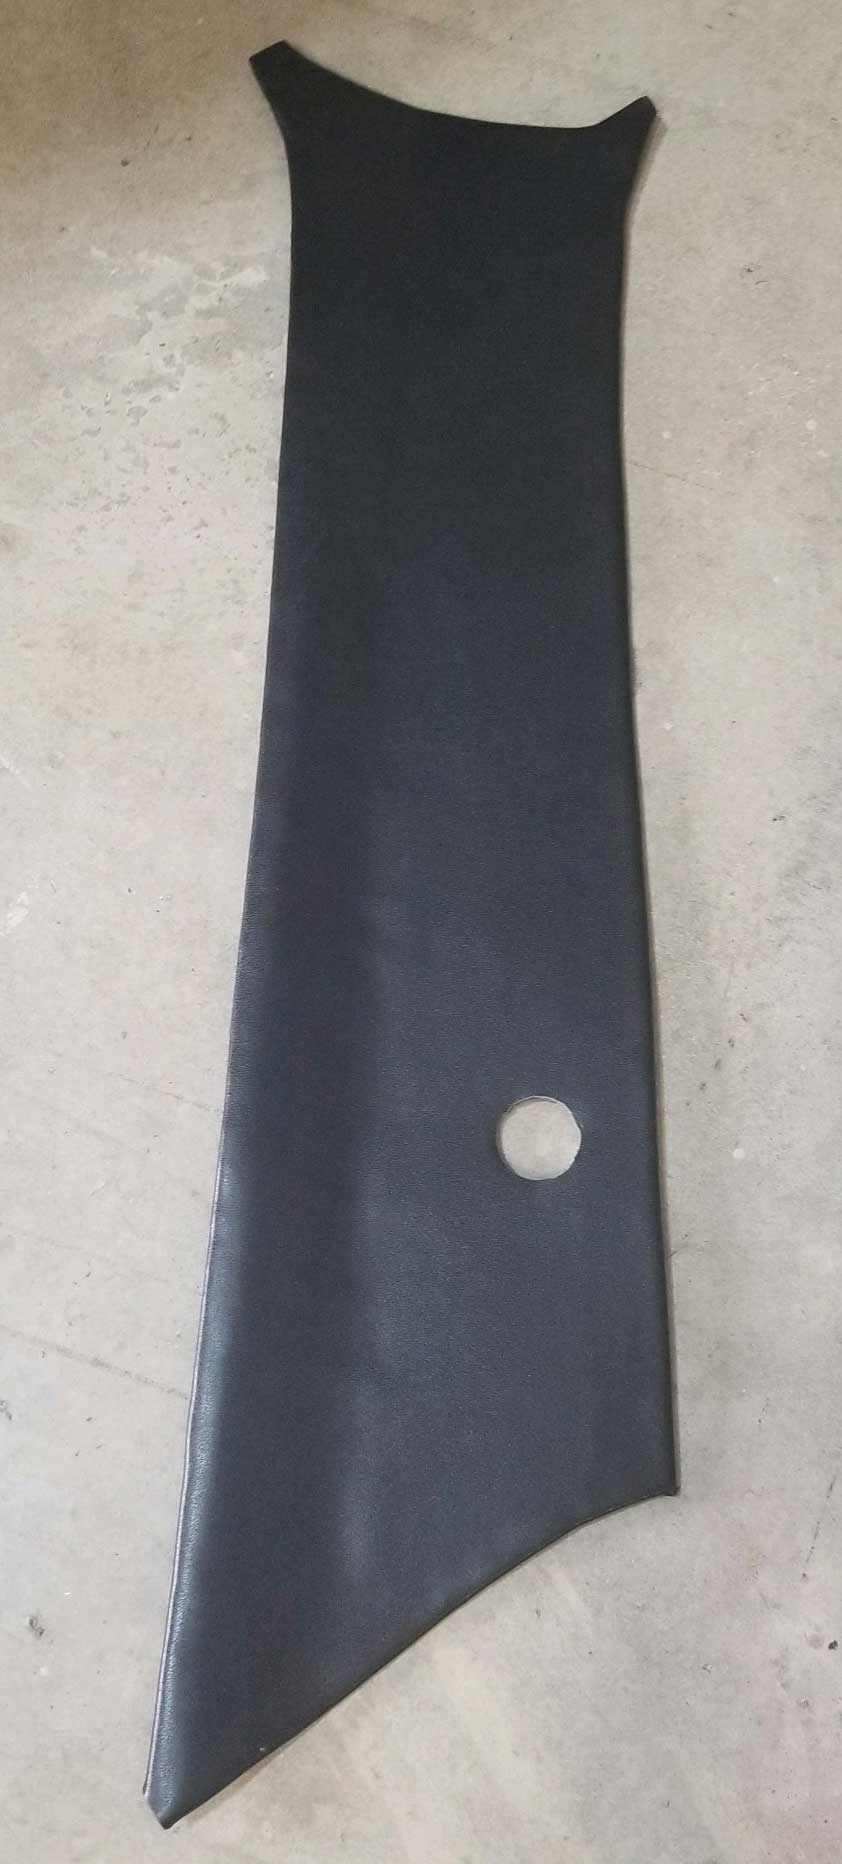
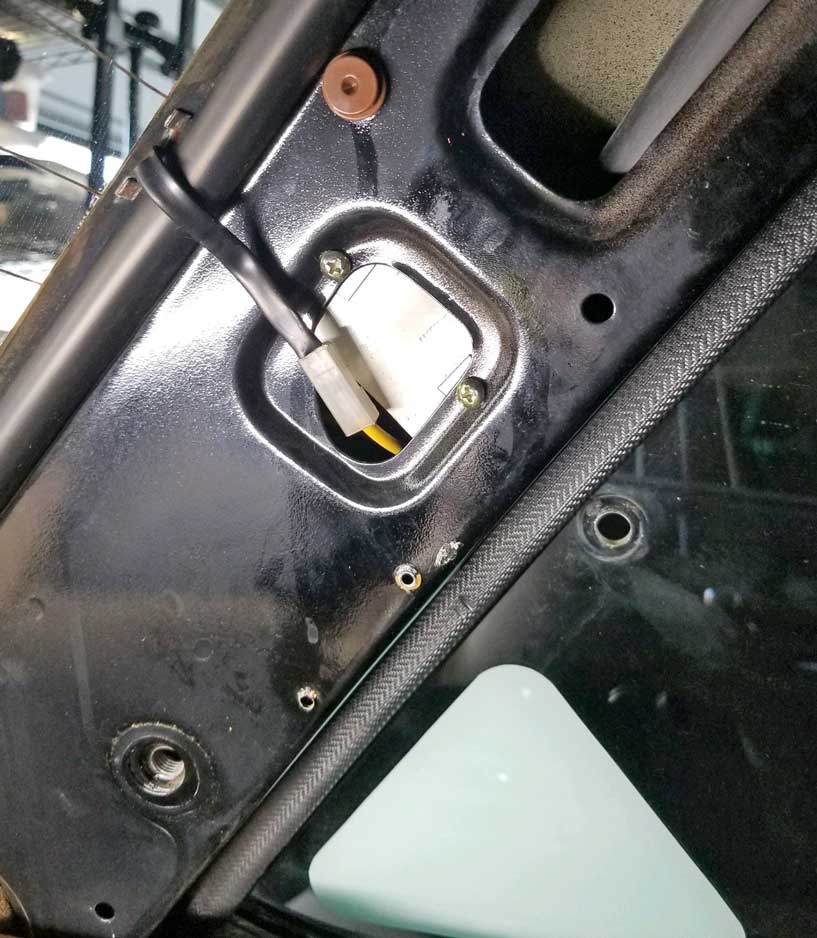
MOUNTING THE MOTOR
The C-pillar plastic panel has been
removed in this photo. Later I'll be installing a new C-pillar panel I made. The C-Pillar Project Page is HERE.

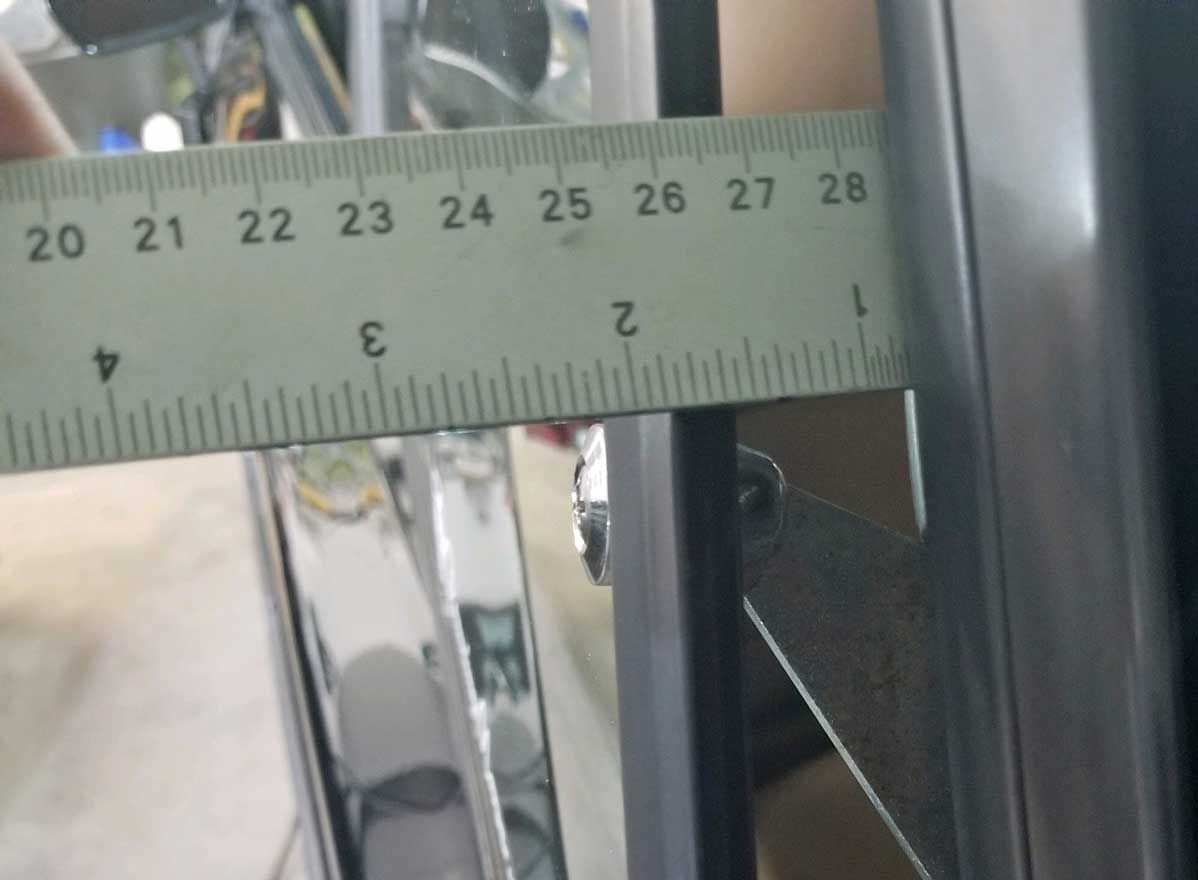
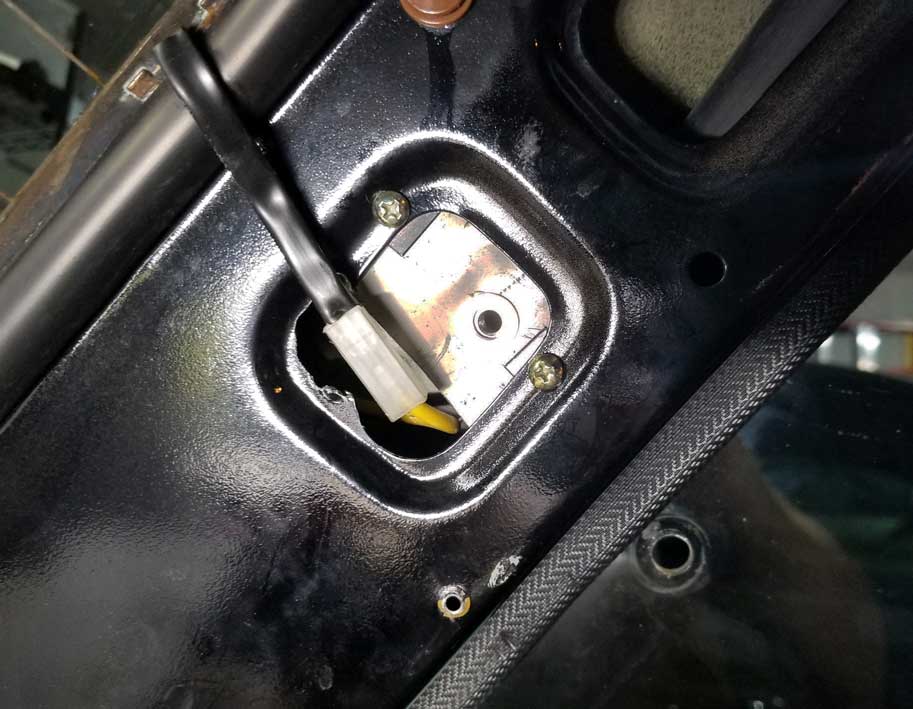
Here's the approximate position for the left side actuator. The ball and socket
is lined up pretty well with the hole in the glass.
The ball socket doesn't quite reach the glass (more on that HERE). It's about 1/4 inch from
it, so a spacer may be needed to bridge that gap.
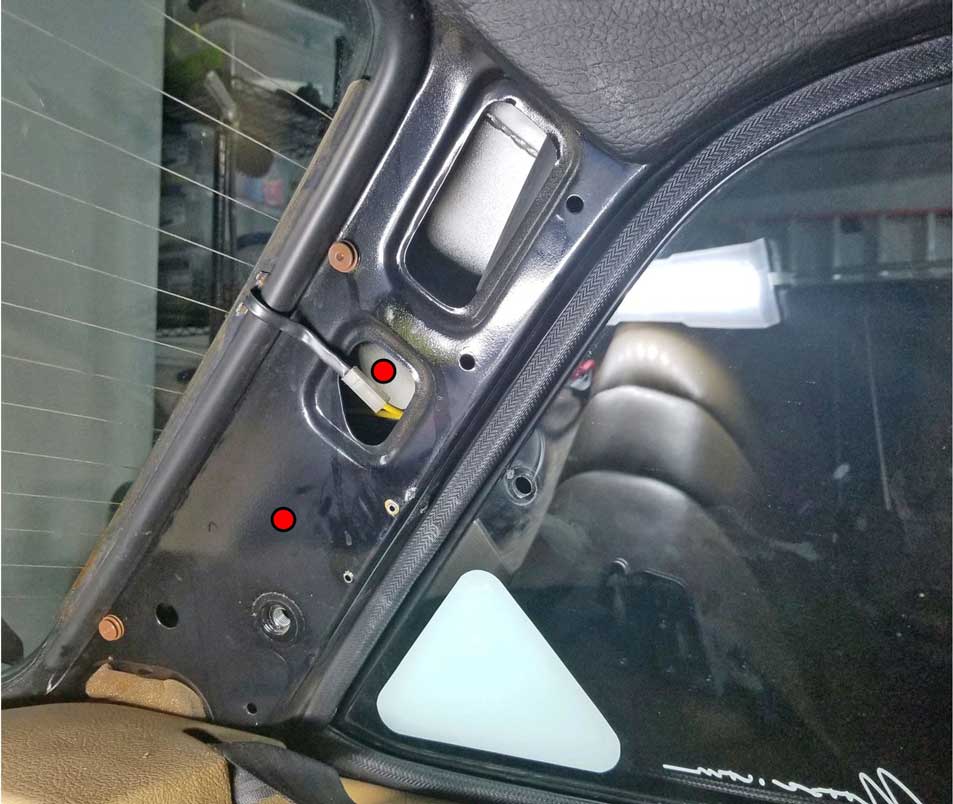
The two RED DOTS above are the approximate locations for thread inserts to be installed to hold the actuator. There's a problem: There's no sheet metal behind the top location where that top red dot is. Keep reading.
Also that yellow wire connector is for power to the rear glass heater.
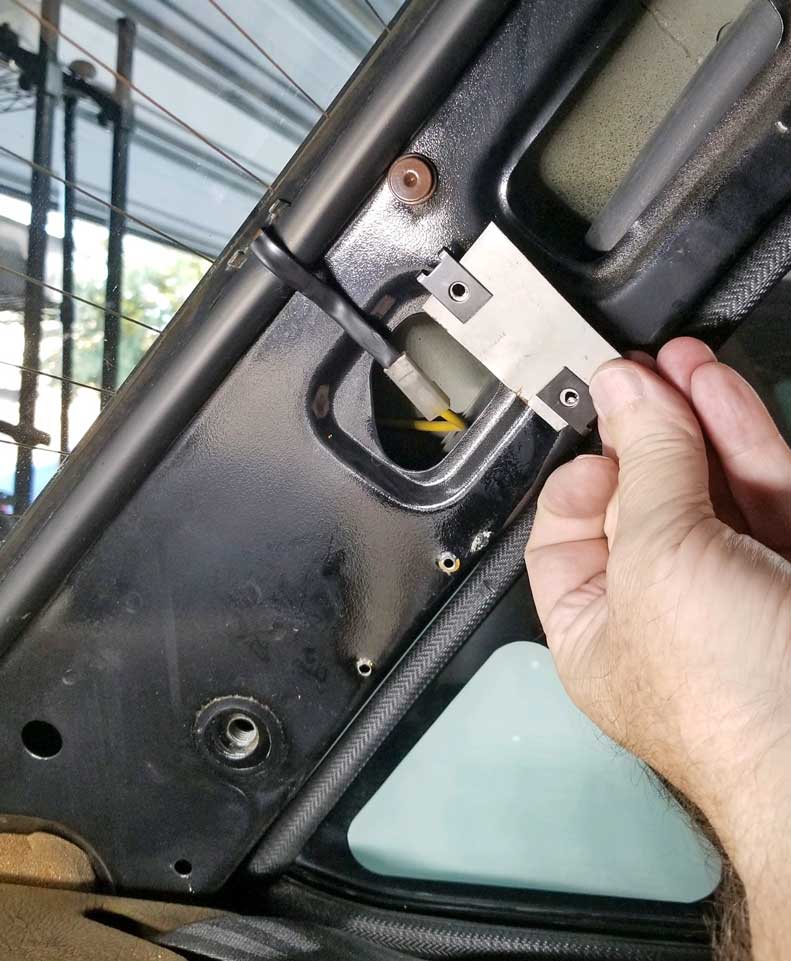
Here's a piece of sheet metal. It's approximately 1/16 inch steel (about
2 1/4 by 1 1/4 inches). It's to be mounted behind that hole. That piece
of metal will hold the top thread insert.
If you have a rivet gun, that
would be a good tool to mount this. I do, but I used sheet metal U-clips instead. The U-clips are from an assortment I bought on Amazon years ago: https://www.amazon.com/KCRTEK-170Pcs-Automotive-Assortment-Interior/dp/B09536BFLS/. The holes were drilled about 1 7/8 inches apart on this piece.
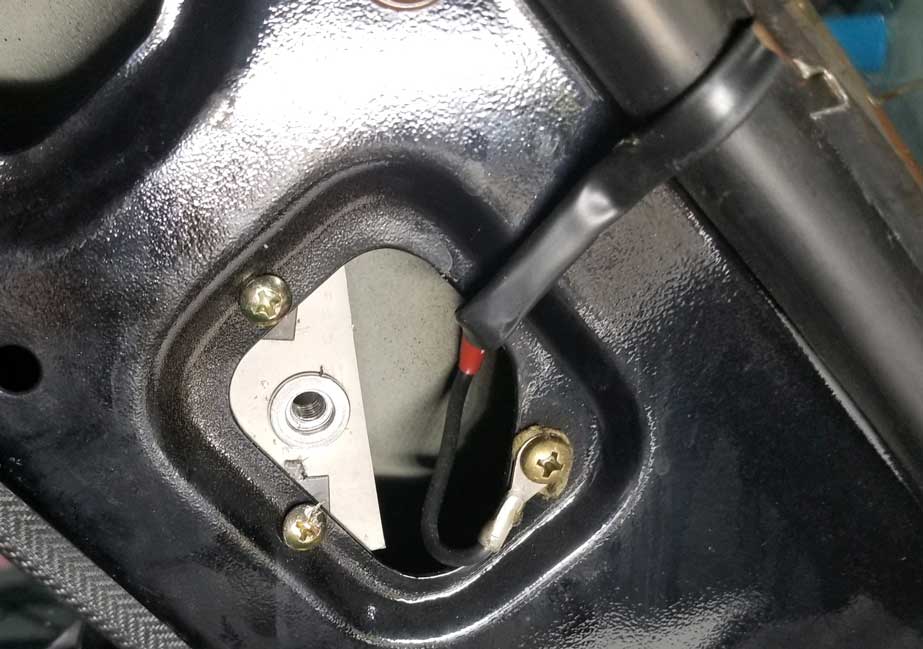
Here's the new metal piece mounted in place. Try to not disturb that connector.
It's the power supply for the rear glass defrost heater. If you find the plastic
connector becomes damaged, you should make sure it's well insulated so it doesn't short when touching the car metal.
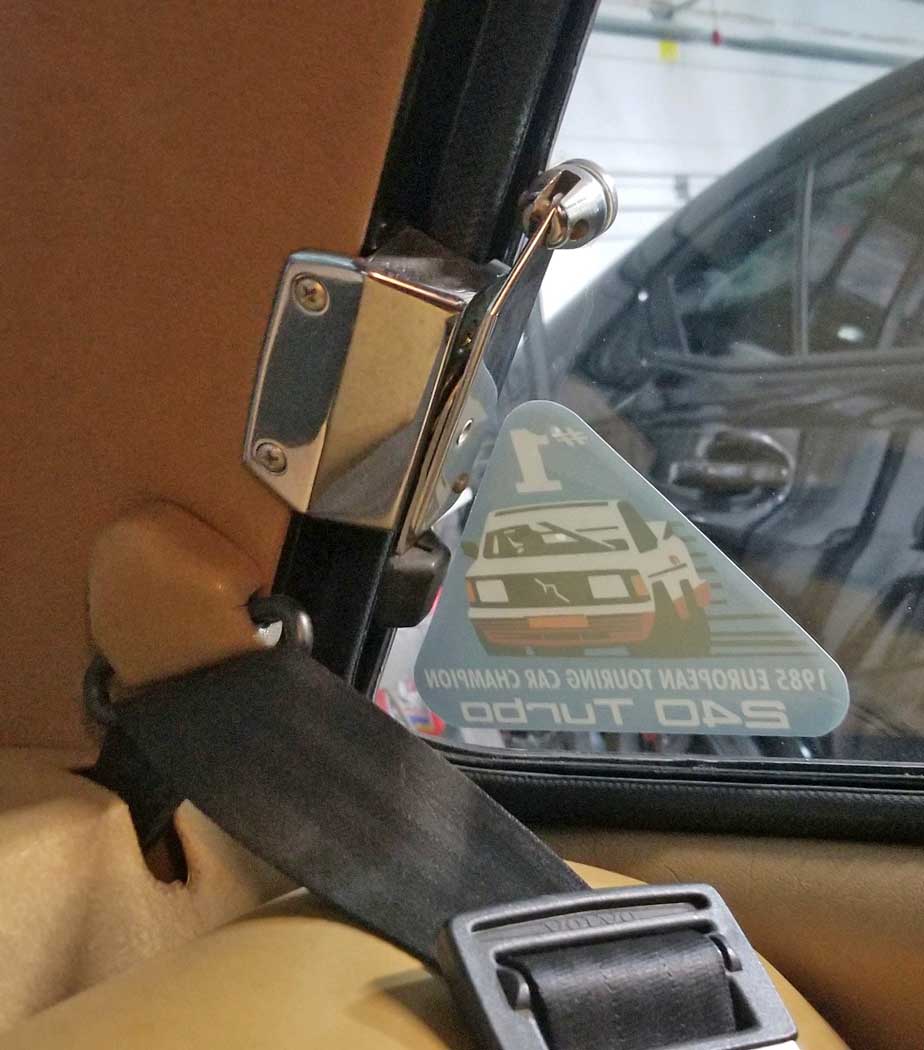
SOME GLASS MOUNT EXPERIMENTS
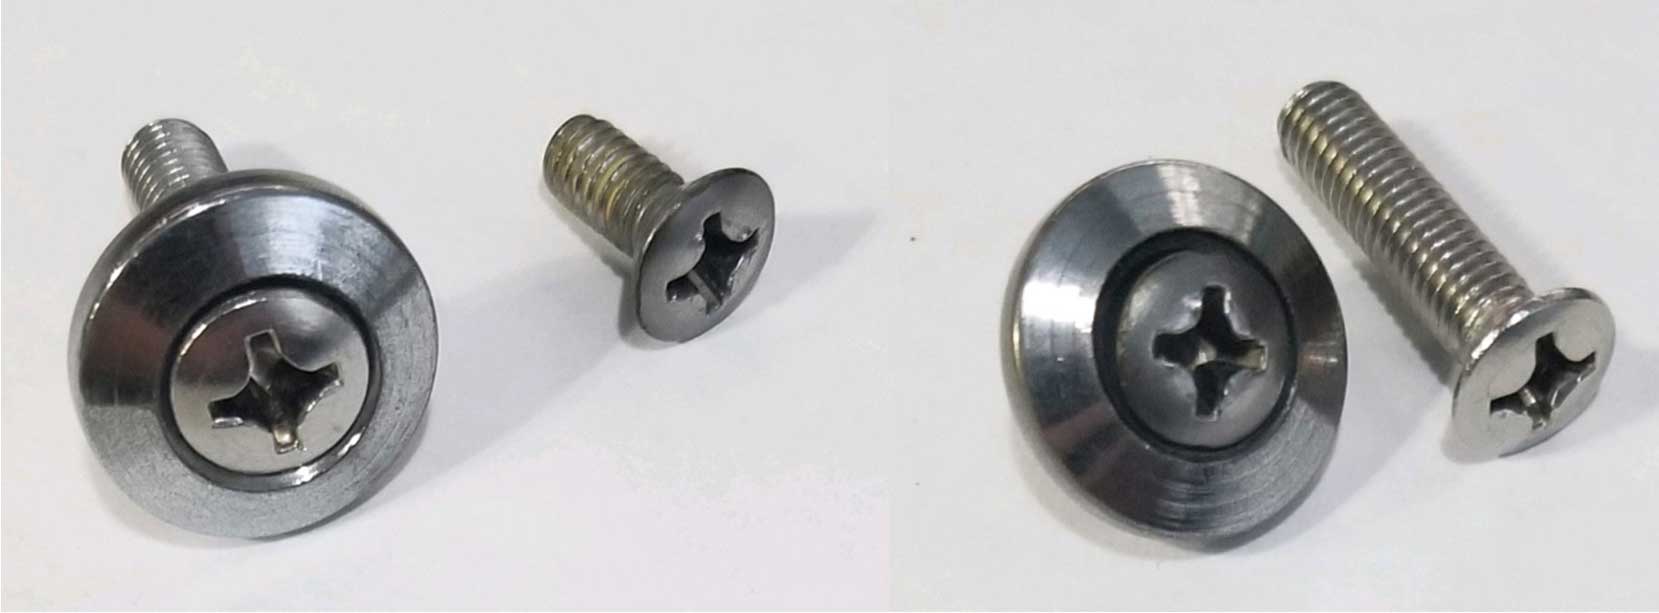
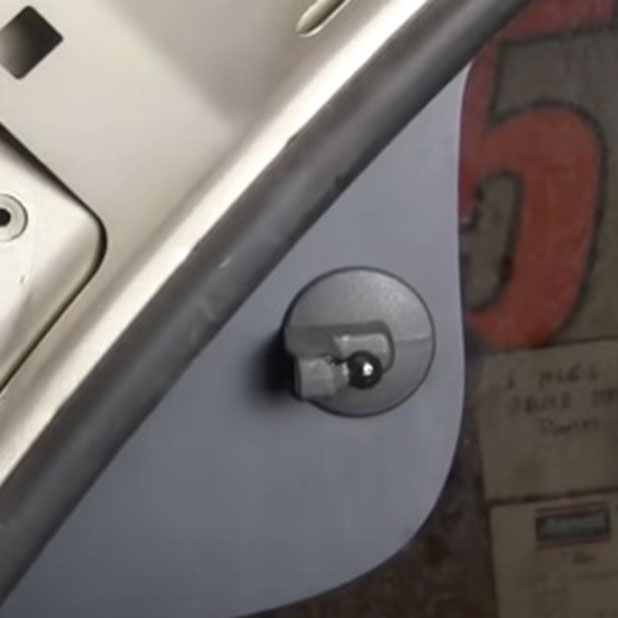
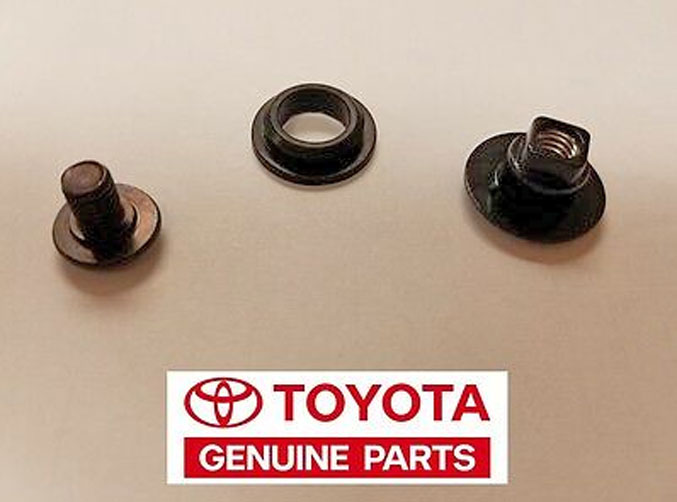
The original 242 vent window uses the above short screw and fat washer, along
with a thin plastic washer touching the glass. The original
screw is an M6 x
1.0 x 12 mm long OVAL HEAD screw. The longer screw above is an M6 x 1.0 x 25 mm long screw I bought from McMaster-Carr. A selection of metric oval head screws can be seen at their page: https://www.mcmaster.com/screws/metric-phillips-oval-head-screws/
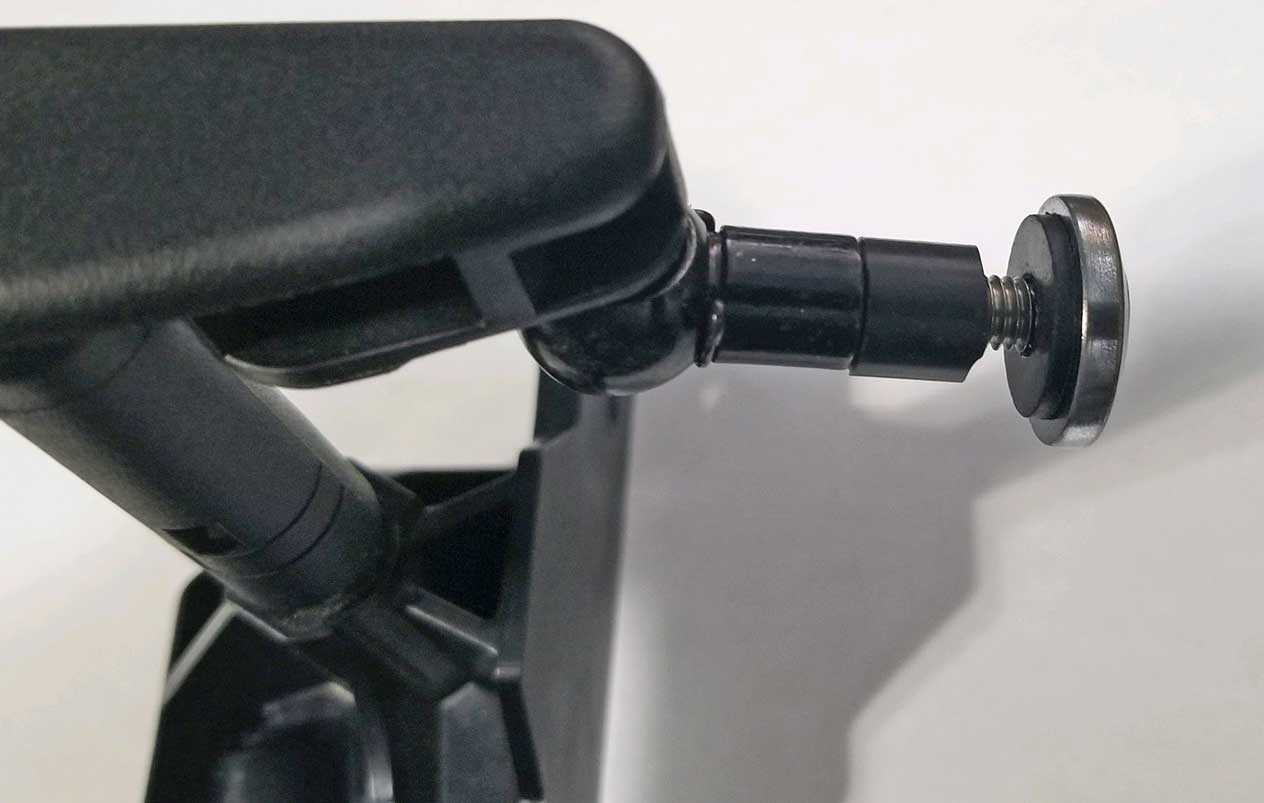
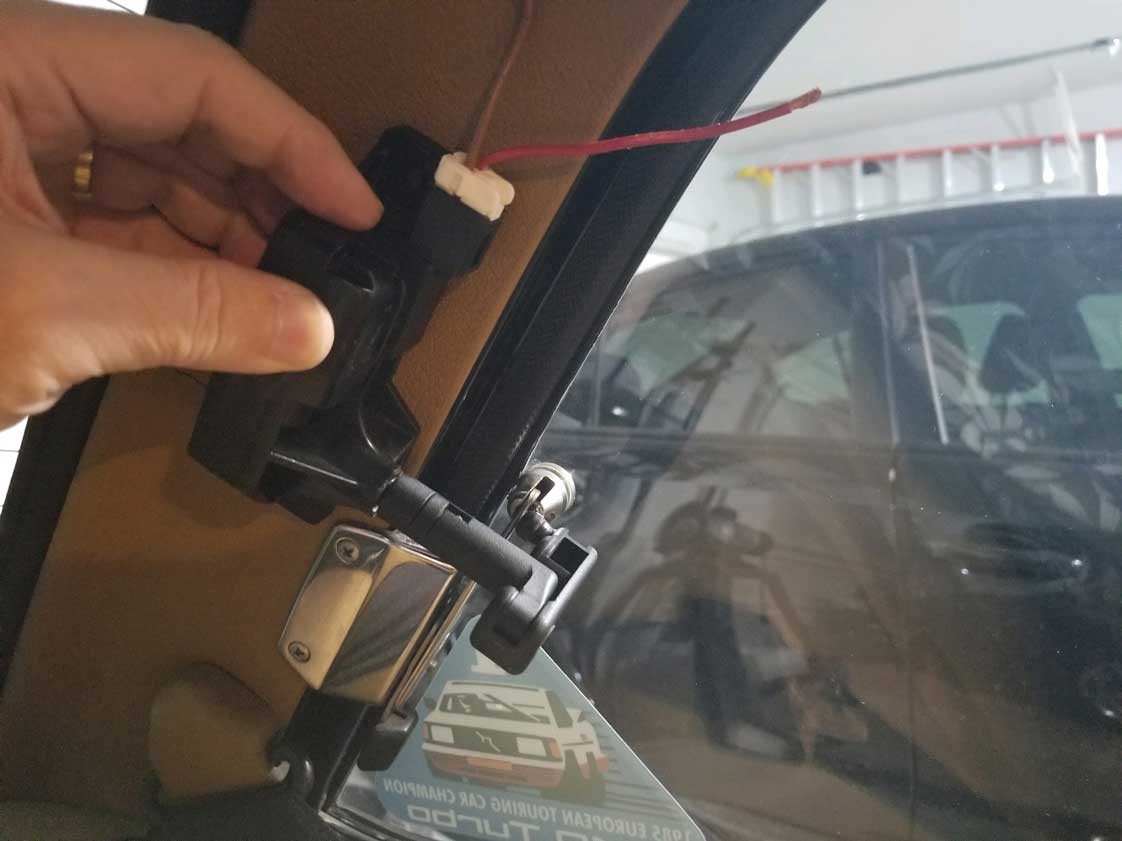
As I mentioned earlier when mounting the actuator, the ball socket
didn't quite reach the glass when closed. It was about 1/4 inch from the glass, so
a spacer was needed to bridge the gap on the inside. I didn't think a spacer needed to be fancy. To mock this up on the car I used a piece of
4 or 5 mm vacuum hose as the spacer,
which is what you see in this photo ABOVE. This was quick and easy.The
new
longer screw matched the look of the original Volvo screw on the
outside perfectly. That
thin black washer seen ABOVE next to the original outer metal washer is
an M6 rubber
washer. I thought I'd try that instead of the old brittle original white
plastic washer that I found next to that outer washer originally.
POSITIONING THE FINAL MOTOR MOUNTING
 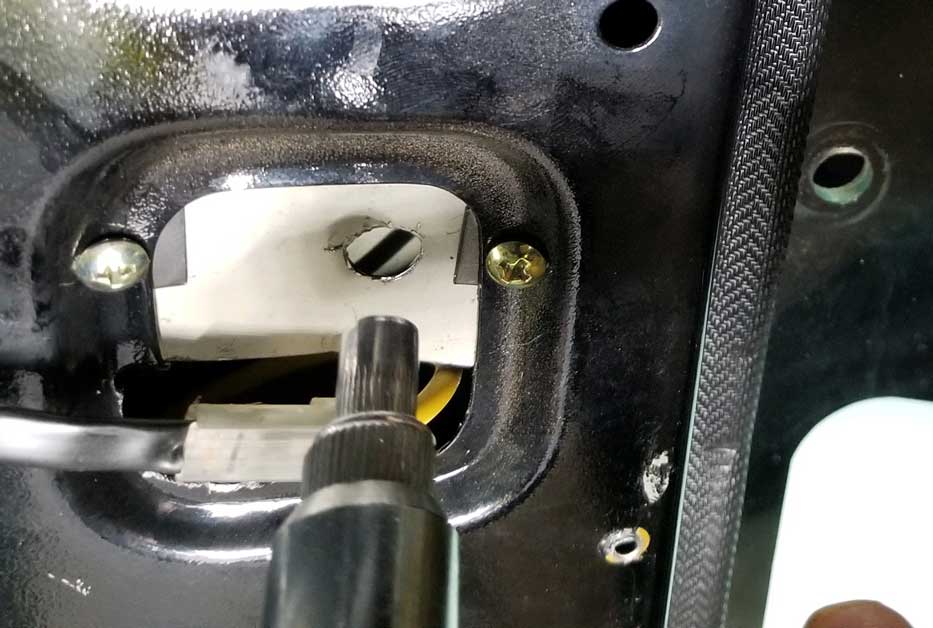
When it came time for finally mounting the actuator to the C-pillar, I
drew a paper template of the actuator base. Then when I
held the
actuator and template up
to the C-pillar to decide on the final position, I taped the template
to the C-pillar. In the FIRST PHOTO ABOVE you can see the paper
template in place. Then I drilled the first TOP hole into that new sheet
metal
piece I added. Since I was using a thread insert there, M6 x 1.0 mm, I
found the drill hole
needed to be 9 mm, so I used a 9/32 inch drill bit (same as 9 mm), first
beginning
with a smaller bit and slowly stepping up to the final size. Then I
installed the top thread
insert into the sheet metal piece.
If
you're new to installing thread inserts, the kit I used was a Blind Rivet Nut Threaded Insert Kit M3/M4/M5/M6/M8, which can be seen at Amazon: https://www.amazon.com/gp/product/B07G5Q2BLD/.
Here's a video showing how it's used: https://www.youtube.com/watch?v=c8sy_Glha28
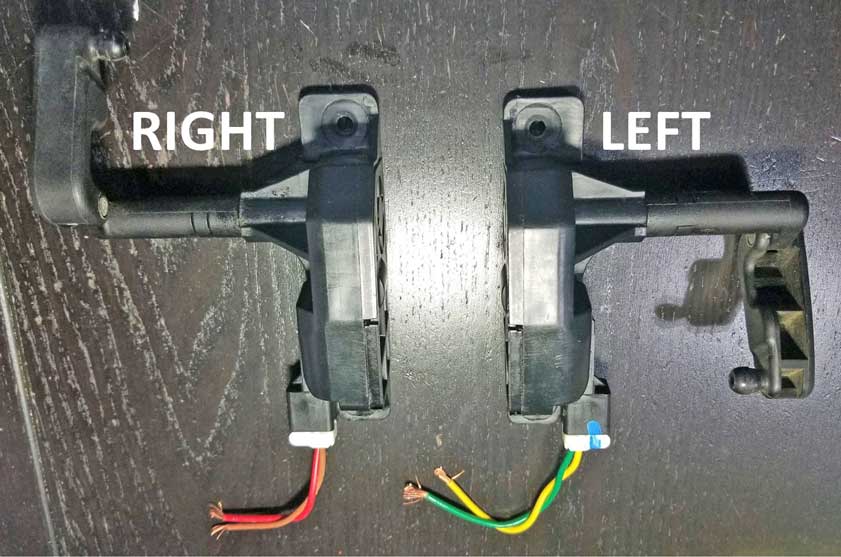
Here's the RIGHT SIDE C-pillar
and the sheet metal piece I added to that side. I positioned it a little differently.
On this side you can
see the GROUND connection for the rear glass heater.
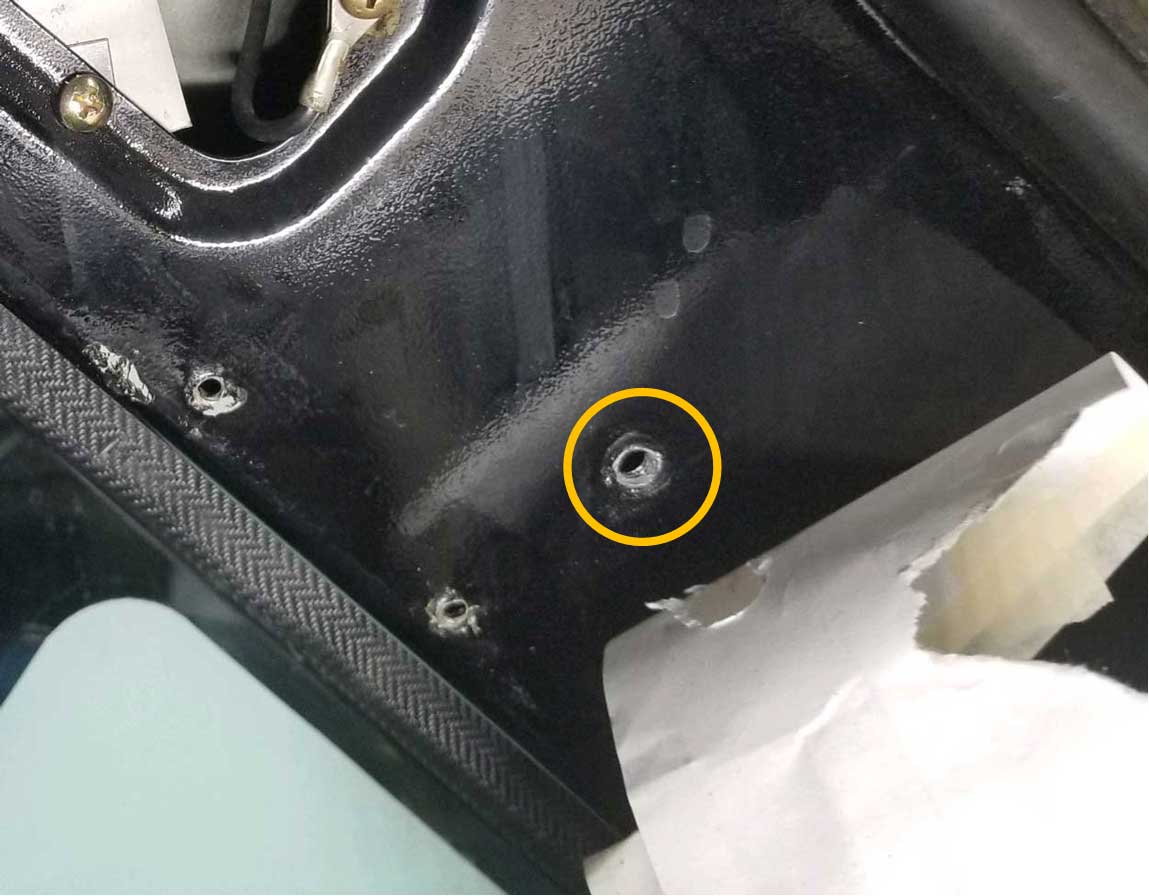
When it's time to drill the bottom hole for the actuator (PHOTO ABOVE RIGHT), keep in mind that I found the sheet metal in that area to be around 3 times thicker than other places. It's not far from the big seat belt anchor bolt hole. So it's obvious Volvo added some some extra metal reinforcement in there, which seems to extend
at least a few inches from that seat belt hole. This means this bottom hole location may not need a
thread insert. So instead of a thread insert, I drilled a 13/64 inch (5 mm) hole and
tapped the hole with an M6 x 1.0 mm thread tap. There are inexpensive
kits available on-line which include one metric thread tap and a drill bit for under $10.00.
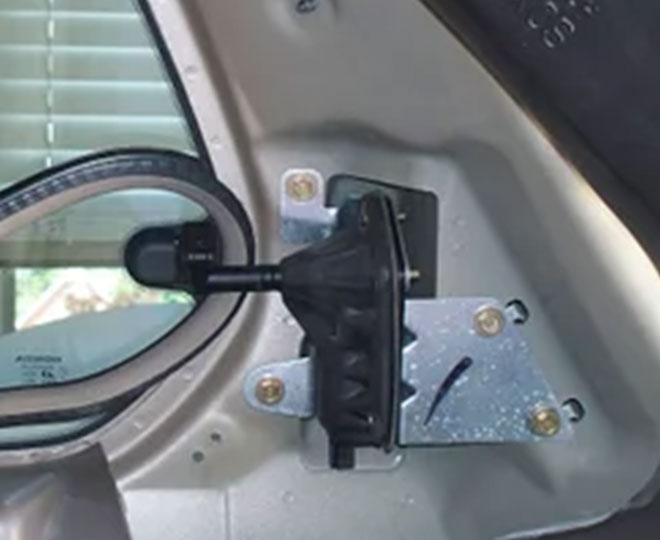
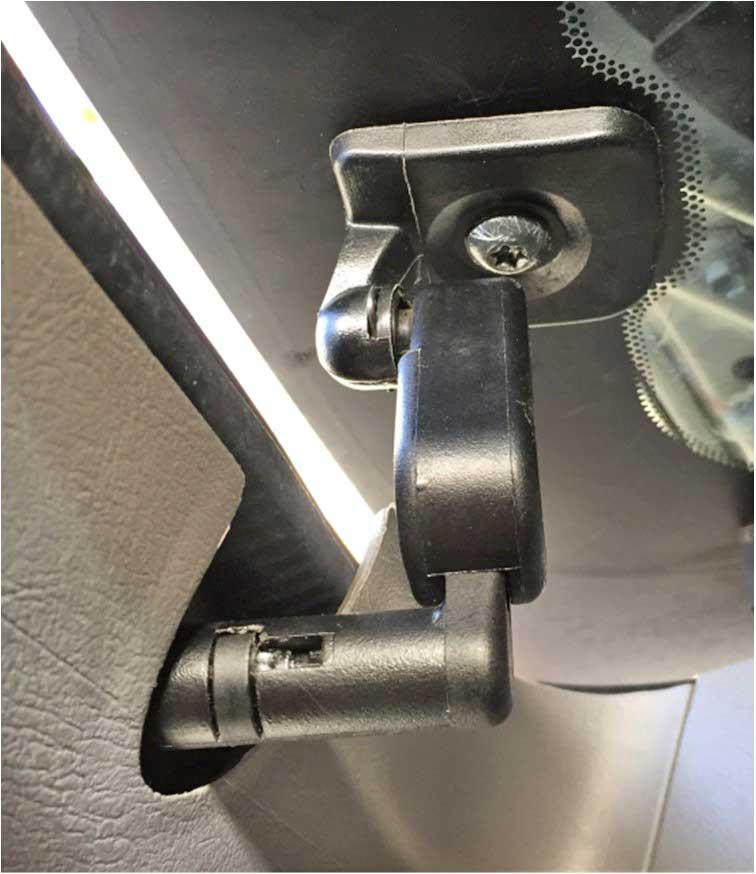
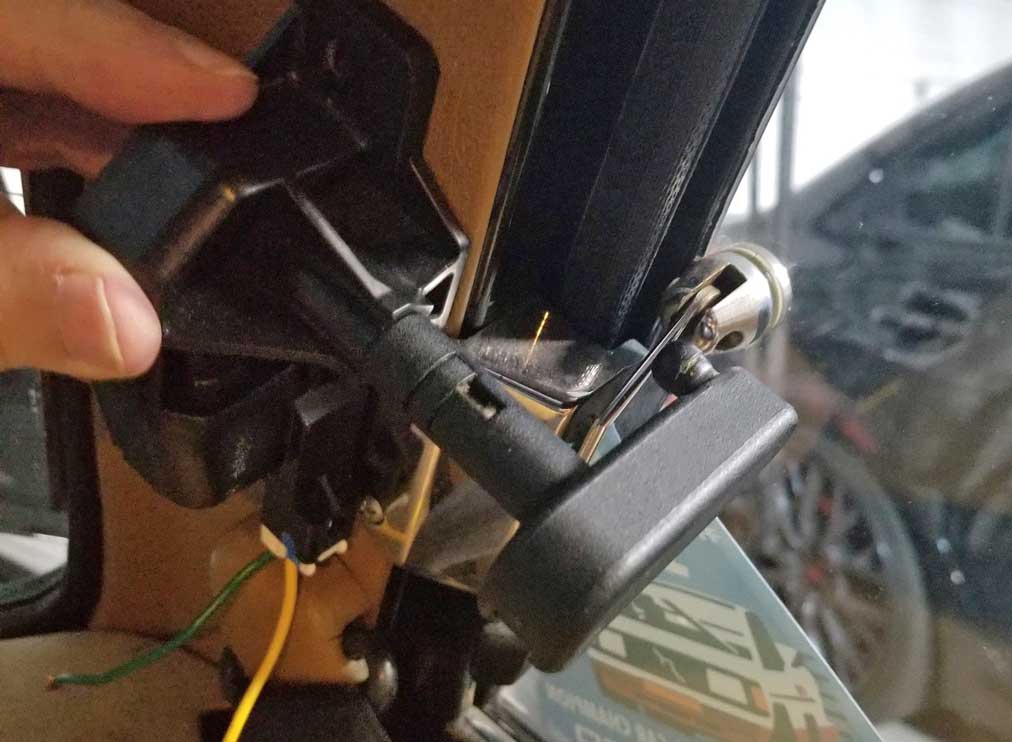
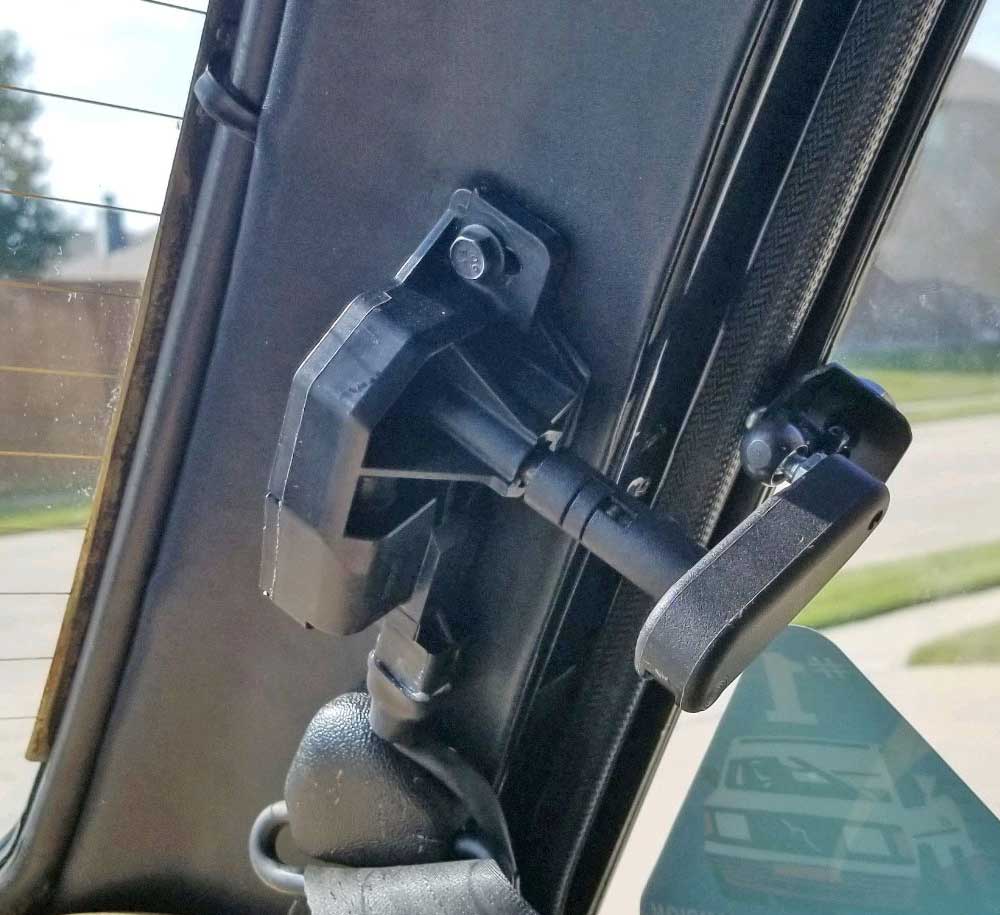
Motor is temporarily mounted in the final position.
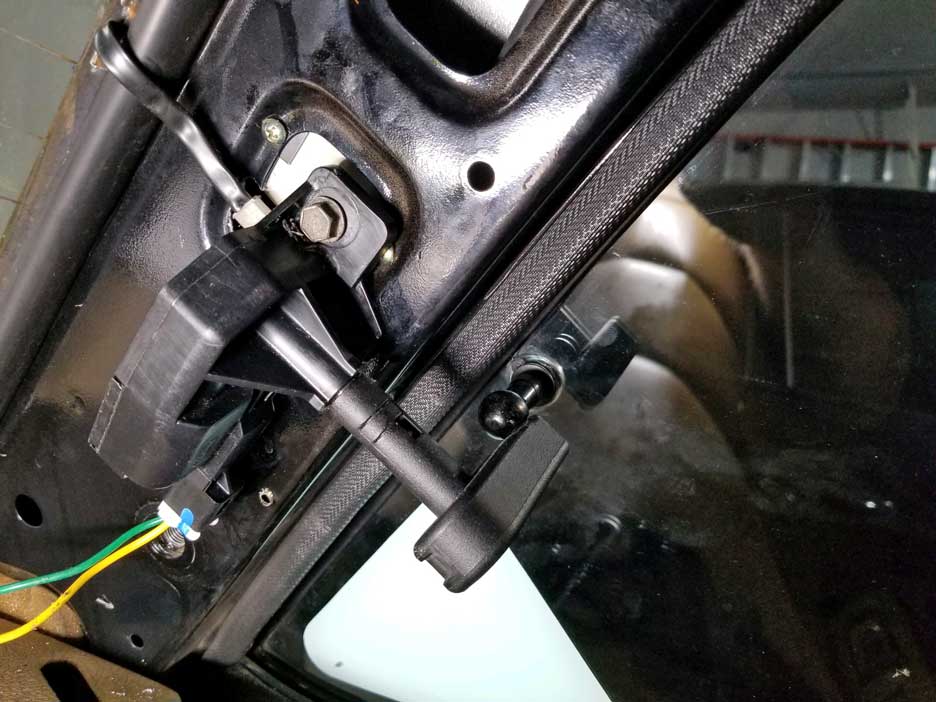
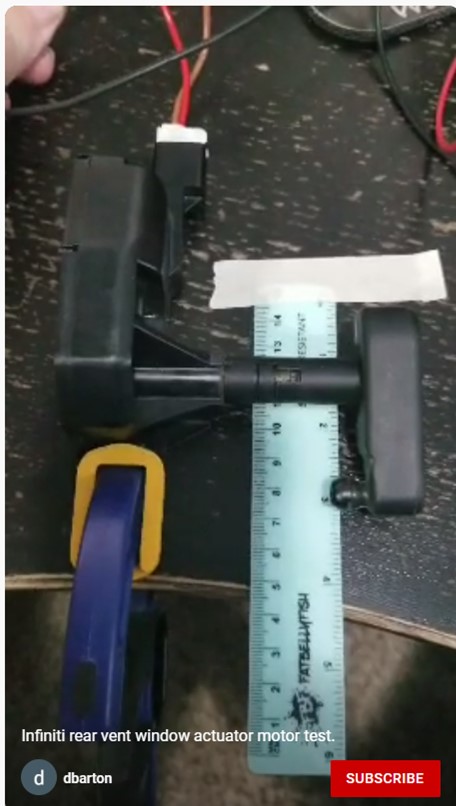
Here's a test video below I made showing how
this looked when testing for the first time. The first thing I noticed (and didn't like)
was how much the actuator arm was twisting the glass mount at the end of
the travel. This could probably be worked out with a lot of fine
adjusting, but ultimately the idea of a glass mount that moved that much was not going
to work out in my opinion.
|


 alternators are known for poor voltage.")