| ANTI-CORROSIVE
ZINC PASTE
|
If we can just just keep our
electrical connections clean and tight,
almost all of the electrical
issues would be gone
forever. That would be
nice, right?
  I
have owned a number of Volvos
over the last 40 years and my
current 240 is over 40 years
old. It almost never has
electrical problems. Nothing
like the endless numbers of
other 240s out there that I hear
about so often. What's the
difference you ask? One
difference is that my 240 has
been always garaged all of its
life. Why is that
important? Because leaving
any car out in the open elements
for years and years slowly
introduces corrosion to grounds
and power connections until
things begin to go wrong. I
have owned a number of Volvos
over the last 40 years and my
current 240 is over 40 years
old. It almost never has
electrical problems. Nothing
like the endless numbers of
other 240s out there that I hear
about so often. What's the
difference you ask? One
difference is that my 240 has
been always garaged all of its
life. Why is that
important? Because leaving
any car out in the open elements
for years and years slowly
introduces corrosion to grounds
and power connections until
things begin to go wrong.
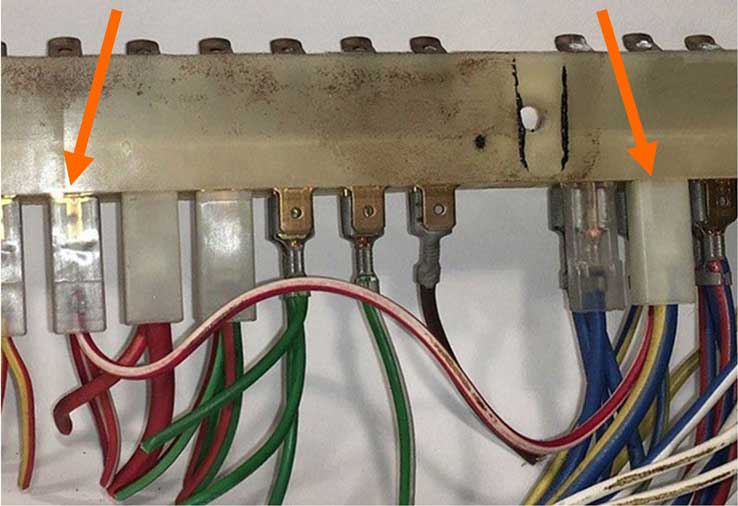
So if you own one of
those cars that has been outside
forever, it's not too late. You
can still clean as many grounds
and electrical connections as
possible.
And while you're
at it, I recommend
that you smear a little ANTI-CORROSIVE ZINC PASTE on
those connections.
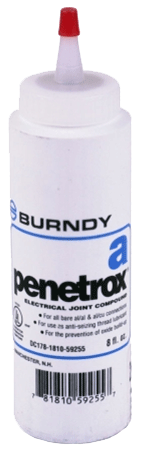
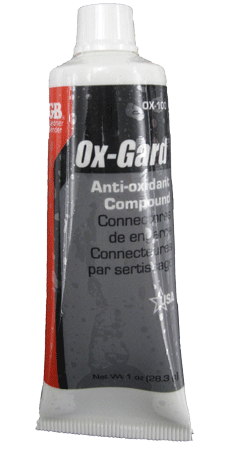
Many
people in the Volvo community
gravitate toward Ox-Gard or Penetrox,
which both do a similar job.
The below information was
contributed by Ron Kwas and should
come in very handy to old Volvo
owners:
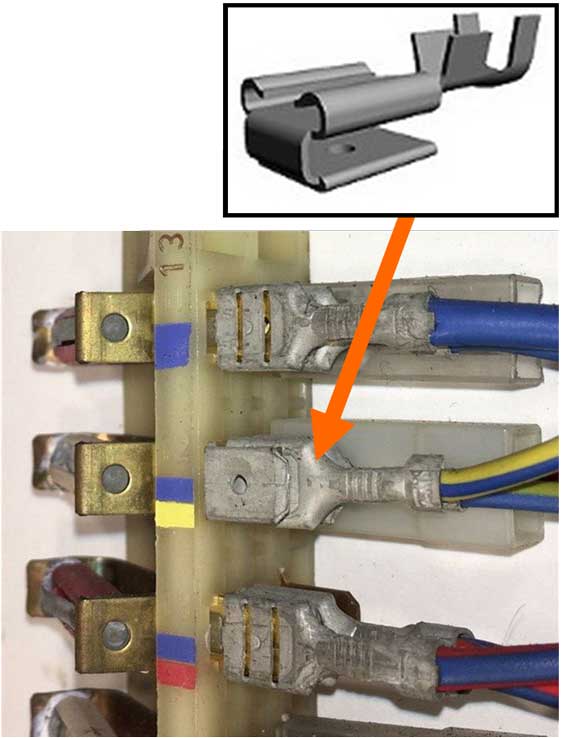
Anti-Corrosive Zinc Paste
(a generic name for zinc dust
contained in a grease) was
originally developed for and later
required by electrical codes for use
on alumunum to copper electrical
connections (or other dissimilar
metal connections). No,
it's not the same as Dielectric
Grease, which is often
incorrectly recommended. Dielectric
Grease can offer some protection in
the form of encapsulation
from
moisture, but it also
carries with it the potential
disadvantage of locking in moisture
or corrosion which may have already
begun. Anti-Corrosive Zinc
Paste (or ACZP) is the next
evolution of the encapsulation
principle, because zinc (the lowest
on the Galvanic nobility chart)
neutralizes corrosion on a
micro-scale to truly protect
connections on a long-term basis
during the encapsulation, INCLUDING
an added protection from corrosion
which may otherwise begin to form in
that connection.
Ron
uses
and recommends Penetrox
A (by Burndy). Many
Volvo fans are familiar with Ox-Gard,
which is a similar zinc compound.
Ron and I are huge advocates of treating
ALL electrical connections on our
cars (except of course High Voltage
Ignition connections) with a
suitable version of this
material.
You can learn more about this
stuff at Ron's page here:
http://www.sw-em.com/anti_corrosive_paste.htm
|


 alternators are known for poor voltage.")