|
Installing a Later 1991-93 Windshield
into an early Volvo 240 (or 140).
This is a VERY common 240 mod with
a fair amount of info already out there. But
since I still get regular questions about
this, I decided to post this page.
The 240 was built from 1974 (1975 model year)
to 1993 and the body design changed very
little over the 18 year production run.
The windshield structure had no changes
whatsoever between 1974 and 1993. Even in an
earlier 140, the windshield structure is
identical to the 240. You may
have noticed that all 1991-93 240s came with a
different type of windshield trim than those
found on earlier models. It's all black
and made of rubber. No metal trim is used like
on earlier 240s.
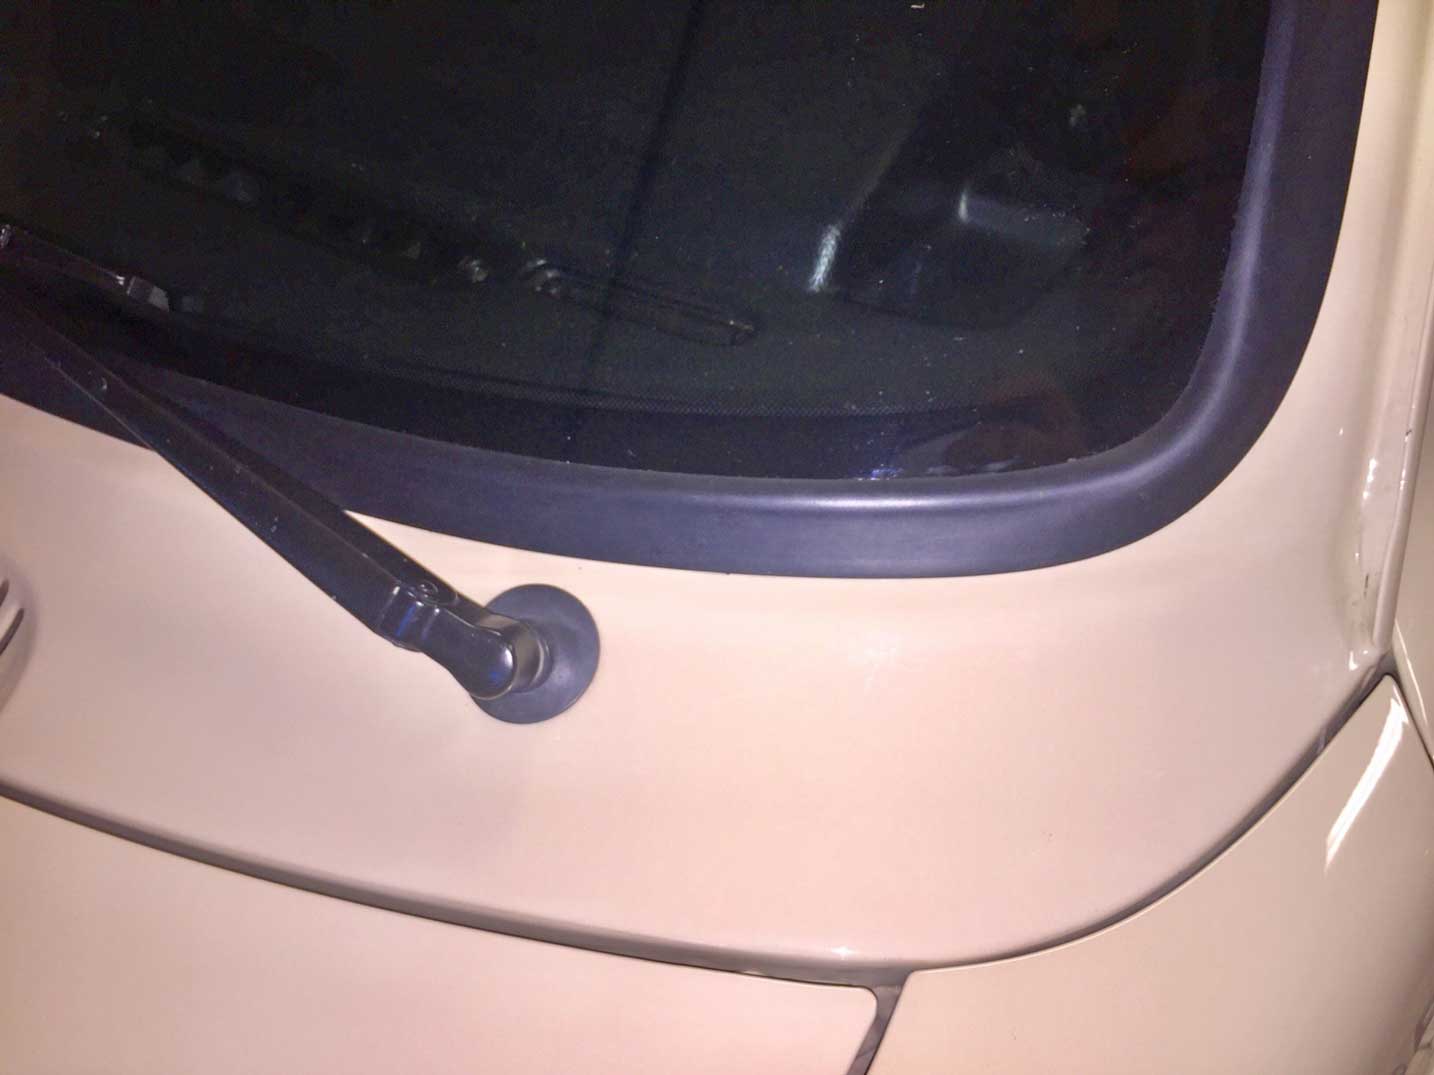
1975-90 240 (and 140) windshield with metal
trim: This early type of
windshield was glued in place using a soft,
messy butyl rubber. Plastic trim clips were
inserted into the soft rubber to hold the
metal trim in place. This trim tended to
stick up from the windshield too far and in
many cases it created lots of wind
noise. Thanks go to Ben Buja for
supplying this photo.

|
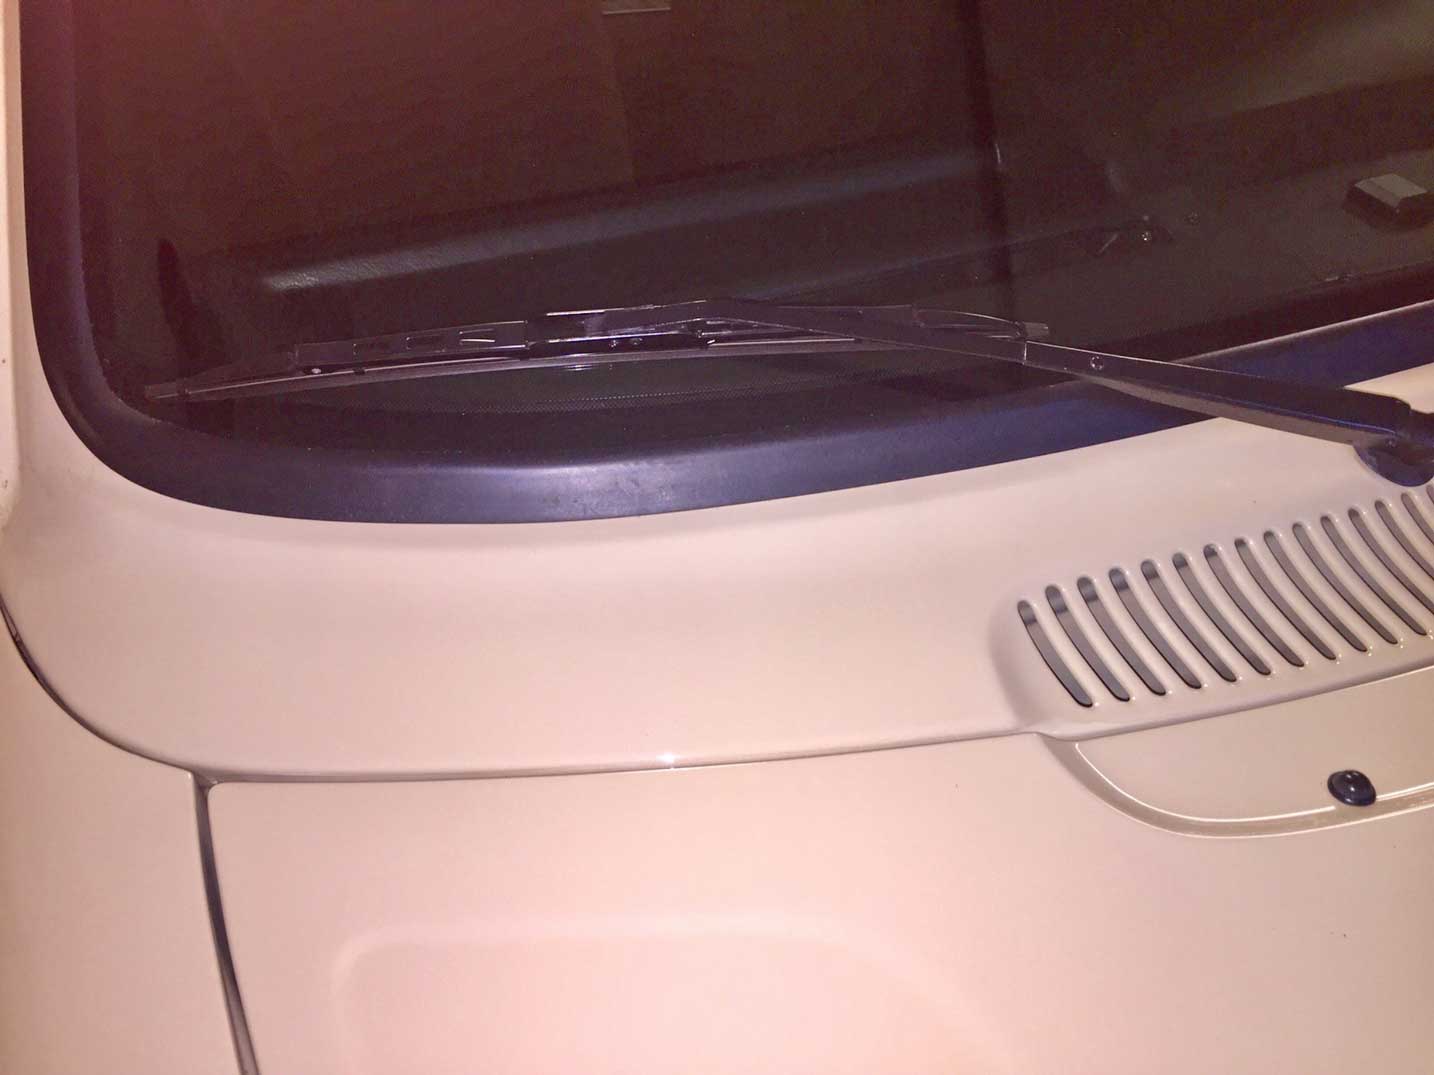
| 1991-93 240 windshield with integral rubber
trim: As you can see below,
this later type black rubber trim is nearly
flush with the body. The trim is cleaner looking
and it can reduce some of the wind noise when compared to older metal trim.
Above image shows original Volvo later trim.
When you purchase a newer 1991+
240 windshield, it will always come with the black
rubber trim already attached around the
edge, but if you buy a non-original
windshield, the trim will appear different compared to an original Volvo
later windshield. Rubber trim may also be available
separately if needed.
For a later windshield like this one above, the
installer may use a newer style URETHANE rubber
when gluing it in, instead of the soft, gooey,
messy BUTYL rubber used in original older installations.
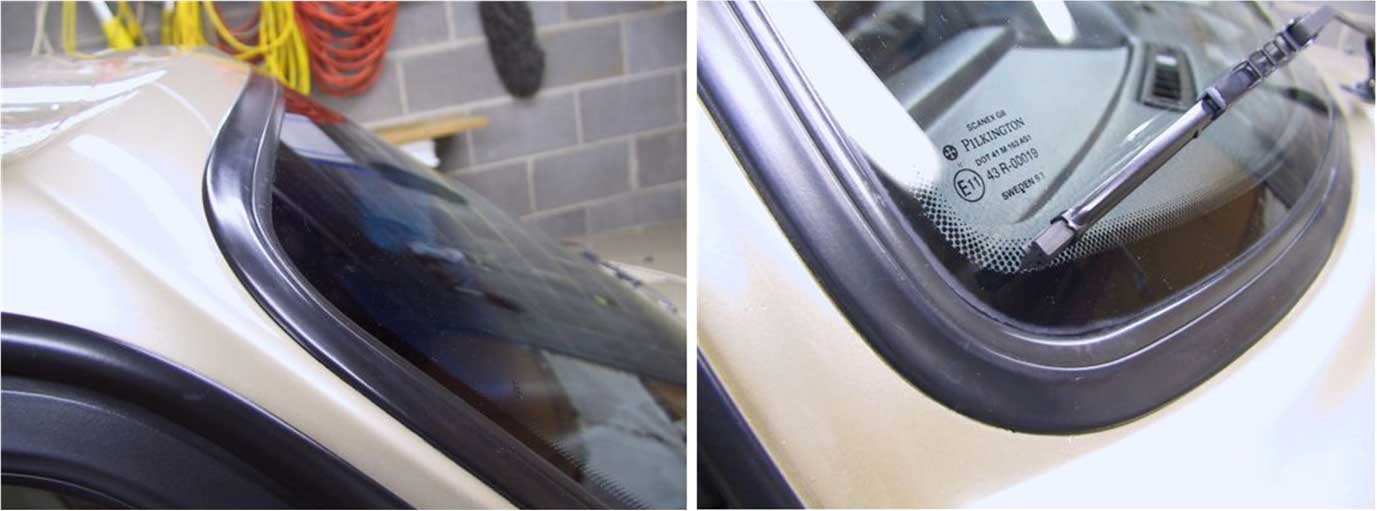
Here I'll detail are some differences between the LATER TRIM on a GENUINE VOLVO windshield and many AFTERMARKET style trims.
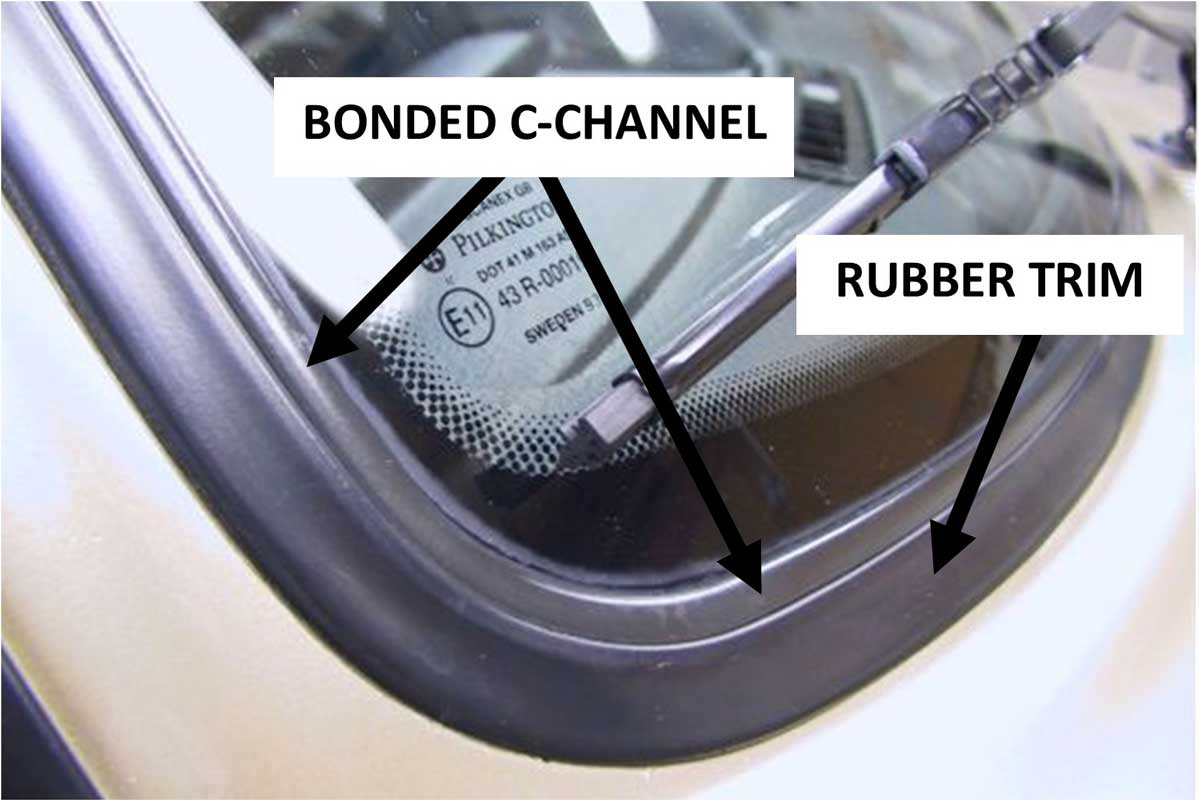
The trim on the GENUINE Volvo windshield
is made in two parts. The glass has a
black C-channel, which is bonded to the outer glass edge. Then the rubber seal or rubber trim is a
separate piece on the original later windshield. The C-channel can be seen
also by itself in this second photo below if you look closely. The outer molding has been cut
away during windshield removal.
It would be possible to use an original
Volvo rubber seal IF you could still source the black C-channel (this channel is NLA). The original
outer rubber seal is still available as Volvo PN 3540053 (like this from iPd), but the C-channel is NOT, so you would need to improvise that part with some other universal C-channel molding if you can.
Using the original Volvo rubber seal without the C-channel would not
likely work out well, since it probably would not be wide enough to cover the edge of the body channel.
Most
aftermarket later windshields will instead have a ONE-PIECE universal
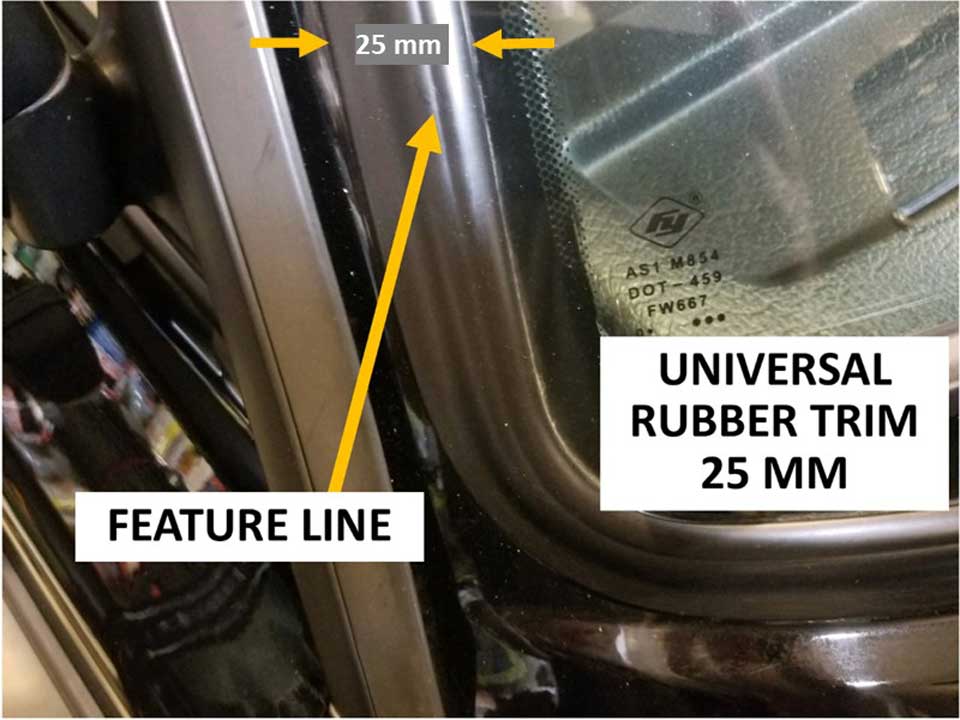
rubber trim around it. Sometimes this trim comes with a "feature line,"
which appears to mimic the two-piece look of the original trim.
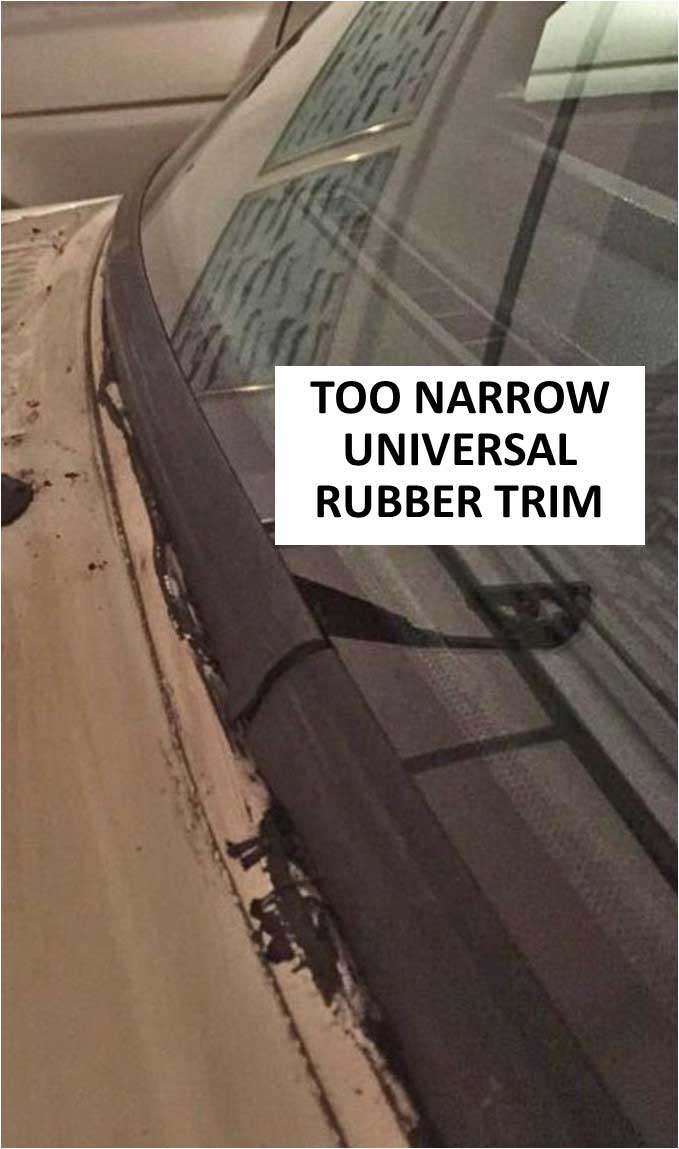
Be aware that some cheap windshields have been found with very narrow 18 mm universal molding.
Often that narrow molding will not cover the surrounding area very well,
especially if there's a paint line or other imperfection that becomes exposed with a narrow seal like that. If the windshield comes with such a narrow seal, you might ask the installer or shop if you can get or substitute WIDER molding. Wider molding is available (CLICK HERE).
Many aftermarket windshields will come with 25 mm wide molding. Most people seem to be happy with 25 mm wide molding, but if that's not wide enough, wider 31 mm is available further below.
SOMETHING A BIT DIFFERENT
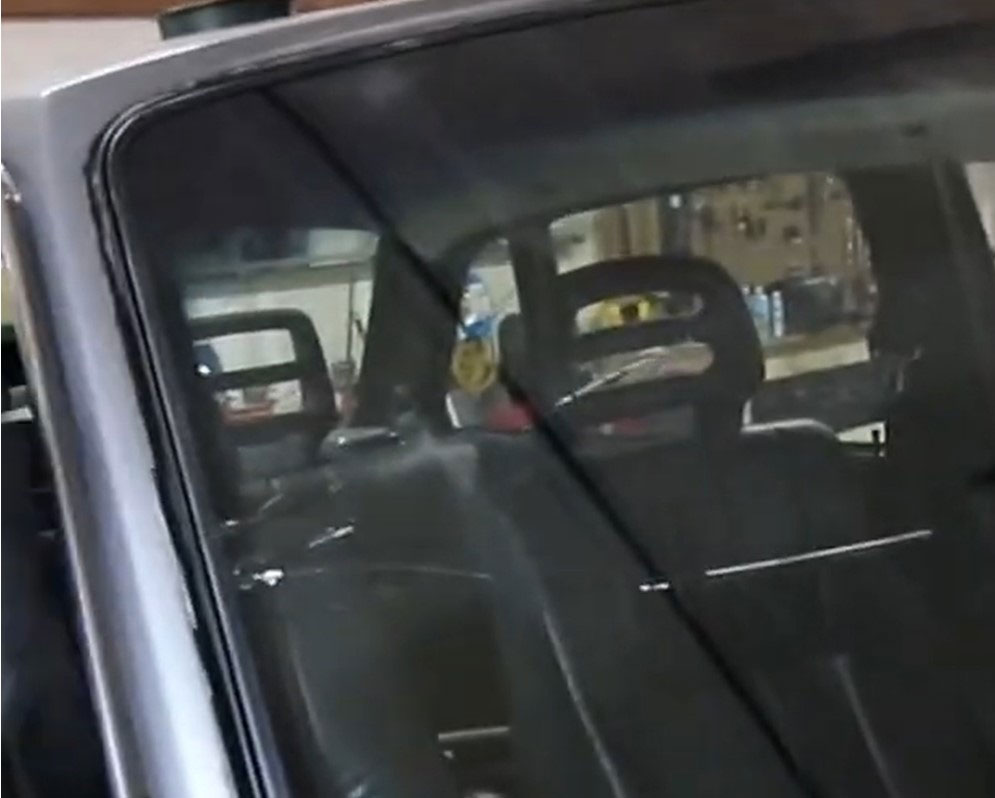
This photo below is from the 240 windshield re-sealing page found at fewstreet.com/240-windshield.html.
It details the use of universal trim to reseal a 1989 windshield in a 1989 240.

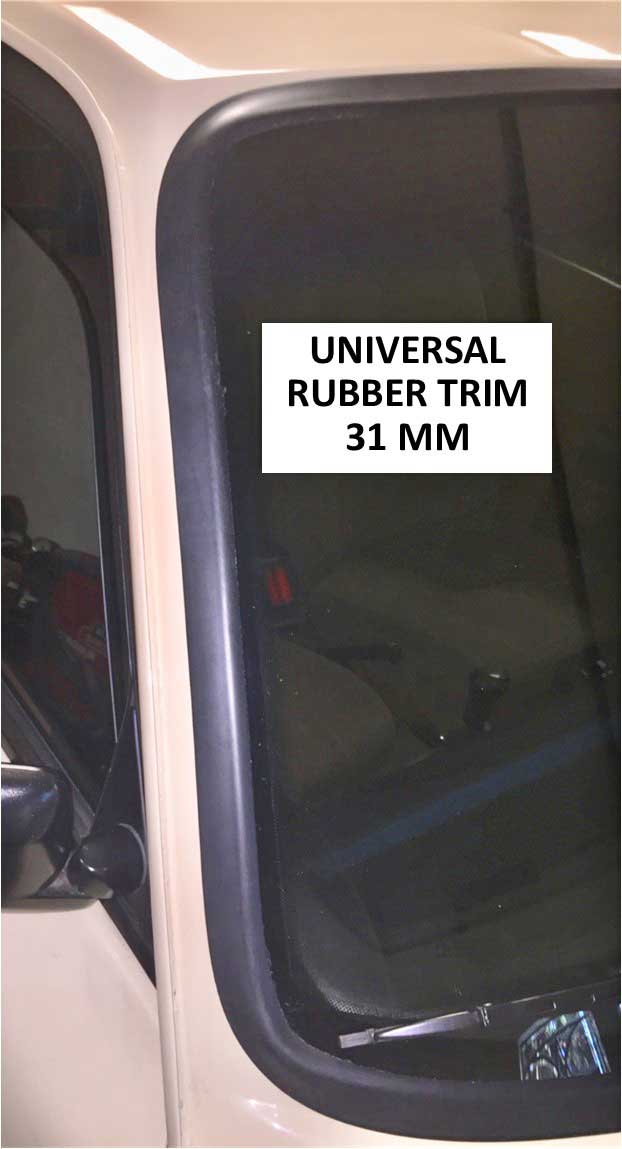
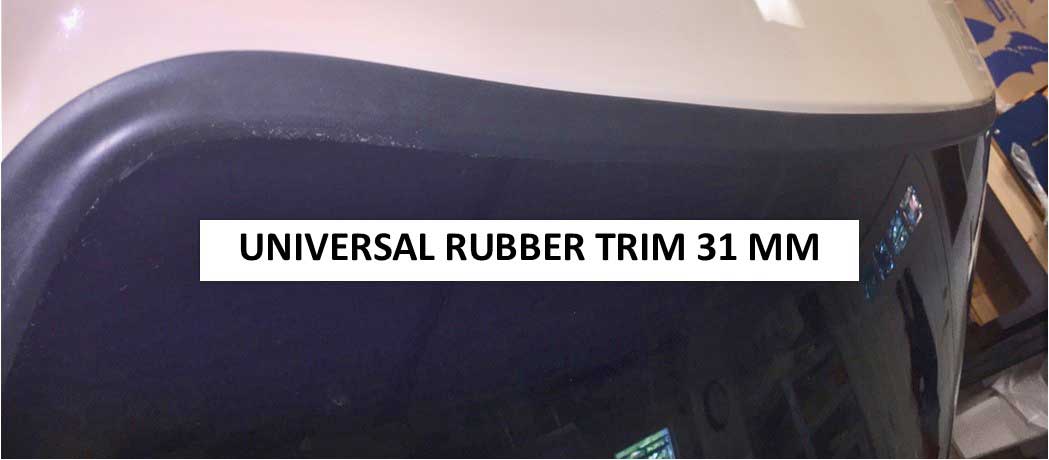
WIDER TRIM THAN 25 MM?
If you need wider trim, 31 mm universal molding is available. This wider 31 mm molding is used in the below DIY installation.
There is one possible problem with this wider seal that you should know. The
turns around the corners of the windshield can "pucker." This effect
can be seen in the below photos. A talented or experienced
installer may be able to lessen that with some care.
Otherwise, fitting a later windshield to an earlier 240 (or
even a 140) is not a problem at all. It goes right in
with no difference in the installation technique.
SOME INSTALLERS ARE NOT INTERESTED
Be aware that there are installers out there who
aren't aware that the 240 body design never
changed in all the years it was made. They may be skeptical about
installing a later windshield in an early 240. Some will even
refuse to do such an install because they
won't believe you when you insist it fits.
But rest assured, the newer windshield WILL
fit. Many 240 owners have done this over the
years.
If you want to avoid the
argument,
just tell the installer the car is a
'91, '92 or '93.
Here's a comment from T.M. of
White Marsh, Virginia: "I took your advice about using a 1991
windshield in my 1987 240 Volvo. Just like you
suggested, in your article, I told the
installer I
needed a 1991 windshield for my car.
When I brought my car in, the receptionist
goes out and looks at my car's ID tag and sees
it's am '87. She freaked out. She was
all like, "it won't fit", "I won't give you a
warranty," and if I insisted on putting this
windshield in the car I would be responsible
when it all went wrong. I told this
receptionist that it would fit, it would be
easier for the workers to install, it would
look just fine, and that she already told me I
wouldn't have a warranty anyway, because she
said I had rust in the channel. So what is the
difference? She got all huffy when I
told the installers to proceed anyway and to
ignore her. She was in a bigger snit
when she saw that it fit and looked just fine
too. There was NO rust in the channel, but I
didn't really care about her silly warranty
anyway."
"You were totally right, the wind
noise is much less, and the installation was
so much cleaner. I'm glad I took your advice
everything is great; not original, but
actually better. One freaked out receptionist,
two satisfied installers, one happy customer,
and one slightly improved Volvo. A good
day was had by most of us anyway. I
don't think the receptionist is ever going to
forgive me for "lying" to her about the year
and having it all work out just fine. lol."
USING ORIGINAL BUTYL or MORE MODERN URETHANE
Early 240s windshields were installed using black butyl,
which is very sticky and messy and never hardens. The more modern
technique uses URETHANE, which will harden. A professional installer
will most likely use a 2-part urethane,
which hardens even faster. If you install your own windshield, you can
choose either adhesive, but in most cases if you have your windshield
installed by a pro, they'll use urethane.
Here's a
TB discussion:
turbobricks.com/240-windshield.375462/
Or try a search for more:
google.com/windshieldinstallationturbobricks
|
DIY INSTALLATION
In 2018 Michael Yount did his own
installation of a later aftermarket windshield in his
1982 242.
He provided the
following tips below for those thinking of doing
this yourself.
Much of this info was included in a thread here:
turbobricks.com/windshield-support-blocks-240.341873/
|
1.
Removing the old black BUTYL makes a helluva
mess. To keep the car clean, you should completely mask each
A-pillar, and across the top of the car, and the entire
cowl, including covering all the cowl vent
holes. Debris can and will get
EVERYWHERE. Butyl comes off of paint
easy, but if you get it on fabric or carpet
- forget it. You won't get it out.
So cover everything. Use towels or something to cover
the dash, steering wheel, front seats,
floors, etc. And a couple of big blankets
over the entire hood is a great idea, since you'll be repeatedly lifting or setting
the old or new windshield over the hood of the
car.
2. Get two double-suction-cup
handles from Harbor Freight. These work well
for the old and new windshield. One person
can remove the old one. You should have a helper for
installing a new one.
3. Do your best to cut the old BUTYL all
the way around before attempting to remove the
old windshield. If the old windshield is cracked
or you're not trying to salvage it, just
getting the A-pillars and top edge loose will do. Then just pull it away or push from inside.
Old windshields are notably
heavier and thicker than new ones.
4. CLEAN: Your pinch weld should be completely
clean. All you should see is paint. It will take some time.
5. You'll see in the above TB thread, chemicals to remove the old butyl and clean the
pinch weld. Citrus Power Goo Gone or some Xylene (used in a well ventilated area).
6. You can use guitar/safety/piano wire
as a cutter, but know it will try to hang up
on the old plastic clips used for an older
windshield. Those clips were used to hold the older trim on. First remove the old stock trim so
you can see where the old clips are and navigate
around them with the wire OR you can use a screwdriver to pry out the clips.
7. The new later style windshield comes
with rubber trim molding glued around the
edge. The width of that trim is usually
about 25 mm (similar to T108 universal "T" molding). In some cases that trim is
not wide enough to cover a re-paint line
that may existed if your car was repainted when an older windshield was in place. You can buy new
wider trim molding, T109B universal "T" molding, 31 mm
wide. This trim comes in a 65 foot
roll and can be found at Gold Glass: gggcorp.com/Universal_Mouldings. The direct link to the T109B 31 mm molding is: gggcorp.com/Universal_T109B.

8. If you change that rubber trim
molding on your new windshield,
take your time removing the glued on molding
that came on the glass. It may be glued on with BUTYL. You can use duct tape (the sticky side)
to remove the leftover BUTYL from the edge of the
new windshield before gluing the new wider trim
back on. Cleaning can be done PREPSOL cleaning solvent.
9. Before installing new trim, use a square to get an accurate 90 degree cut
on one end so you're starting with a perfect 90 degree cut edge.
Measure the windshield to find the precise center at
the bottom and start the new trim
there. Work your way all the way
around. It helps to have another person to help
managed the trim as you go. You can use a
small wooden roller to firmly press the trim
onto the edge of the windshield so the BUTYL
inside the trim U-channel sticks to the
windshield well. When you get all the way around and back around to
the bottom center, make a quick cut so you have about
1 inch extra. Then CAREFULLY measure and
accurately make a good square cut to match the other side of the
trim. Cut it about 1/16 inch LONGER than needed and
then squeeze that little extra trim back in along
the bottom edge. YOU ONLY GET ONE CHANCE
ON THAT SECOND CUT -- IF YOU CUT IT TOO SHORT,
DO NOT TRY TO STRETCH IT. If you goof and have a gap, you'll be
better off leaving the gap and trying to
fill it with black silicone or
something.
10. There were some foam pads that came stuck
to the windshield to protect it during
shipping. You can use those for some windshield
SPACER BLOCKS during installation. One on each side of each
A-pillar and two along the bottom to hold it up. You can use 3M extreme duty double
sided foam tape to adhere the spacer blocks into the
channel. The BUTYL seal stays soft, so you must use spacer blocks at the bottom to keep the
windshield from slowly sliding or moving DOWNWARD over
time. The spacer blocks on the sides will keep
it centered. NOTE: The foam spacer blocks I used were
MUCH better than the stock Volvo spacer blocks or the
rubber ones that came with the BUTYL seal kit.
11. TEST FIT
the new windshield after the new seal is
attached but BEFORE you prime the pinch weld or the windshield. Test fit more than one time. The
more times you test fit it, the easier it will be
to accurately stick the windshield correctly on the last placemant.
12. BUTYL PRIMER is on the pinch weld and on the
windshield edge. 3M 08681 Primer will work.
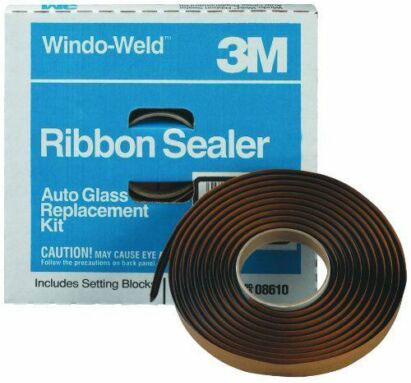 13. Ebay or Amazon BUTYL Ribbon Seal
Kit. (3M
08612 Window-Weld, 3/8 inch wide, 15 feet long).
As
you lay it along the pinch weld, you have to
remove the paper tape to turn the
sharp corners. Then put the tape back on and use the roller to GENTLY apply a bit of
downward pressure before placing the
windshield on. 13. Ebay or Amazon BUTYL Ribbon Seal
Kit. (3M
08612 Window-Weld, 3/8 inch wide, 15 feet long).
As
you lay it along the pinch weld, you have to
remove the paper tape to turn the
sharp corners. Then put the tape back on and use the roller to GENTLY apply a bit of
downward pressure before placing the
windshield on.
14. Once all is primed and all the BUTYL seal is in place
on the pinch weld, then you can finally place and stick the
windshield.
But FIRST, fold
the rubber trim at the corners UP and AWAY from the
body, BEFORE sticking the windshield. As soon as you stick the windshield, check to be sure it's being
held in place (not sliding downward) by the bottom spacer blocks and it is
centered between the side blocks.
Once in place and you're happy with the position, then fold the trim corners down over
the body. Work your way around the trim,
applying pressure all the way around the
perimeter of the windshield several times to
be sure the windshield is pressed cleanly
against the BUTYL and the BUTYL is pressed
cleanly against the pinch weld. This will ensure a good waterproof seal.
15. Cross your fingers and then check for leaks after it's been there for a few days.
|
BACK GLASS
|
 <<<
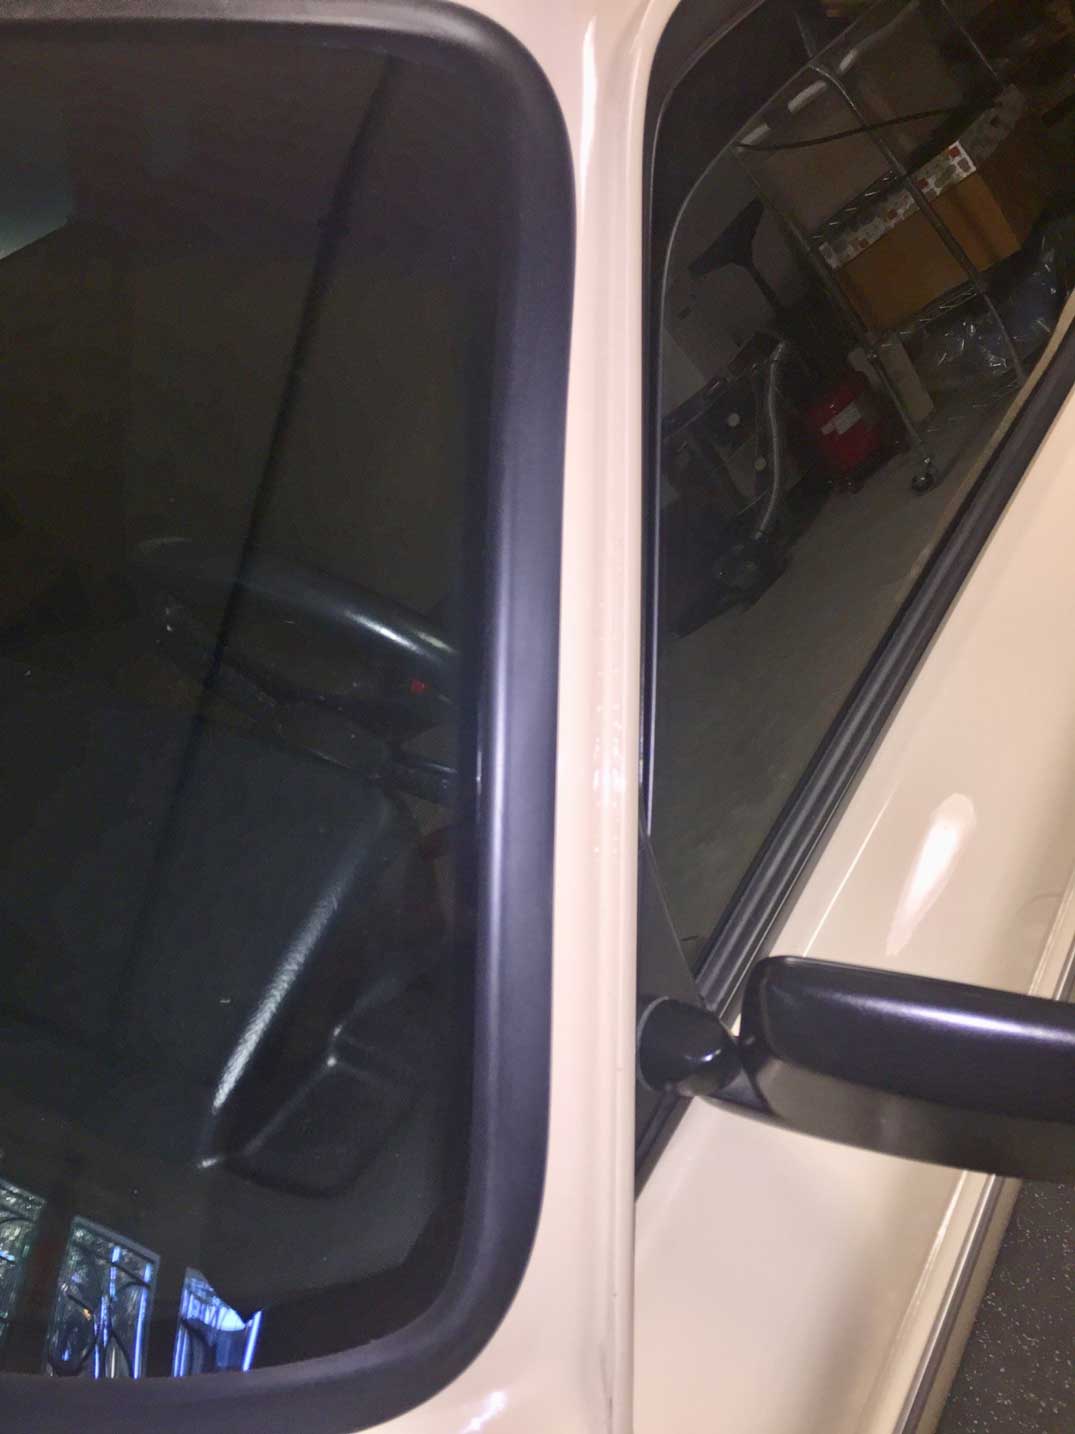
Side note regarding 140 series back
glass: This photo was submitted
by Johnny J. of Sparks, Nevada. His 1973 142
needed a new rear windshield, which was
obsolete. So he took a chance on a rear
glass from a 1990 244. The glass fits
perfectly and wire connectors even line up
perfectly for the defrost element. And the newer
rubber seal from the 1990 glass went right in.
So this shows that any 240 back glass will
perfectly replace the back glass in a 140 series
in case you need to know. <<<
Side note regarding 140 series back
glass: This photo was submitted
by Johnny J. of Sparks, Nevada. His 1973 142
needed a new rear windshield, which was
obsolete. So he took a chance on a rear
glass from a 1990 244. The glass fits
perfectly and wire connectors even line up
perfectly for the defrost element. And the newer
rubber seal from the 1990 glass went right in.
So this shows that any 240 back glass will
perfectly replace the back glass in a 140 series
in case you need to know.
|
|


 alternators are known for poor voltage.")